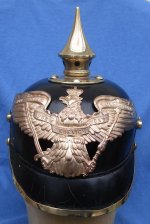
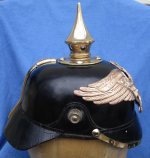
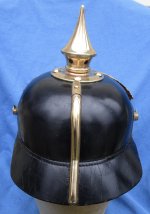
Prussian Grenadier OR's Helmet

b.loree

Administrator
Staff member
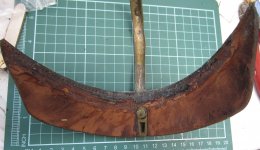
This helmet belongs to a member and was first posted on another thread. Initially we thought only one visor had to be restitched but once I had the helmet in hand it became obvious, that both visors had been glued back on to the shell. I have run into this on numerous occasions. The owner also requested that the fittings should be cleaned. The before photos:
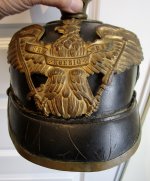
26A0265B-CD18-45D8-9656-0CB6884F2551_1_201_a.jpeg
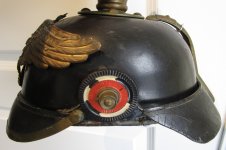
The helmet is in excellent condition for it's age. For once, I having nothing more to do than restitch and clean up the fittings. Yes the glue was a surprise but not a huge issue.
B9805EB4-718D-4765-A261-BADC708D41D3_1_201_a.jpeg
The piece came with an incorrect Saxe Reich kokarde on it which popped off easily and was returned to the owner.
695A39BD-4B88-45C1-9BE3-BC7AD29C7884_1_201_a.jpeg
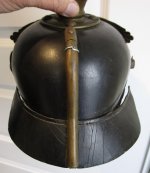
The helmet has a nice wide rear visor of pre war quality. A piece of solder had been wrapped around the spine to secure it to the shell. Fortunately , the split prong was still there. It is very common for these spine prongs to break out of the original solder because of the shrinking of the shell. I re soldered the prong back on to the spine but it had to be placed in a slightly different position due to the shrinkage. My thanks to Tony Schnurr who decades ago, sent me a detailed soldering email titled "SOLDERING FOR DUMMIES"! I have learned much from the Master of Solder! :)
5223C952-34FF-4533-A339-8B793CA5E949_1_201_a.jpeg
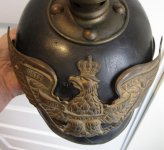
After 120+ years the shell has shrunk and the wappen which was once tight to the shell, is no longer. The wappen wings were carefully bent back a bit but one can never really go back to the helmet's original condition.
7F6DEE44-AD90-4EB3-BEFF-A4927F030FCE_1_201_a.jpeg
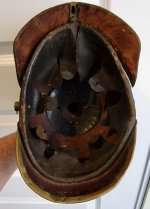
For once, the liner is in great condition.
 
Last edited:
Some photos of the process:
77E4387B-8ABA-4F6D-8159-9435743ABF3A_1_201_a.jpeg
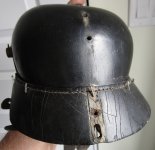
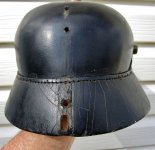
Both visors had been glued on...UGH!! :mad:
8F94FCD8-D68D-48E9-8A80-E11F026E41AF_1_201_a.jpeg
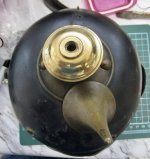
Unscrewing the spike reveals what the brass fittings originally looked like.
B3EF3CB3-FF8E-4762-8C87-EBA74C26C357_1_201_a.jpeg
As usual, the stitch holes were cleaned out and the visors were pinned into proper position.
D93EE3BF-188E-4C94-8499-177DABB8C841_1_201_a.jpeg
Finished.
 
Some photos of the completed helmet with fittings cleaned:
AD3C0BD6-3C40-4008-A080-D18FA200AF86_1_201_a.jpeg
Several applications of shoe black polish were applied to the shell and visors. I always apply polish to the stitch line in order to seal/protect the new thread regardless of whether the fittings and helmet are to be cleaned. Another reason for this, is that small bits of original shellac always break off when you are cleaning out the stitch holes. The polish fills in and smooths out the stitch line.
E03E5A9F-EBE8-4A6F-8229-9C3DC2A13948_1_201_a.jpeg
Again...the leather shrinks, the metal fittings do not.
7A827B2A-979A-4229-B85D-A86B370FB447_1_201_a.jpeg
It was a real pleasure to work on this helmet, I had just gone through a bit of a "hell run" with another OR's helmet, so this got rid of some frustration and thoughts of..."Why the F do I do this?? :(" Anyway, both projects worked out well in the end. :)
 
Last edited:
Yes Sandy, the original brass still can shine under all that hundred years of oxidation. However, each collector has to decide on their own whether to clean or not to. Last, Larcade mentions the “Cupro Aluminum “ wappen in his vol. 1 Infantry. I believe this is an example of what he described, as the piece has a definite reddish tone to it compared to the rest of the fittings. I have one Prussian OR and one Bavarian reservist OR in my collection which share this characteristic described by JLL. They just look different than the regular brass.
 
Last edited:
Looks fantastic ! My first restoration , I really think this helmet needed some love , and I am glad I trusted it to Brian. My first Grenadier it will look great with the other types . Rob
 
Thanks for trusting me to work on your helmet Rob, it is a really cool piece and the only Grenadier that I have ever had in hand. 👍
 
Some photos of the completed helmet with fittings cleaned:
It was a real pleasure to work on this helmet, I had just gone through a bit of a "hell run" with another OR's helmet, so this got rid of some frustration and thoughts of..."Why the F do I do this?? :(" Anyway, both projects worked out well in the end.
Brian - that other OR’s helmet that was so much trouble wouldn’t have been a certain Garde Fusilier Pickelhaube would it?? If so, I can only apologise and say that as a result of your magical skills it has been brought back to life!!
All the best
Michael
 
“Cupro Aluminum “ wappen
Hi Brian,
I've had my encounter with glued visors too, but my results didn't come close to what you're showing here; the helmet looks ready for the parade ground :)
For the M95 Pickelhaube all the fitting were specified as cupro-aluminium, the Wappen however as "Tombak", which explains why they look different. I have heard of the “Cupro Aluminum “ Wappen as mentioned by Larcade, but never found any mention of it in the Prussian regulations; at least until 1908 the Wappen material is still specified as "Tombak".
Regardless of the material, all the Prussian EM M95 Wappen were painted gold (clearly visible in your first picture).
Regards,
Lars
 
No need to apologize Michael, that little GFR turned out fine in the end which is the main thing. I should not be "venting" here. :) I will post some photos of your two helmets now that you have all the fittings back on, they look great. (y)Thanks Lars, that clears things up totally, tombak it is! As far as cleaning goes, I use a sonic cleaner and a formula mix of water, Dawn dish soap and vinegar. This is the same equipment and mix that gunners use to clean their brass. All info is available on YouTube. This process for some reason puts a pink tinge to the brass and this has to be removed using Hagerty Silver Foam and a soft toothbrush. For particularly stubborn spots I will use my Dremel tool, buffing disc and jeweller's rouge. For scales, I want to retain the gilding so I clean lightly with Never Dull. On a wappen that is moderately tarnished, I just go at it with Hagerty's, water and the toothbrush.
A word of caution about neusilber fittings...most of these are plated brass. Many have been severely polished over the years probably with Brasso and the brass is now showing through. Michael's GFR is a perfect example as we shall see. The visor trim has had much of the plating worn off unfortunately. Other officer helmets have silver plated fittings. My avatar 19th Dragoner officer is such a helmet. I cleaned the helmet fittings once when I bought it 40 years ago. The cruciform spike base is now turning black with oxidization and the only safe way to clean it is to put it in the sonic cleaner bath. The sonic cleaner is safe to use on gilding or frosting but not paint eg. a "Waterloo Bandeau" wappen.
 
awesome work Brian. It reminds me a little bit of my helmet you worked on. Was supposed to be a small soldering job which turned into so much more in the end. But it was well worth it and I am very happy with that helmet now.
 
Back
Top