Grenadier Officer Restoration

b.loree

Administrator
Staff member
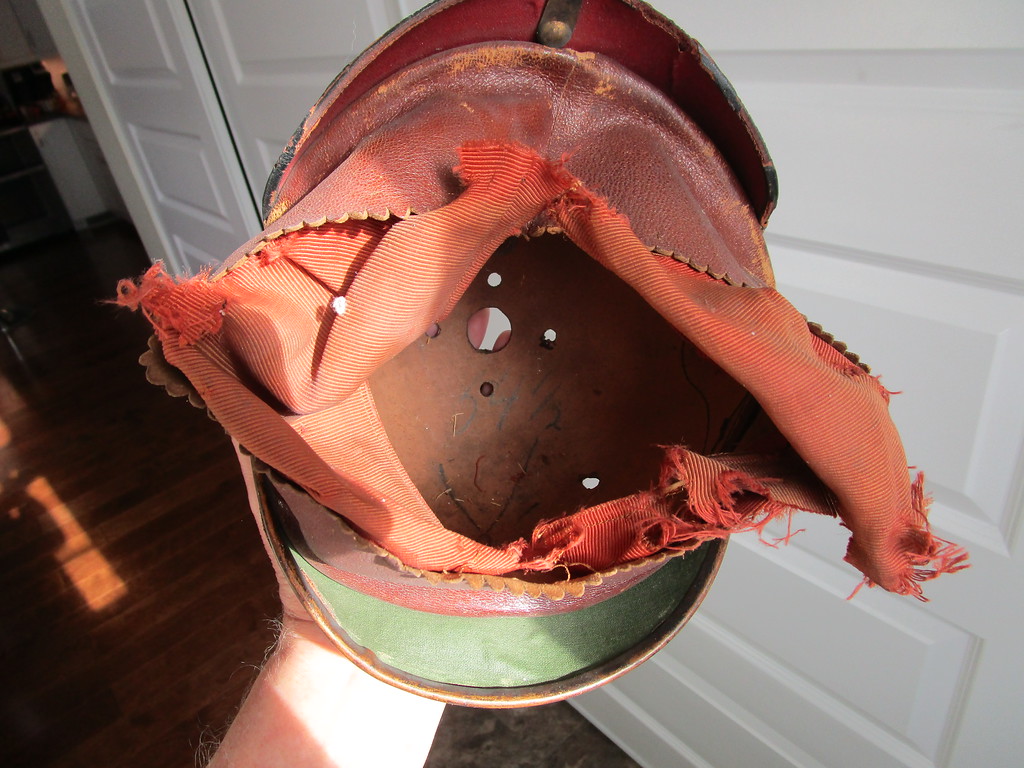
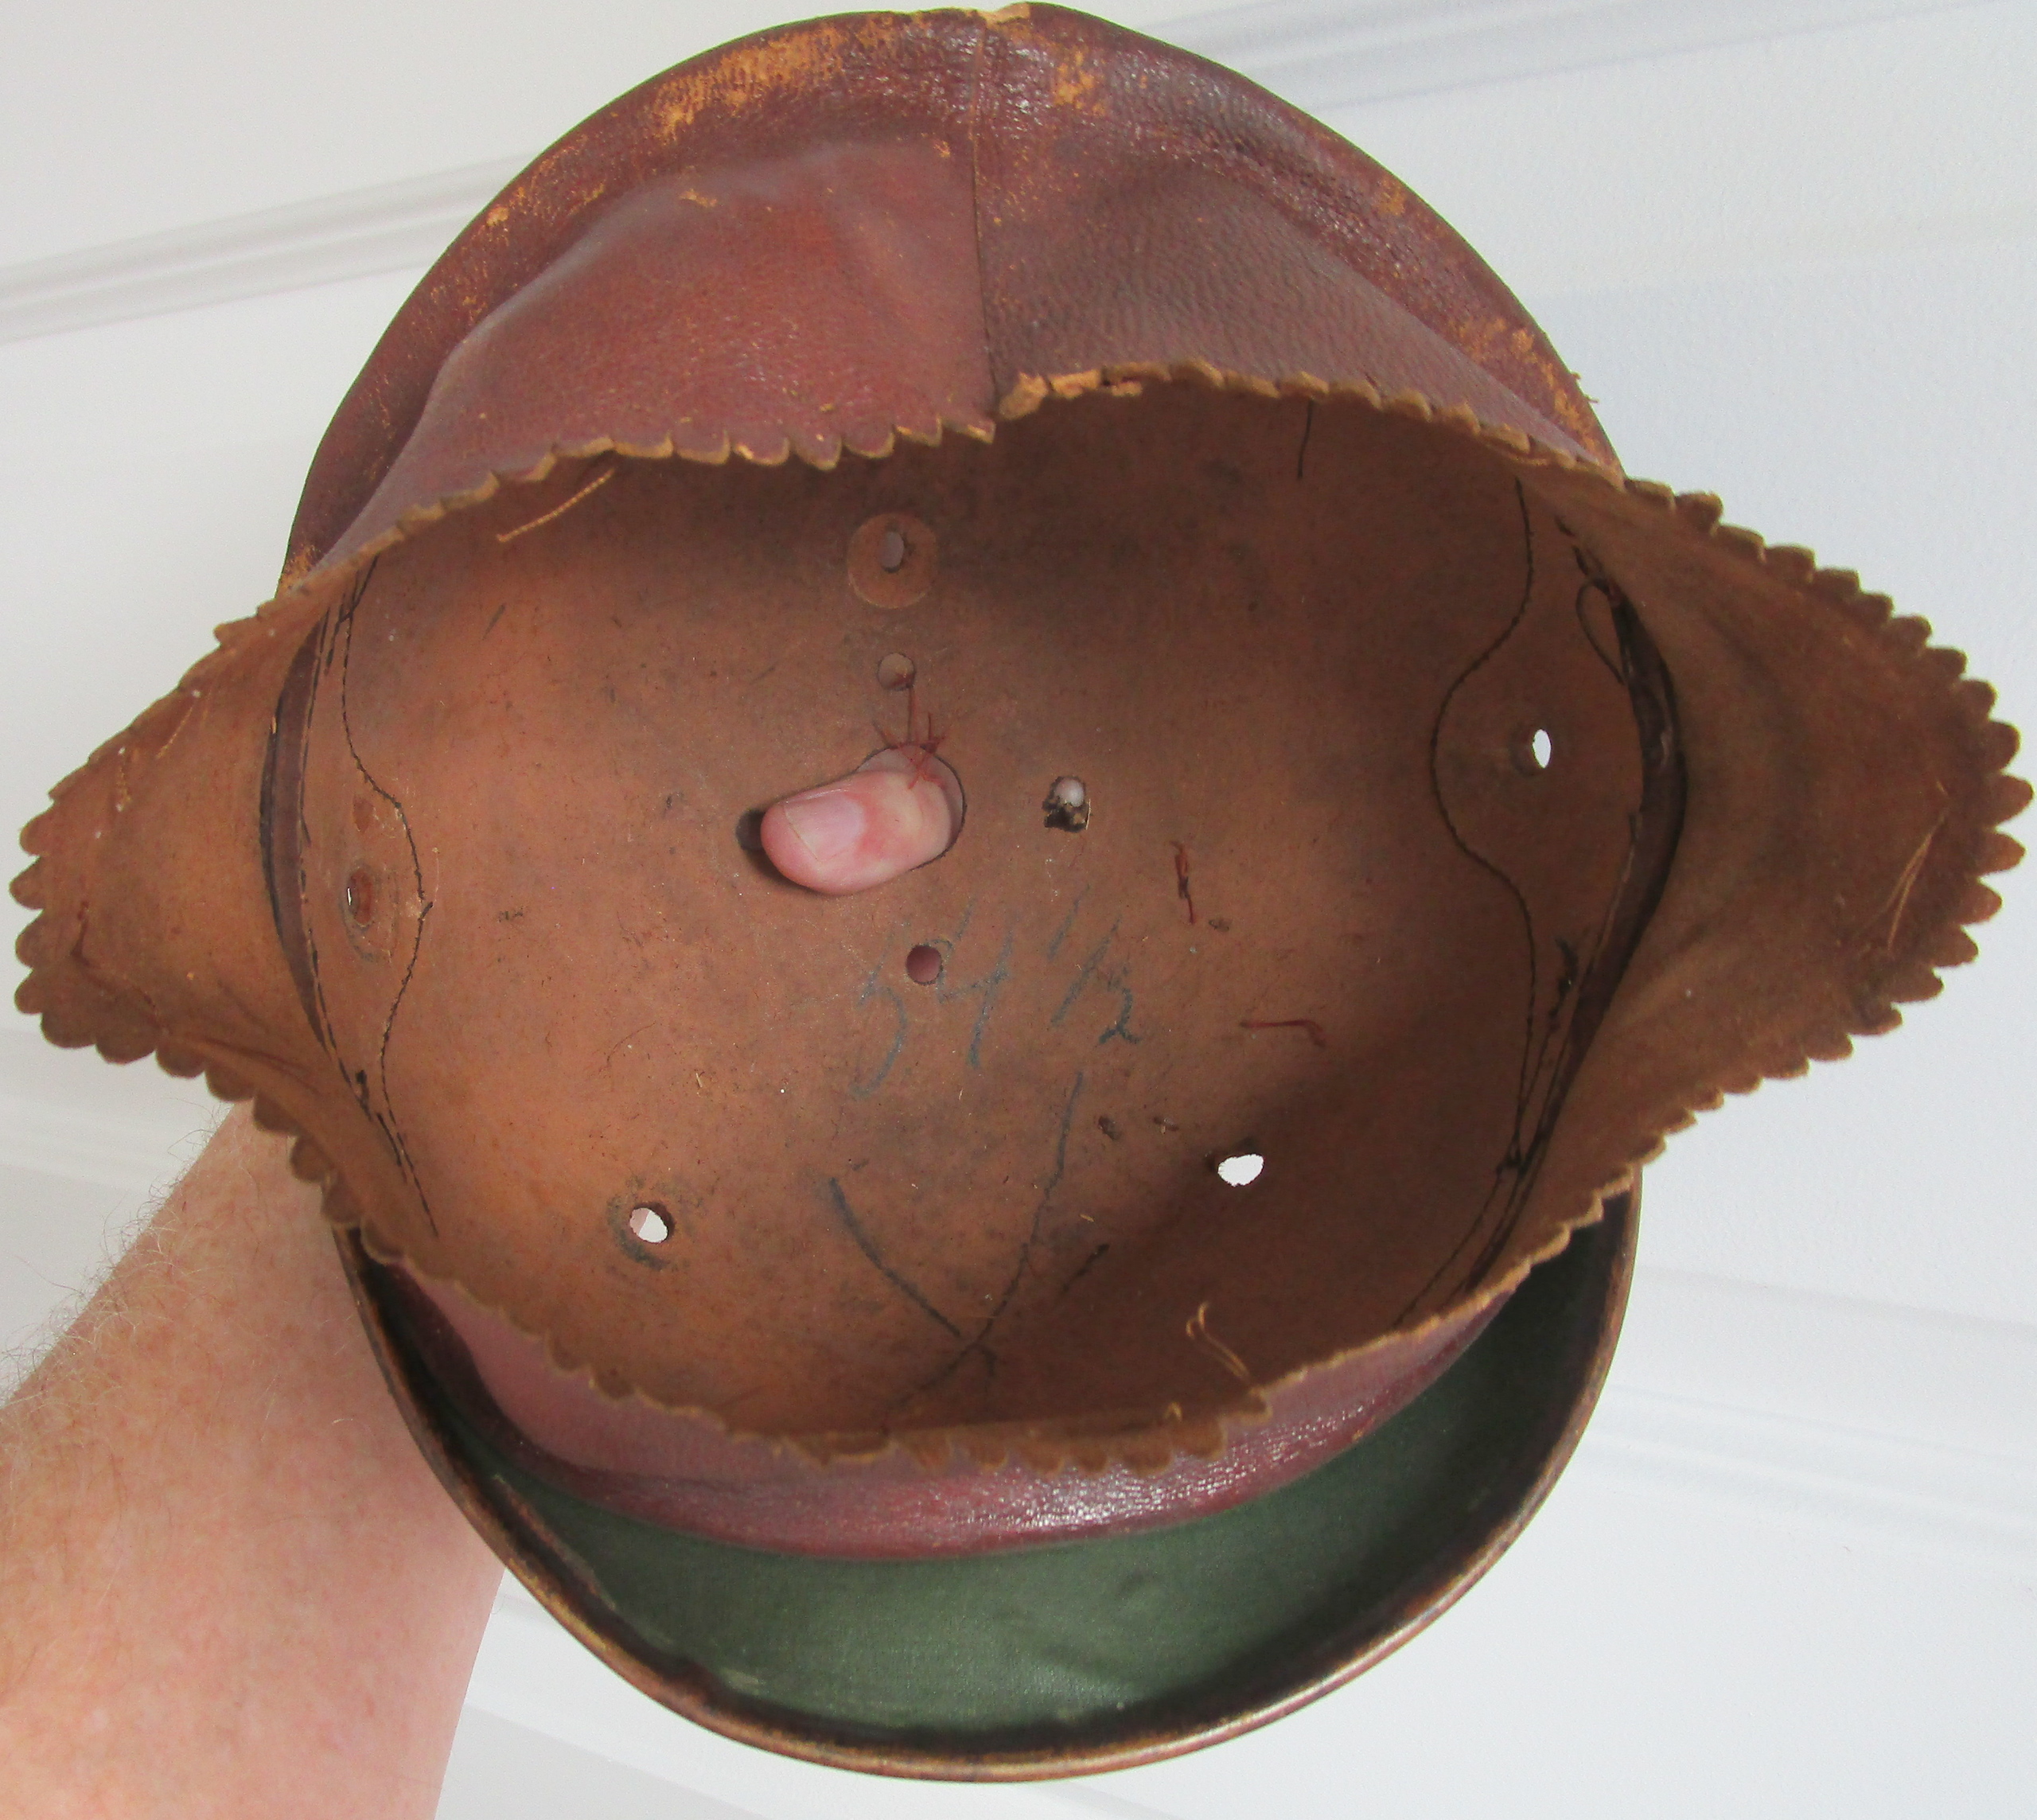
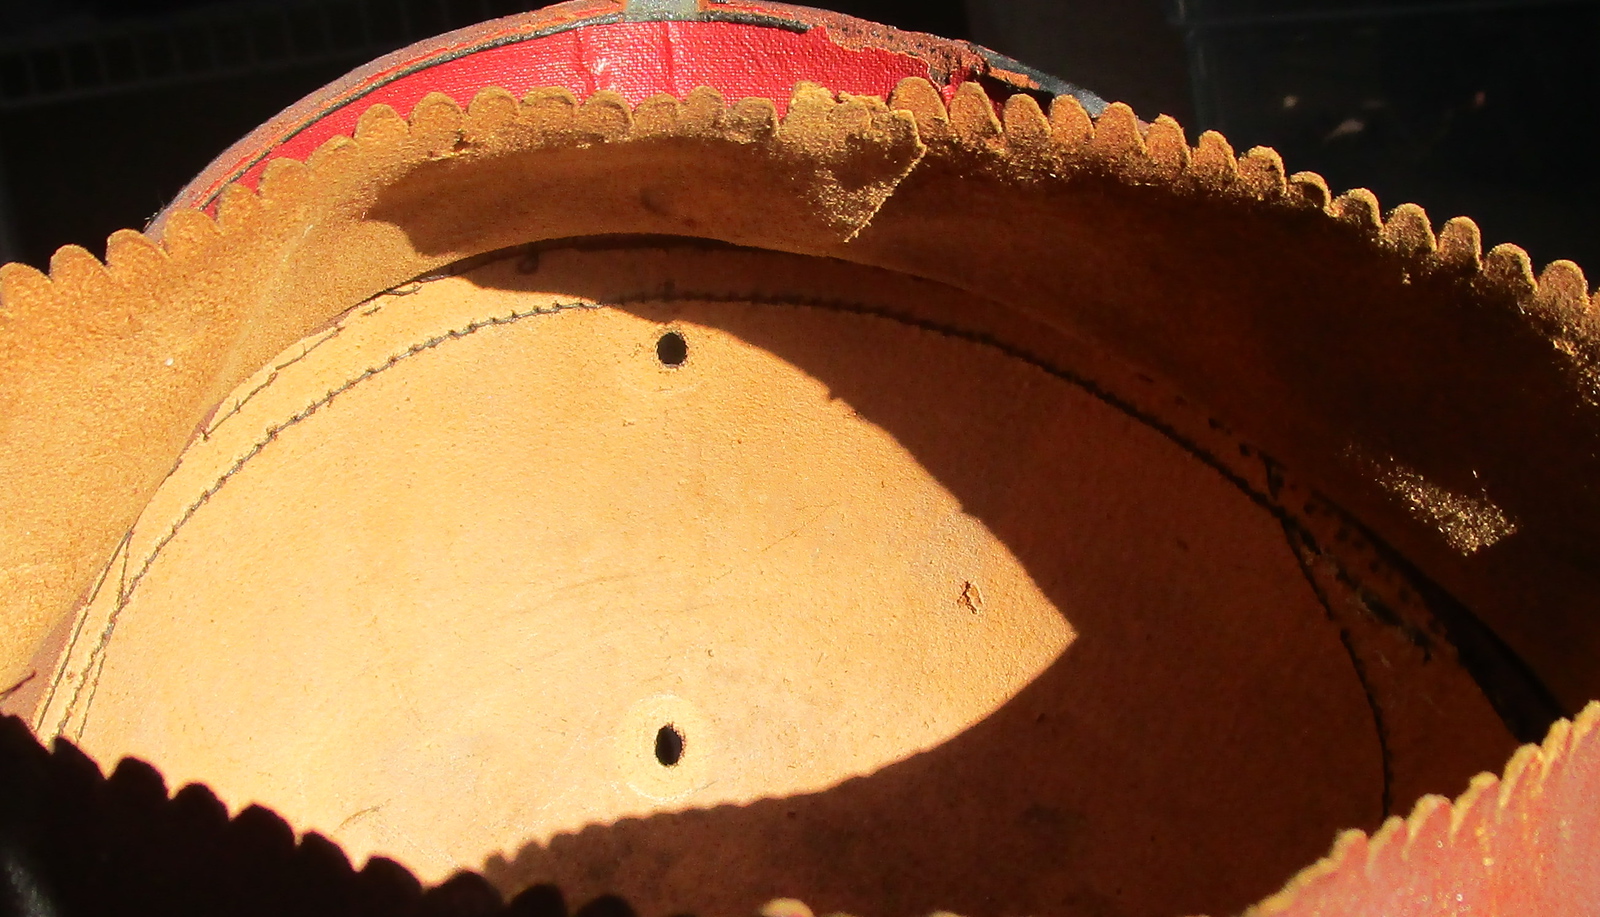
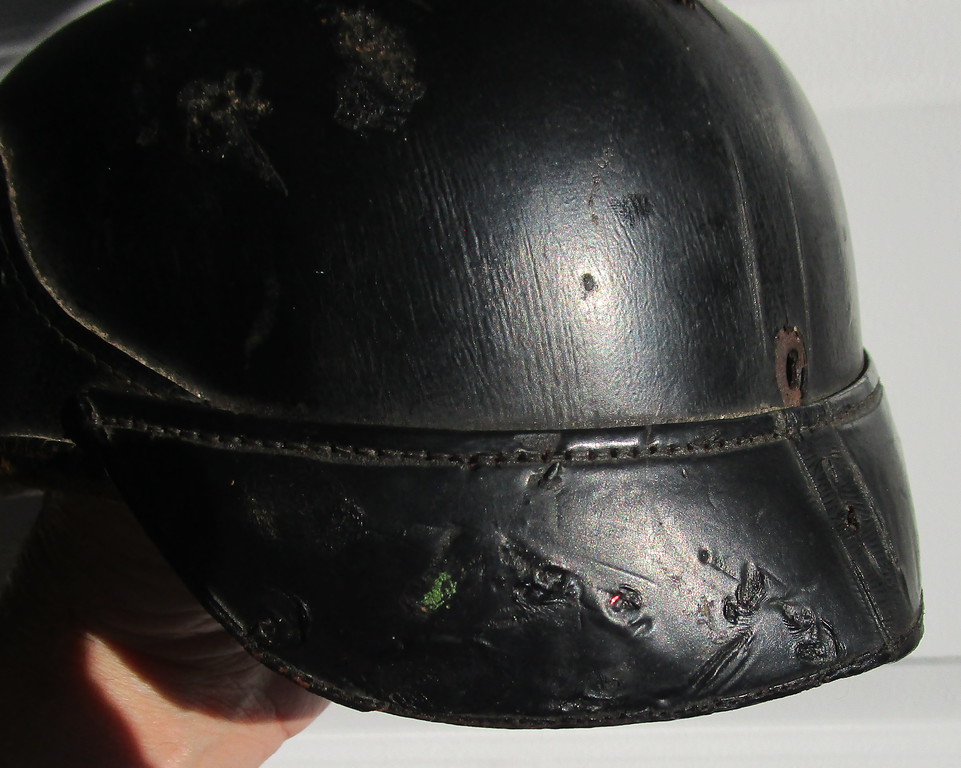
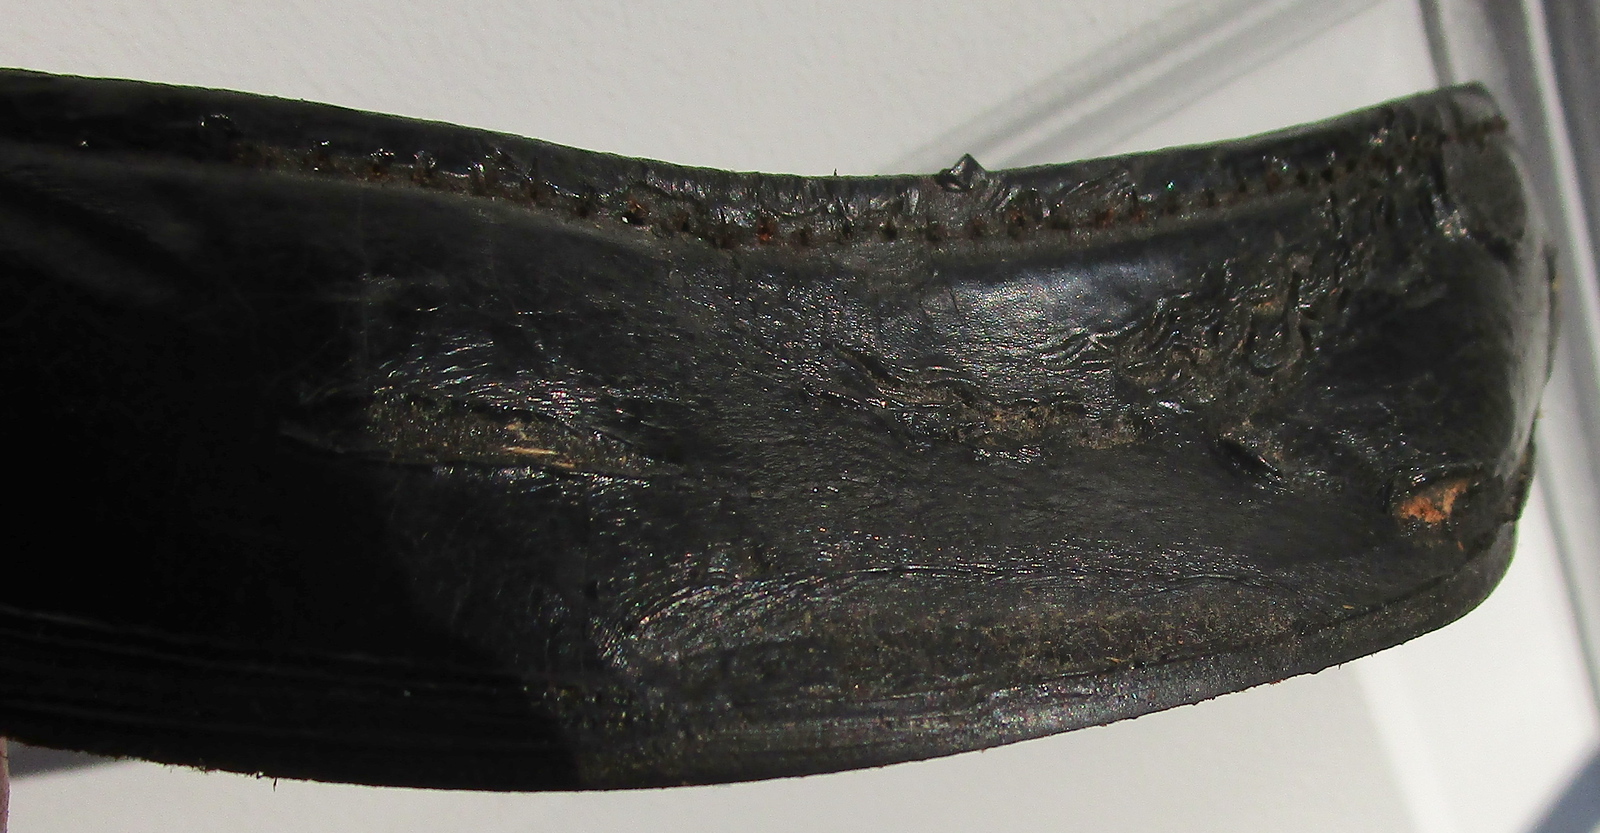
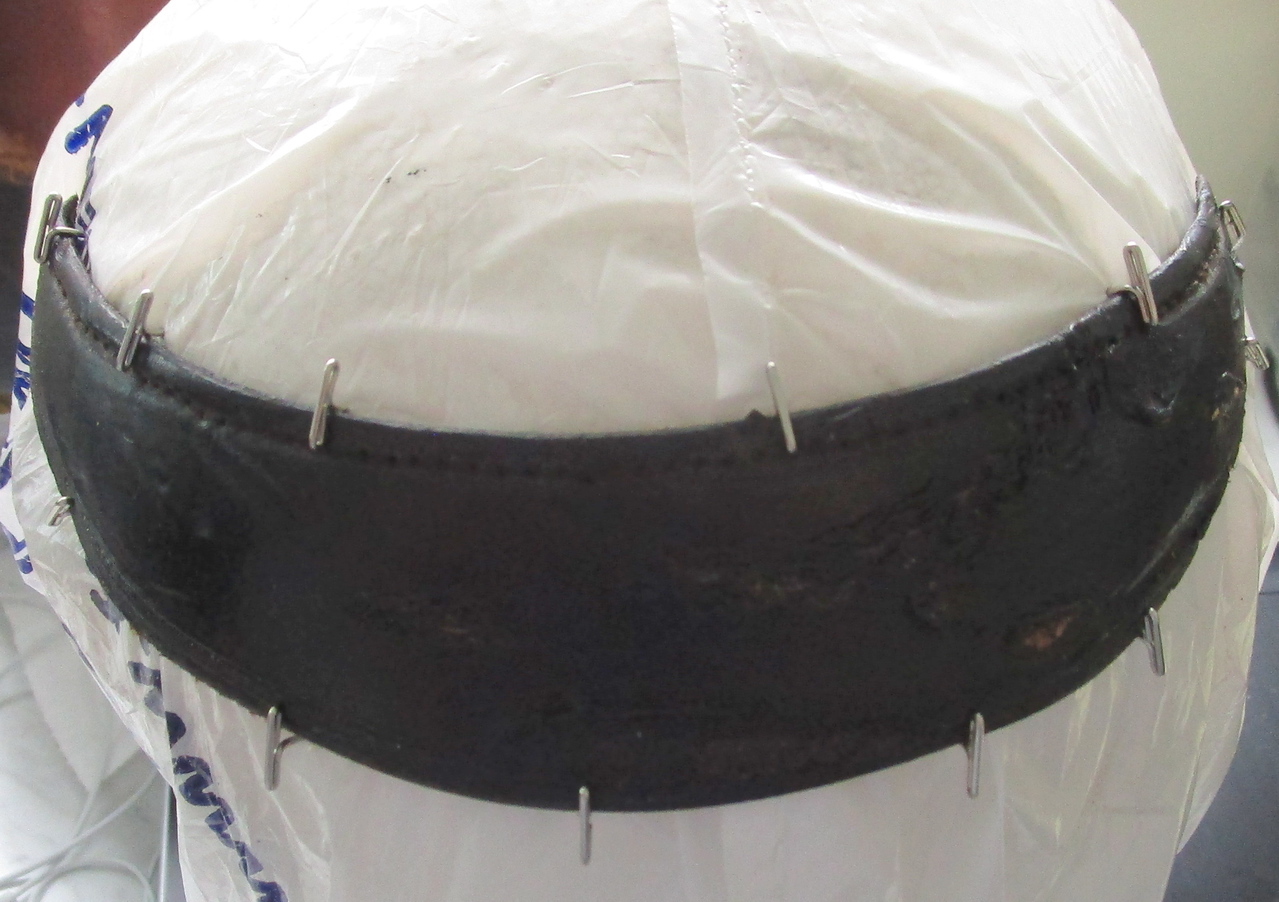
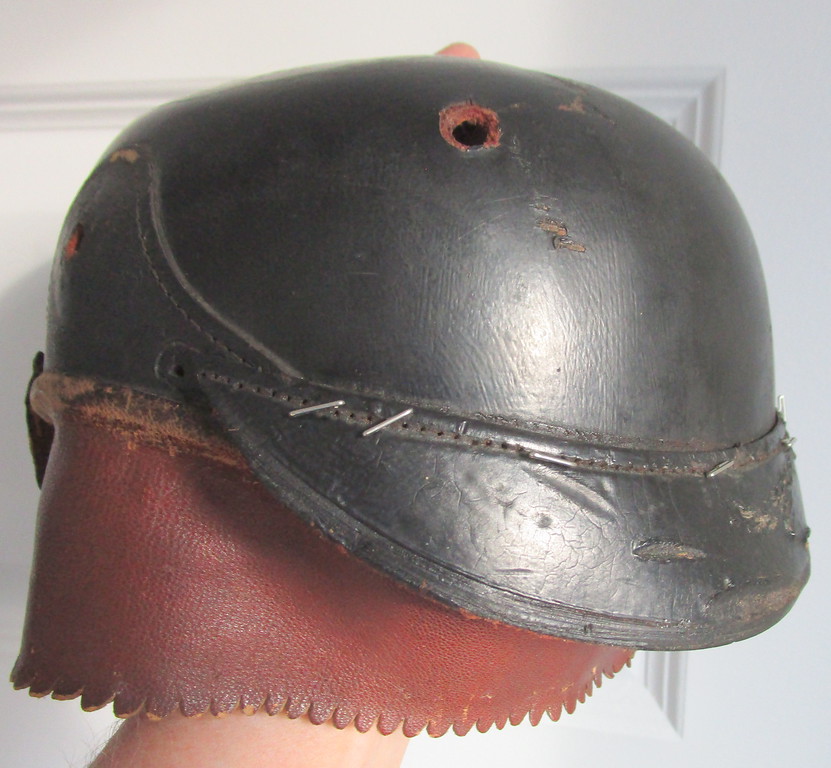
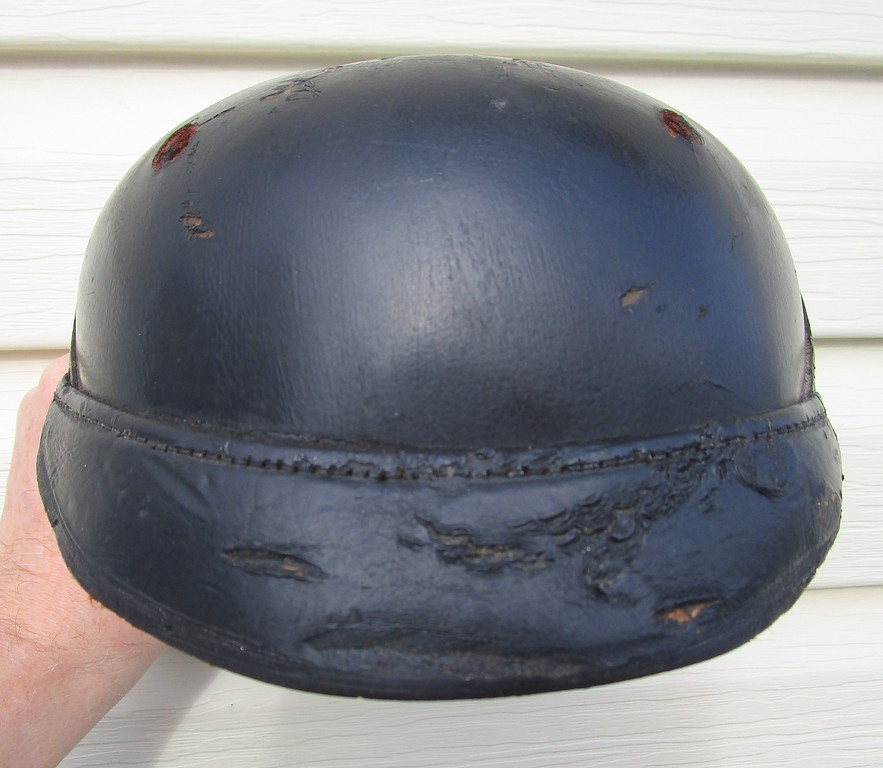
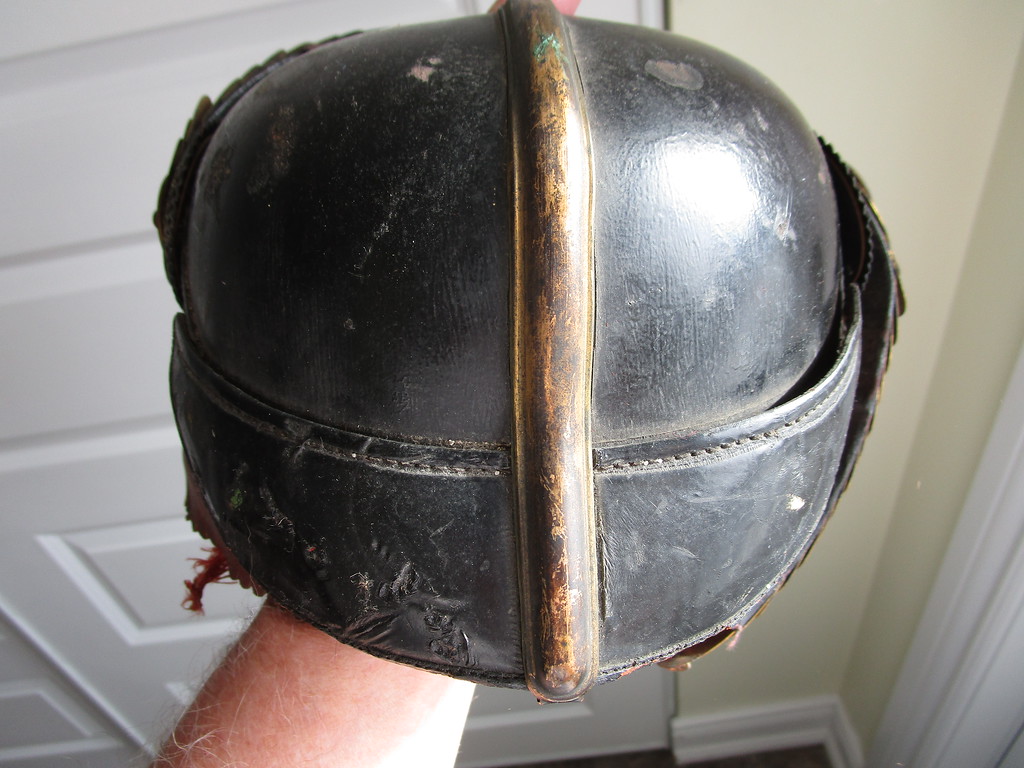
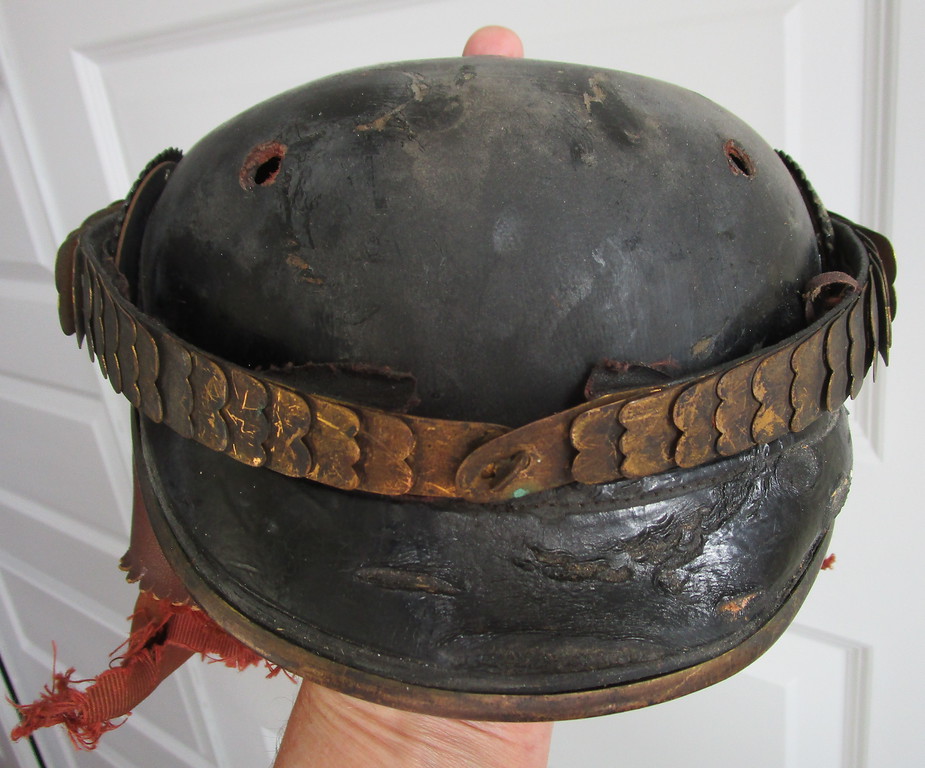
I have been working on this helmet for a couple of months. Problems: both visors need restitching, as does the officer silk liner. The front visor has been depressed after 100 years by the tail feathers of the wappen and finally, the visor has shrunk so that one end of the trim does not snug up against the leather. The "before photos":
IMG_1666-XL.jpg

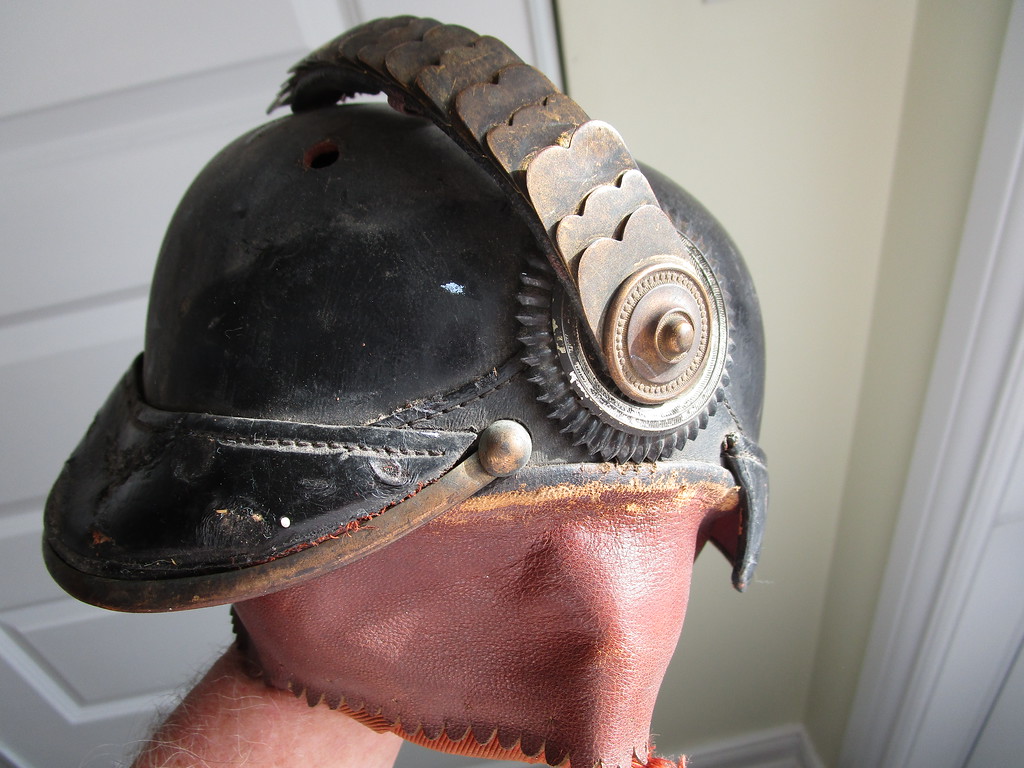
The helmet, especially the brass fittings and wappen are very dirty.
IMG_1662-XL.jpg

IMG_1665-XL.jpg

IMG_1667-XL.jpg

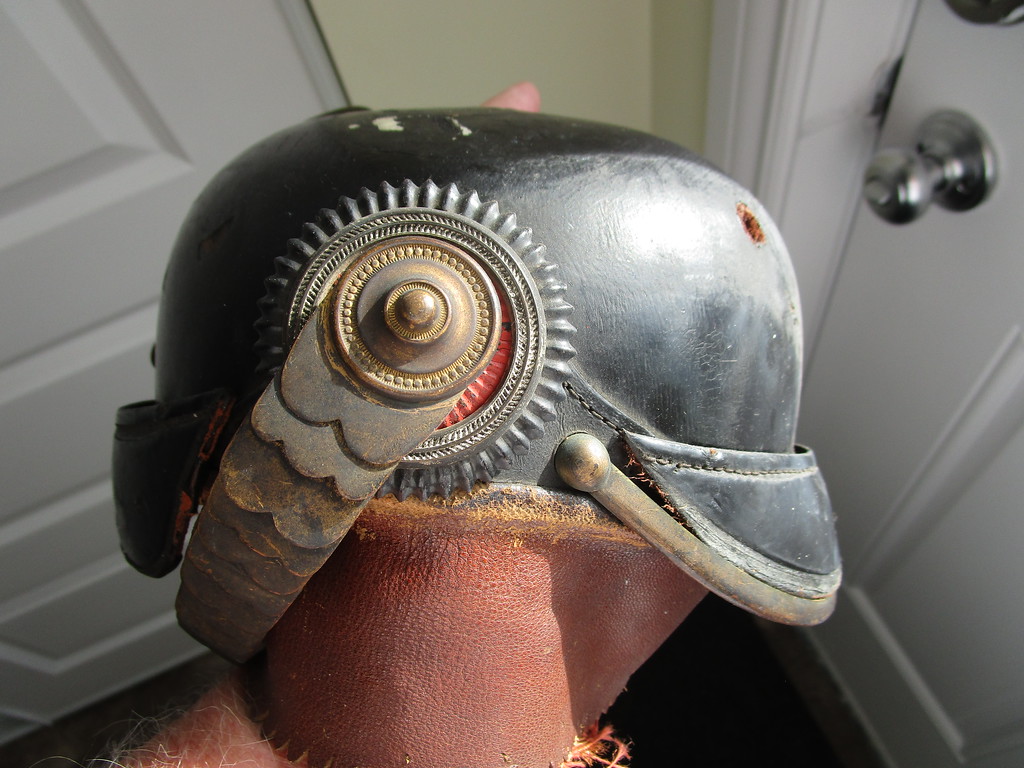
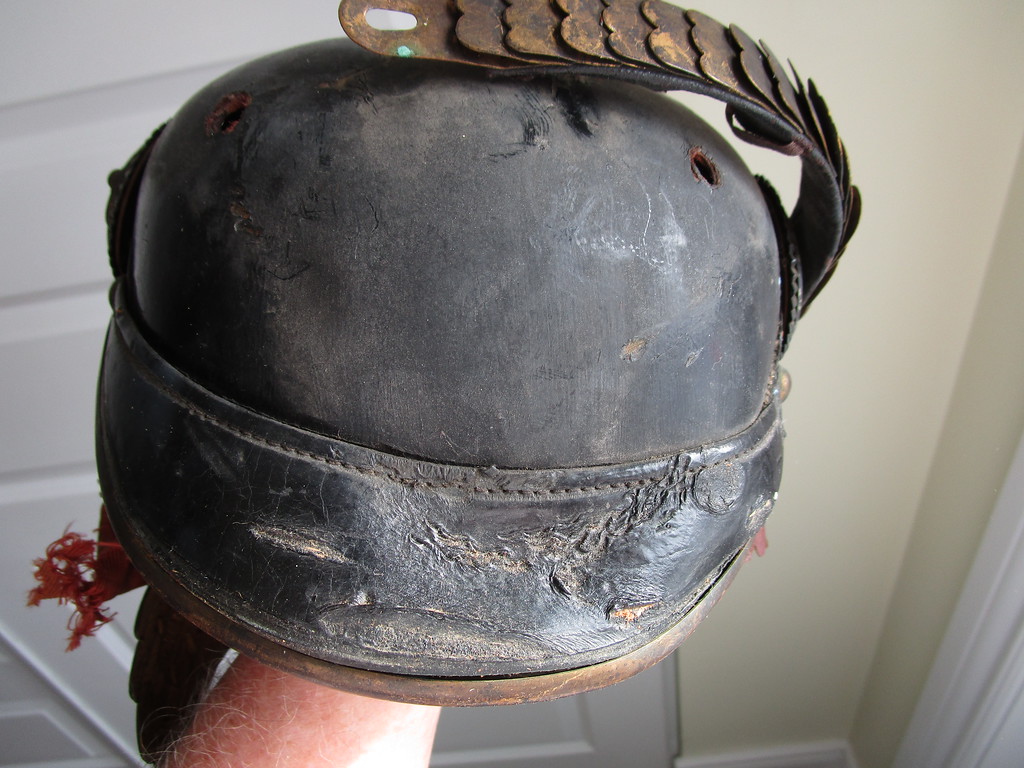
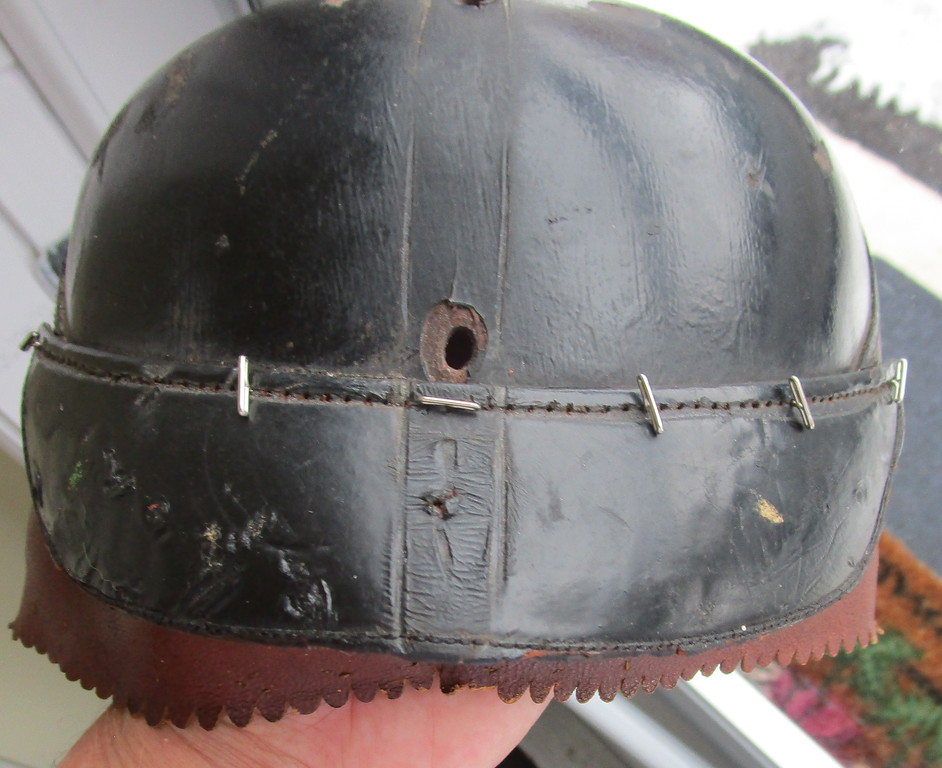
A good photo of the "wappen depression", caused by the rotting of the visor stitching and the subsequent pushing up of the visor into the tail feathers. :( Again, we see how mistreated and dirty this helmet is. :x
IMG_1673-XL.jpg

IMG_1668-XL.jpg

IMG_1669-X3.jpg

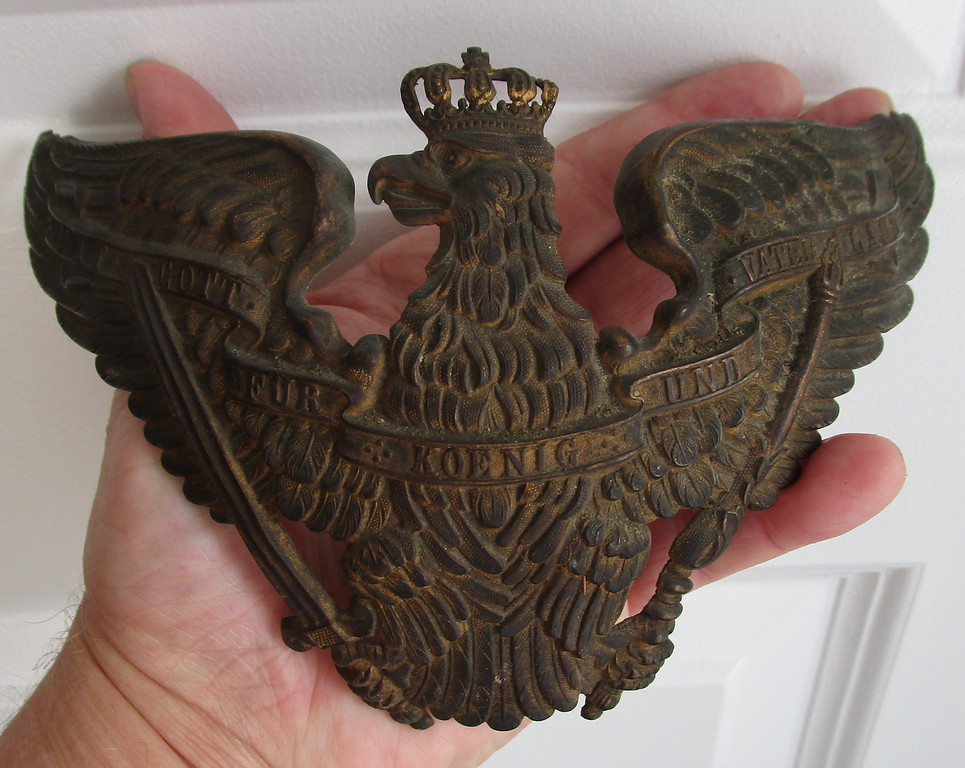
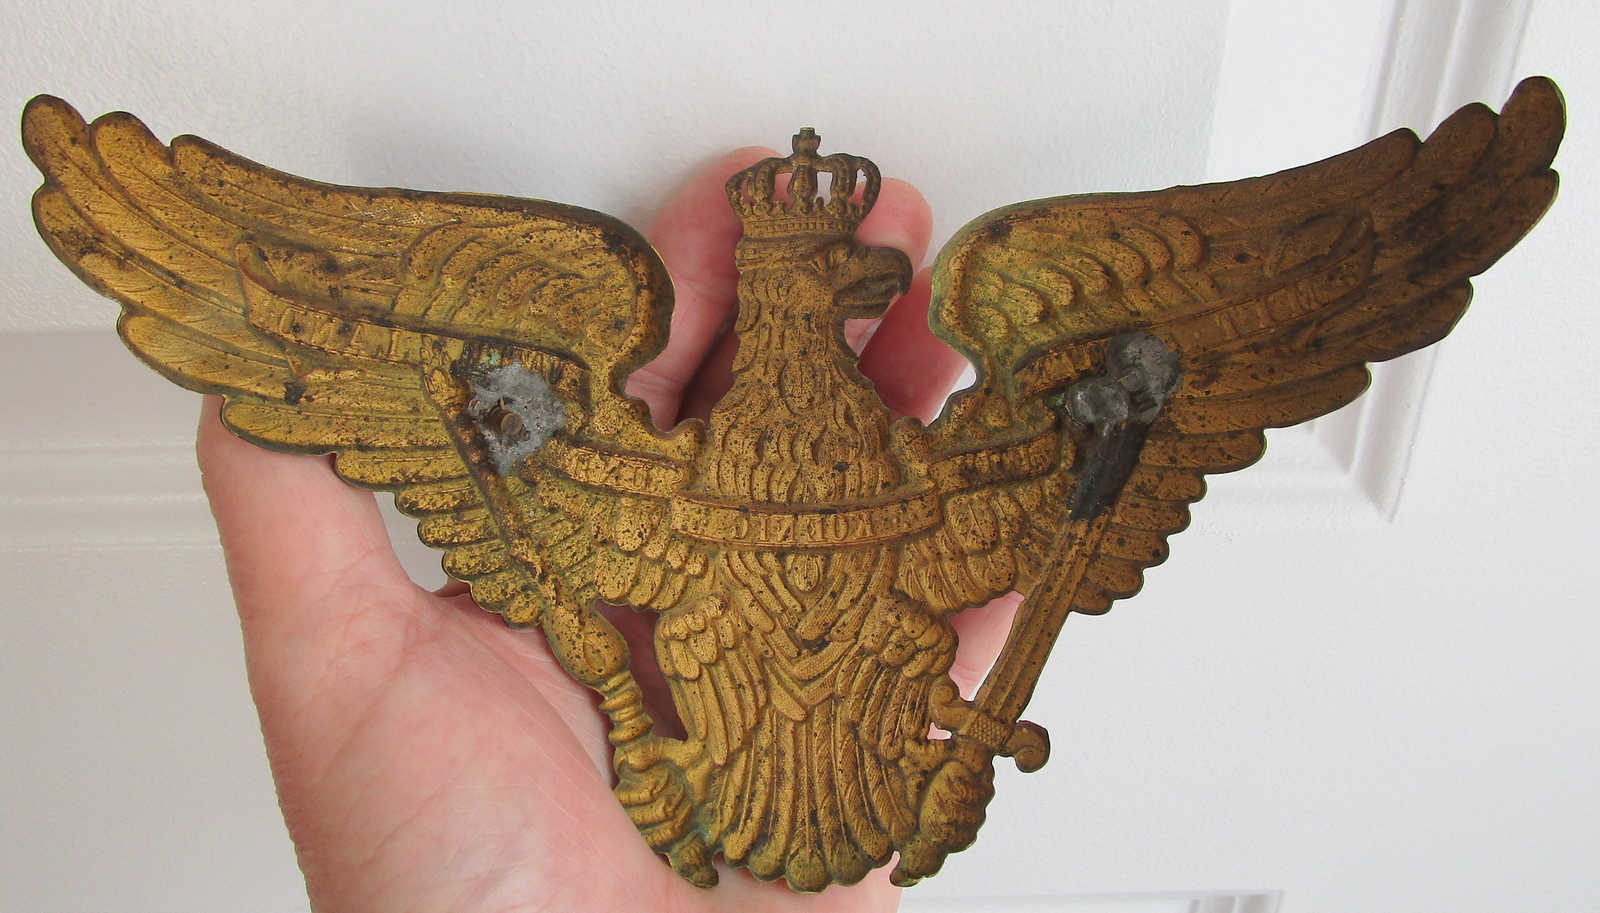
The wappen also shows 100+ years of dirt and tarnish.
 
IMG_1670-XL.jpg

The helmet size is.....54 1/2 cm. The tattered liner had to be taken out as this makes stitching much easier and my efforts would have caused even more damage to the silk. The interior of the helmet also does not have the usual "leather colour. It was painted by the original manufacturer in a sort of salmon/beige colour. I have encountered this before and actually have a Prussian Inf. officer helme in my collection with a similar interior. My guess would be that this was some sort of "sealant" that was applied in order to stiffen the leather and make it less subject to caving in?? :? From my point of view, this lighter background makes stitching much easier.
IMG_1678-X5.jpg

IMG_1685-XL.jpg

The rear visor pinned. The rear visor is always the easiest to line up the stitch holes as the rear spine leaves marks in the finish. The front visor positioning can be more difficult however, as was the case on this helmet but more on that later.
 
It will be a nice helmet after restoration :bravo:
Do you plan to insert the original silk back after repair or is it too damaged for reuse?
 
The original silk will be stitched back in but there is no way that I know of to repair it.
 
I‘m looking forward to see the result :bravo:
I have tryied to stitch in the silk of a liner outside a helmet and it was difficult enough :D
 
Yes Sandy stitching in a torn, separated silk liner is not fun. :( So many are in this condition. The ersatz wartime ones have often just disintegrated.
 
More photos:
IMG_1695-X3.jpg

Stitching on a sunny day, the natural light, "lights" up the stitch line. :D In this case we see the situation after the "first pass" along the line where every other stitch is filled in. Once you reach the end tip of the visor, you simply start back across filling in the missing stitches. Here, the painted inside of the shell really lights things up.
IMG_1696-X3.jpg

Completed ! :thumb up:
IMG_1698-XL.jpg

IMG_1701-X3.jpg

A close up showing the dent in the front visor caused by the wappen feathers. In order to fix this the visor was hydrated in a sealed freezer bag with a wet sponge for 48 hours. A careful watch was kept on this during the process. The humidity softened the leather and then the visor was pinned to a styrofoam head formed covered in a plastic bag...let dry for 24 hours.
IMG_1720-X2.jpg

Pinned!
IMG_1725-XL.jpg

On many occaisions I have stated that lining up the stitch holes correctly is key to a successful re stitch. The rear visor is relatively easy, as you have the "spine lines" to guide you. However, the front visor can be tricky...it took me 3 tries on this one before I got it right. I even counted the stitch holes pinned the middle one and tried that...NOT :eek: However, if you look closely, there are marks in the finish caused by the end tips of the visor. I finally gave up on the counting and used one of these marks, counted my way across pinning every 12th hole and got things lined up correctly. :thumb up: Consequently, the rest of the stitch went very well.
IMG_1730-XL.jpg

Done! However, our work is not ended yet, the front visor was already shrunk and the trim loose when we started. One end of the brass trim has to be trimmed and a new brad hole drilled....a one shot only process.
 
One of the hardest things to do in this restoration process, is removing the front visor trim and then putting it back in place. I would suspect that there was some sort of mechanical crimping that went on in the manufacturing process. We have also seen punched holes on the back side of trim to secure it to the leather visor. Obviously, after the initial haube in 1842 and even before, the haube/headdress makers knew there were problems matching metal fittings to leather which reacts to humidity. Adding to this as can be seen in the photo above, the finish also melts like lava, pushing the metal down and off the visor. So, in this case the melted finish has to be cut away with an X acto blade and the leading edge sanded. On most projects like this, I also have to use a screw driver bit or even the curved needle nose pliers to widen the trim slot so that I can get it back on the leather visor. Then you use the pliers to crimp it back on. Vulcan fibre or visors made from other man made products are usually not a problem providing they have have not reacted to water damage. More photos and script to come.
 
Interesting process Brian. Front visor trim is almost impossible to re-fit onto the visor as you well know.

I have three or four of them sitting in my parts drawer. I should really turf them because I've never been able to use one on another helmet. Too short, too long wrong radius etc. etc.
 
Yes, I can confirm that Steve.... 100% and have the spare bits of trim, rear spines in my parts drawer to back you up. Buying trim or spines or even wappen to complete these 100 year old helmets is a total crap shoot. The leather parts of these helmets have a life of their own which is determined by whatever conditions they experience. They shrink for the most part and the metal bits break (visor trim), squash (spines) or the soldered prongs pop off! I even have an M95 Bavarian bought at the SOS two years ago where, after I re stitched the rear visor...the original brass rear spine won't fit the shell!! Even after a simple visor restitch, it is a relief to get the fittings back onto the shell. Now back to this project.....I have done this trim fit before, BUT, this is not my helmet and it is worth complete, around,....$1,600- $1,800 US??? :-? I will talk to my customer before proceeding.
 
Last edited:
Yes, I can confirm that Steve.... 100% and have the spare bits of trim, rear spines in my parts drawer to back you up. Buying trim or spines or even wappen to complete these 100 year old helmets is a total crap shoot. The leather parts of these helmets have a life of their own which is determined by whatever conditions they experience. They shrink for the most part and the metal bits break (visor trim), squash (spines) or the soldered prongs pop off! I even have an M95 Bavarian bought at the SOS two years ago where, after I re stitched the rear visor...the original brass rear spine won't fit the shell!! Even after a simple visor restitch, it is a relief to get the fittings back onto the shell. Now back to this project.....I have done this trim fit before, BUT, this is not my helmet and it is worth complete, around,....$1,600- $18k US??? :-? I will talk to my customer before proceeding.
So what happened to the project ?
Steve
 
Yes it did but I am going to have to look up the photos on my old hard drive. I had to replace my laptop but kept all photos. This post got lost in the transition.
 
Last edited:
Well gentlemen, I have tried to locate the "completed photos" of the Grenadier but to no avail. Unfortunately, there are thousands of mostly non described pictures on the hard drive. However, I did discovered that it was Alan's helmet and I have emailed him asking that he post a couple of pictures of the helmet as it is now. Hopefully, he will do so when time permits.
 
The helmet in question was sold to Amy. I have asked her to post a couple of photos.
 
Thanks for the effort Brian.

I have a vulcanfibre Grenadier officer helmet that needs work as well, and this thread looked promising.

No worries!

Bryan.
 
Vulcanfibre being almost “plastic “ is easy to stitch. However, if it is bent or broken, I have not been able to fix it.
 
Amy has kindly sent me photos of the helmet as it looks now after restoration:
20221204_135809_resized.jpg
Alan prefers his fittings left uncleaned....me not so much but I follow the wishes of the customer.
20221204_135815_resized.jpg
20221204_135821_resized.jpg
The deep grooved stitch line is unique to whoever manufactured this helmet. the wappen also fits tight to the shell as it should.
20221204_135827_resized.jpg
20221204_135848_resized.jpg
The silk lining was stitched back on to the sweatband. As shown in previous photos in this post, the front visor trim had to be cut and a new brad hole drilled into the trim. This is a nerve racking task as there is no second chance if things go wrong. My thanks to Amy for emailing these photos. :) (y). This is the first Grenadier officer that I have worked on in years of doing this. 2021 was also the year of my first Grenadier M95 OR restitch and cleaning. I have worked on several Prussian General Officer helmets over the years but the Grenadier is an elusive beast in my experience. Those of you that have them in your collection...keep this in mind. ;)
PS: My thanks to Steve (KAGGR#1) for alerting me to this unfinished post.
 
Back
Top