Prussian Officer "Huge Mellon"

b.loree

Administrator
Staff member
First an explanation as to the title of this post...for our non English speaking members, "Mellon"is English slang for one's head, so if I have a big mellon then it means I have a large head.
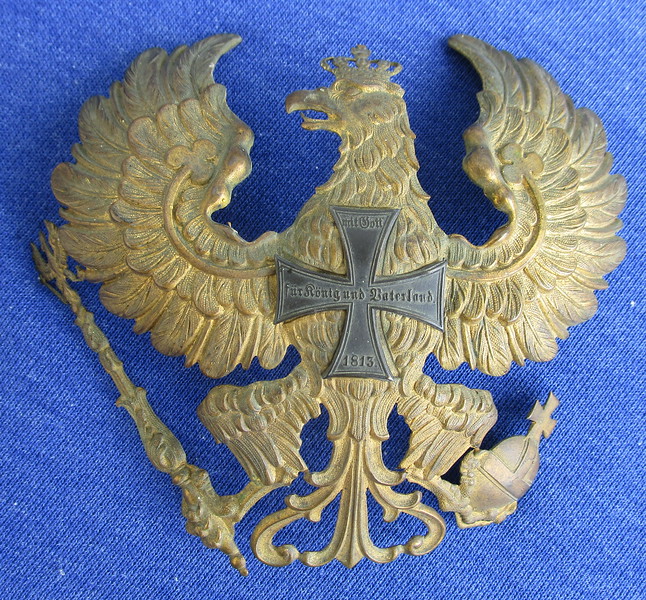
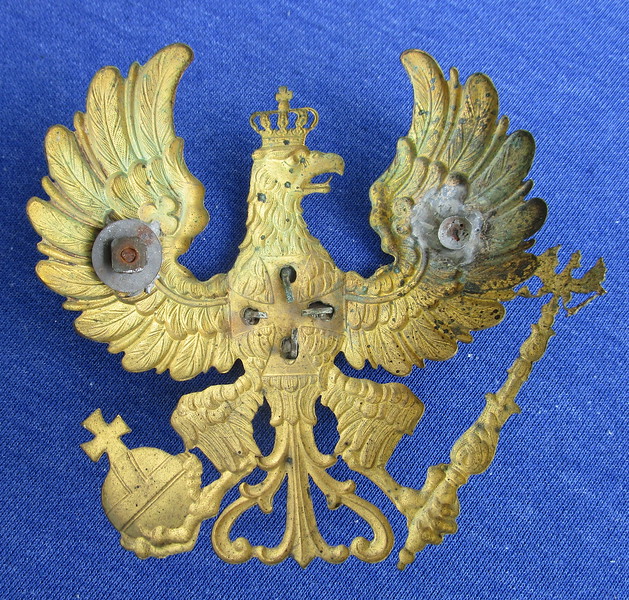
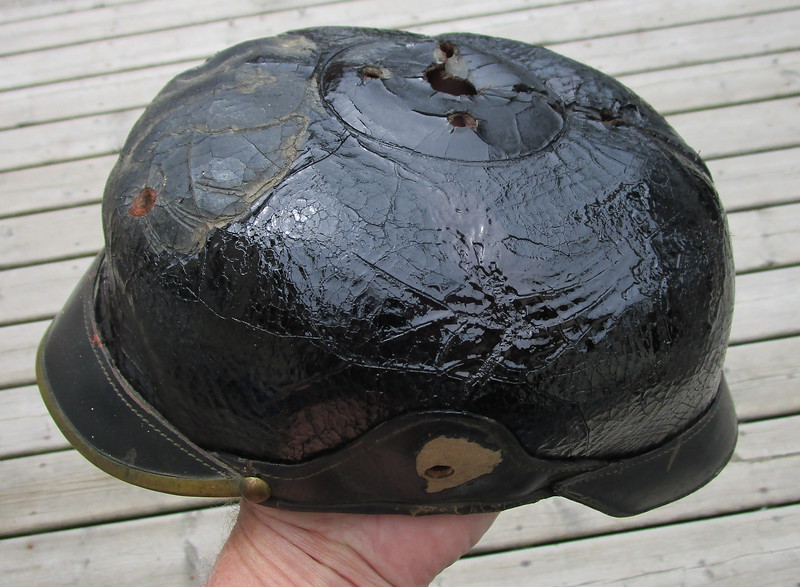
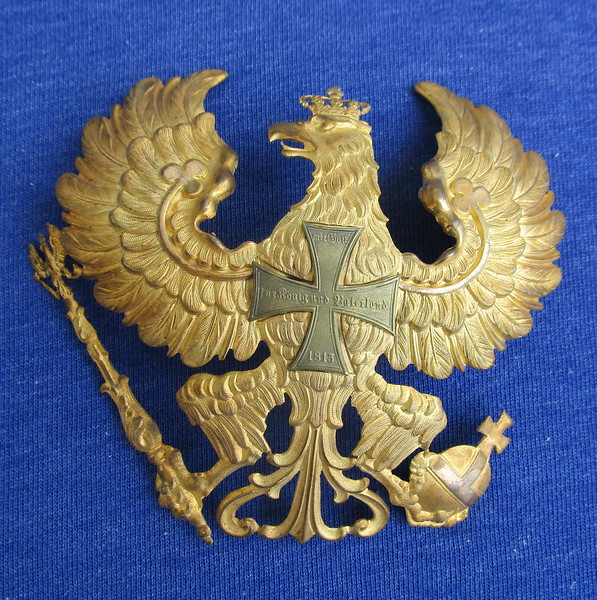
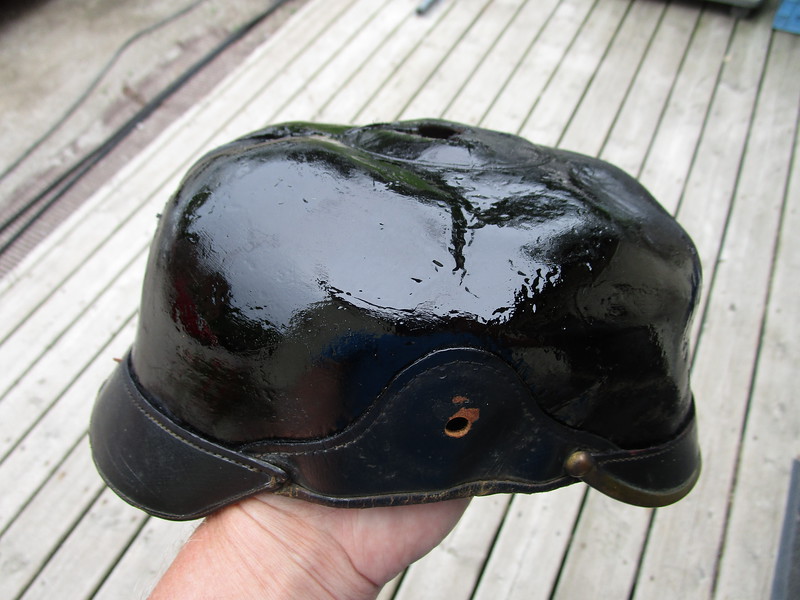
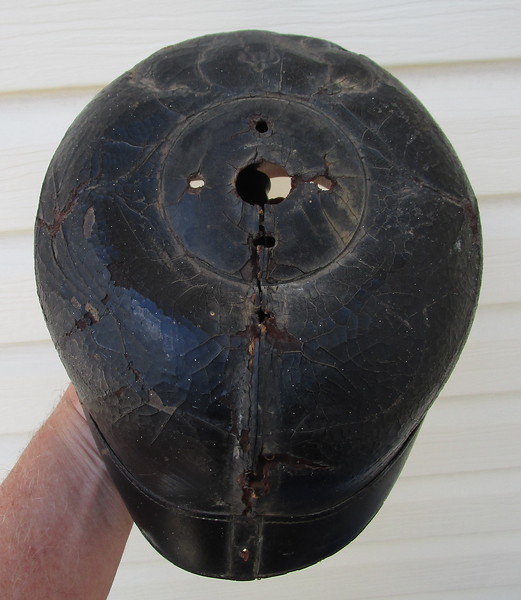
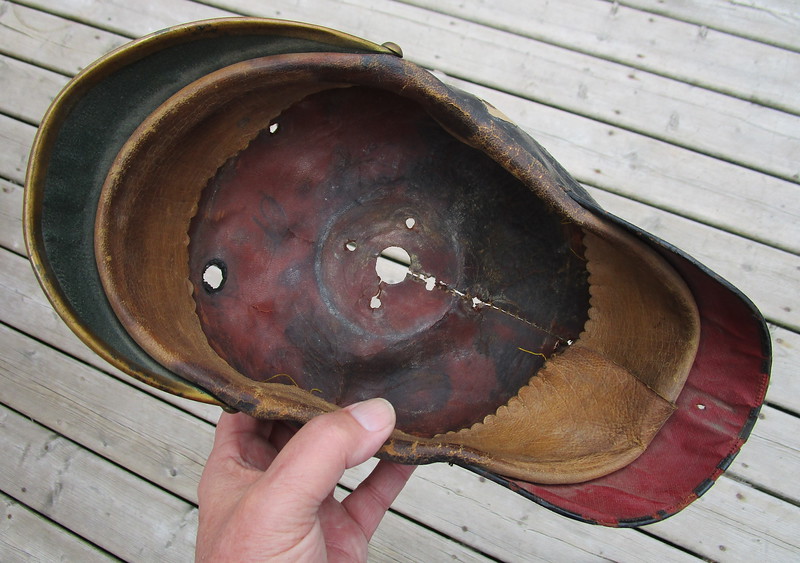
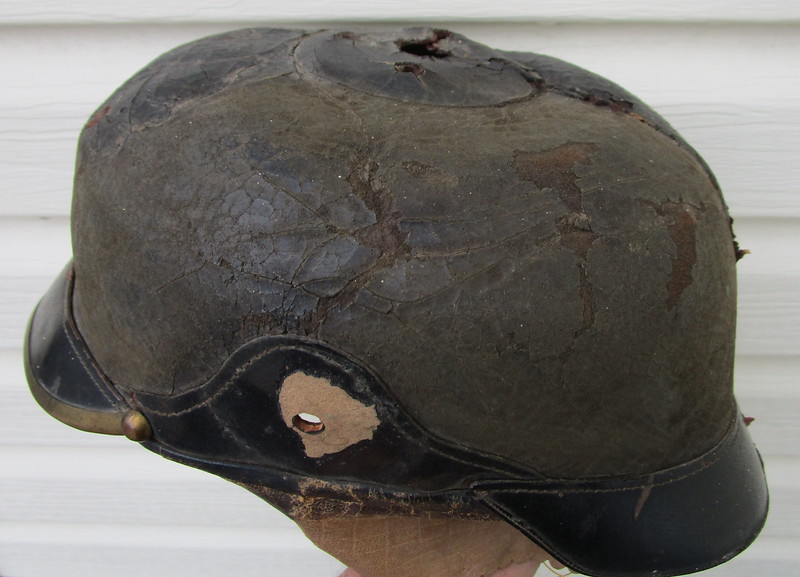
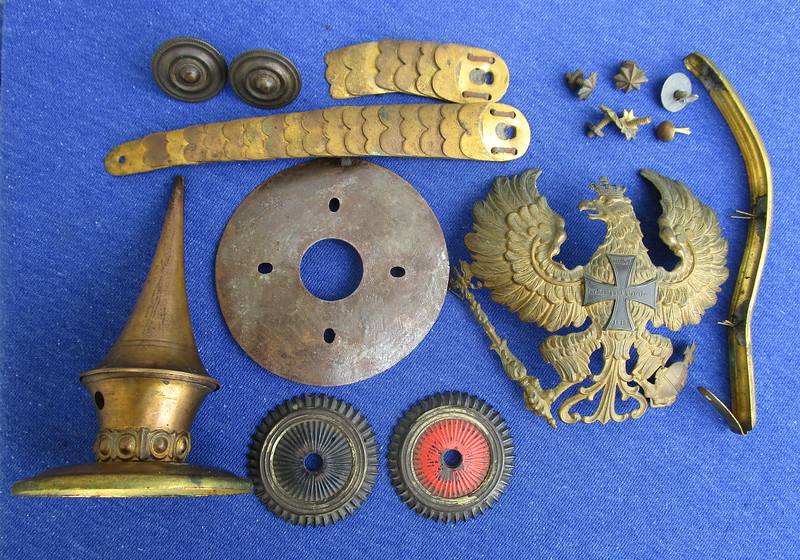
I started another restoration project for a customer today, a Prussian infantry officer helmet with some problems. A Prussian Officer pickelhaube is not unusual but what is exceptional about this helmet, is "THE SIZE"...61 3/4 cm. This is the size marking written in grease pencil on the inside of the shell. This is the largest size Imperial German helmet that I have ever seen. :eek: My previous Haube record was a size 60 cm JzP helmet which I had in my collection but had to sell. These are the problems involved in this project: shell top and sides have collapsed, small tear in shell near rear stitch line, major crazing to shellac finish and missing silk liner. I was sent all fittings so these will be put back on once the shell is dealt with...one scale is missing it's lower section. The photos:
IMG_0422-L.jpg


IMG_0420-L.jpg


IMG_0414-L.jpg

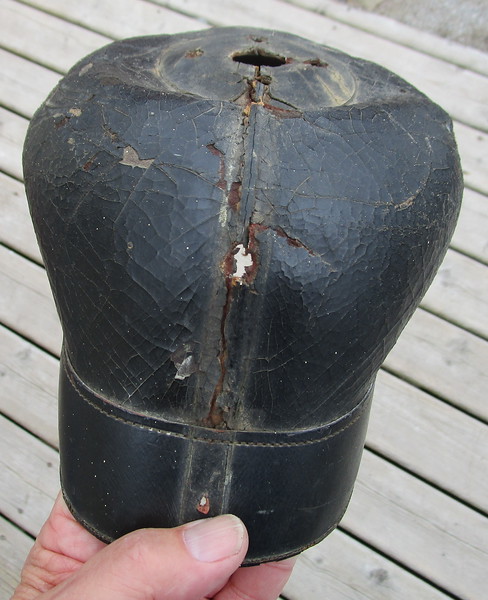
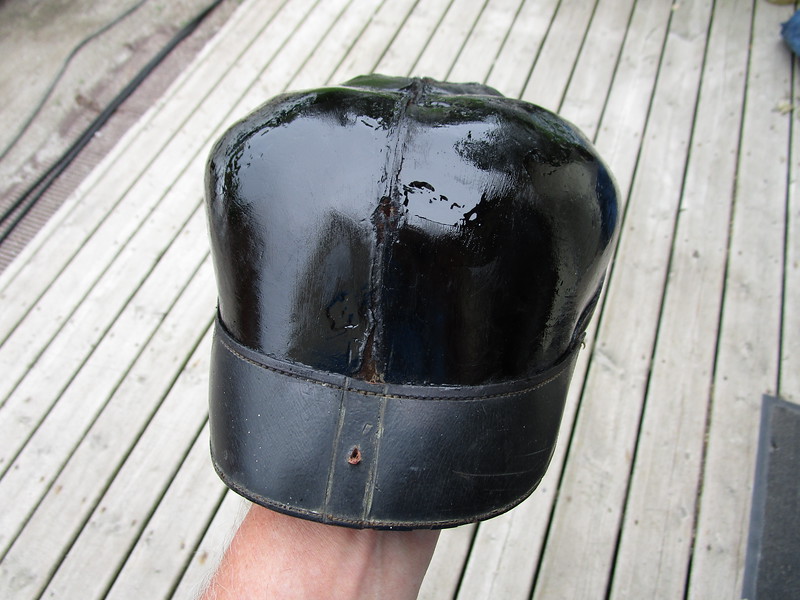
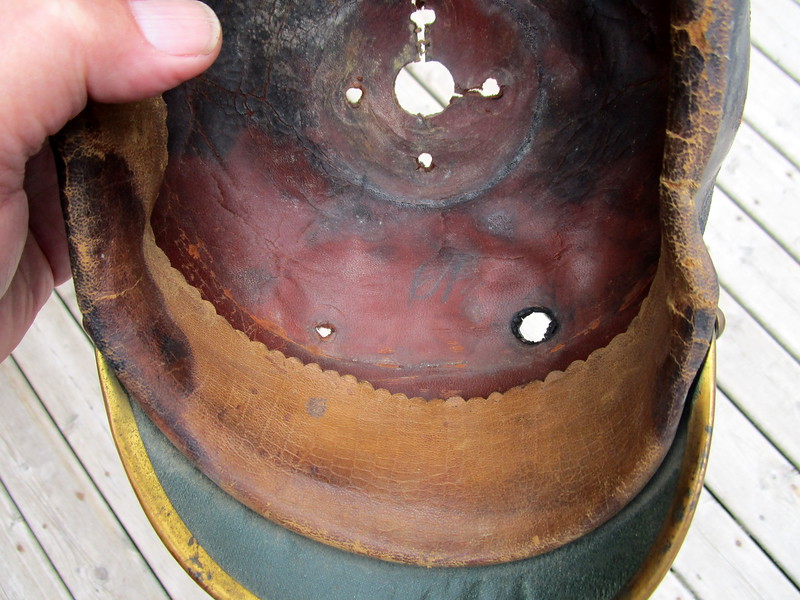
This tear will have to be repaired on the inside and then filled in with finish. It is amazing that with this amount of shrinkage the visors did not pull off the shell.
IMG_0421-L.jpg

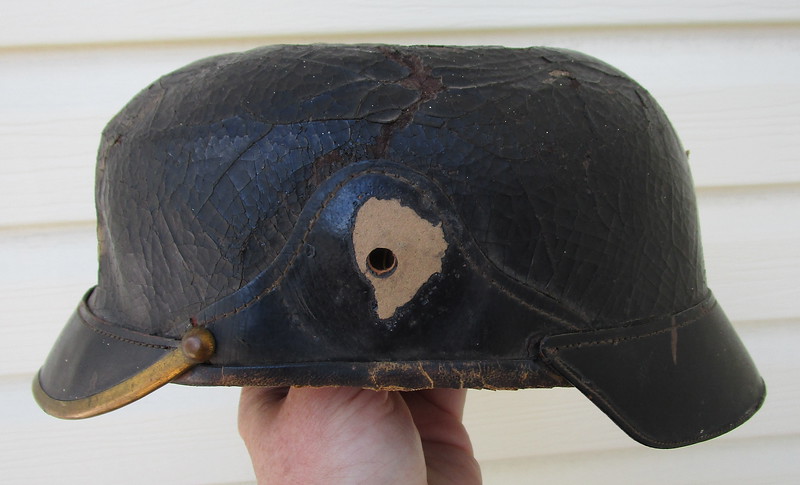
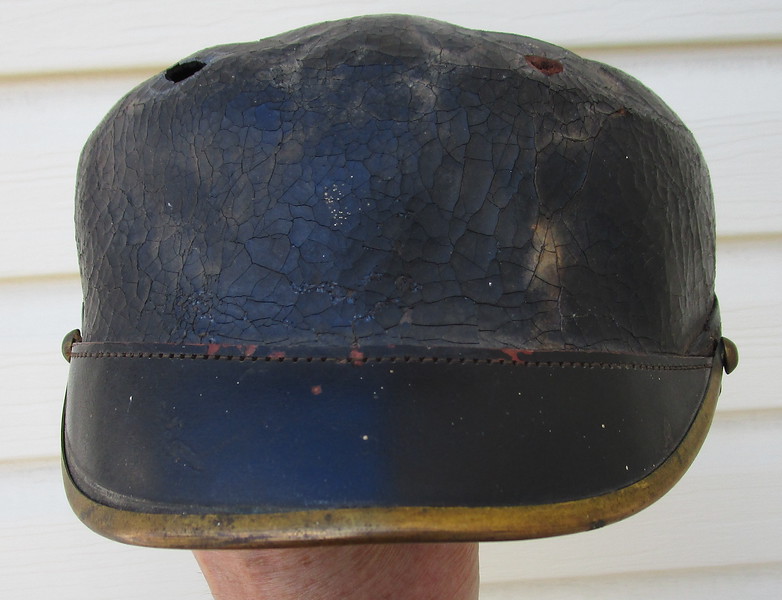
A common occurrence...the card board backing to the kokarde fuses with the finish and tears.
IMG_0419-L.jpg

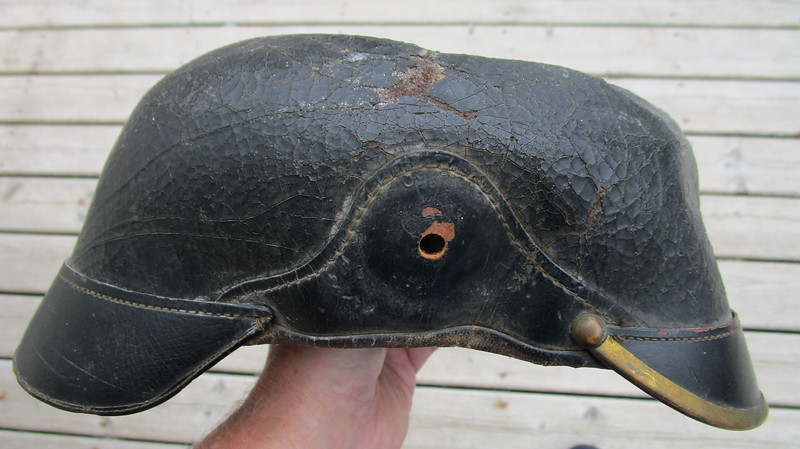
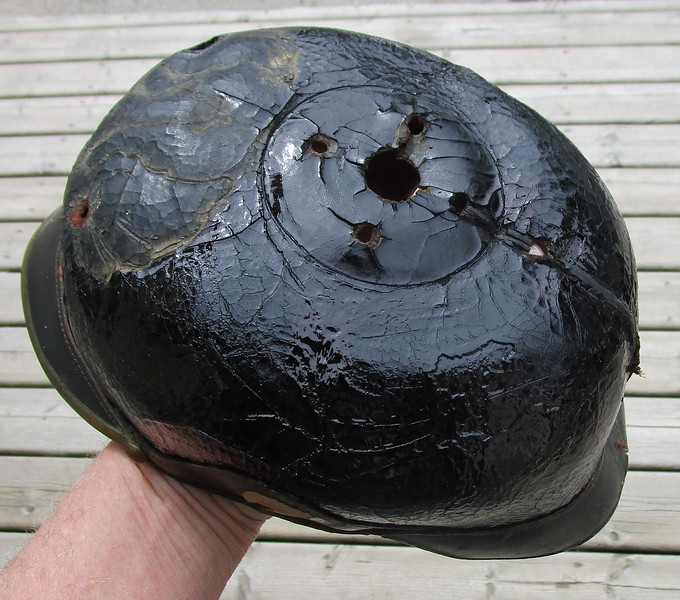
There is going to be a lot of finish work on this project as we have major crazing. This loss of "finish rigidity" has to be restored.

IMG_0417-L.jpg


IMG_0418-L.jpg


IMG_0423-L.jpg

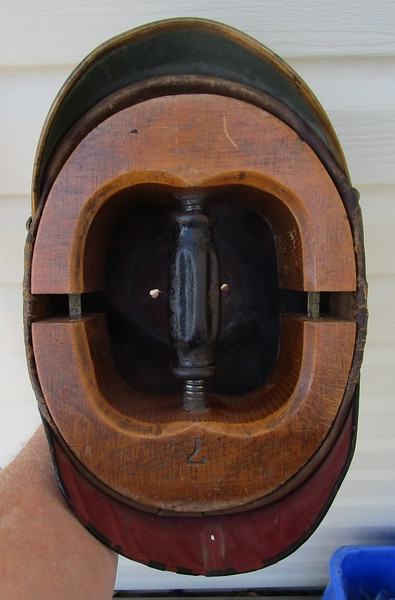
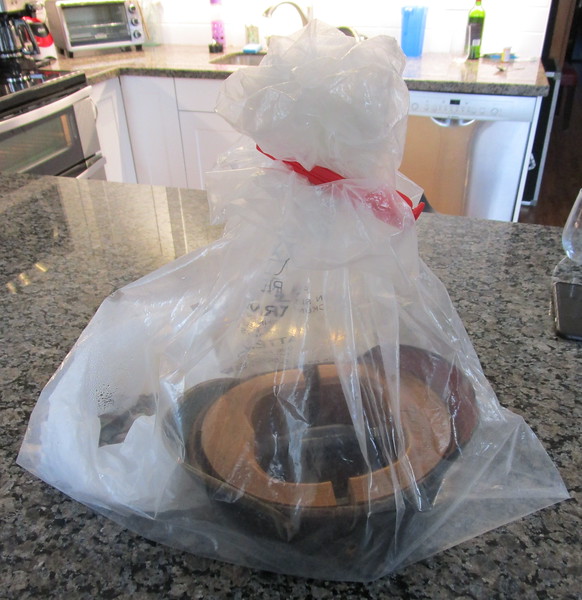
An antique hat stretcher is placed in the shell to put it back into proper shape. The helmet was then placed in a sealed plastic bag with wet newspaper in order to put moisture back into the shell so it can be blocked. The huge size of this helmet becomes evident with the stretcher in place.
 
Love these reports, looking forward to the next installment.
This maybe of interest to some, a chart on hat sizes (BTW English and US sizes are not the same); https://www.ubs.iastate.edu/hat_sizing_chart.html
 
My God..., a pickelhaube that would fit my giant sized head.

Good pro-tips on the process. Looking forward to reading this thread. Thanks for taking the time to do it.

S/F

Bryan.
 
Woa...if this would fit you Bry, you must be a big lad! Glad that you are on our side :D . This is where we are at right now with the project:
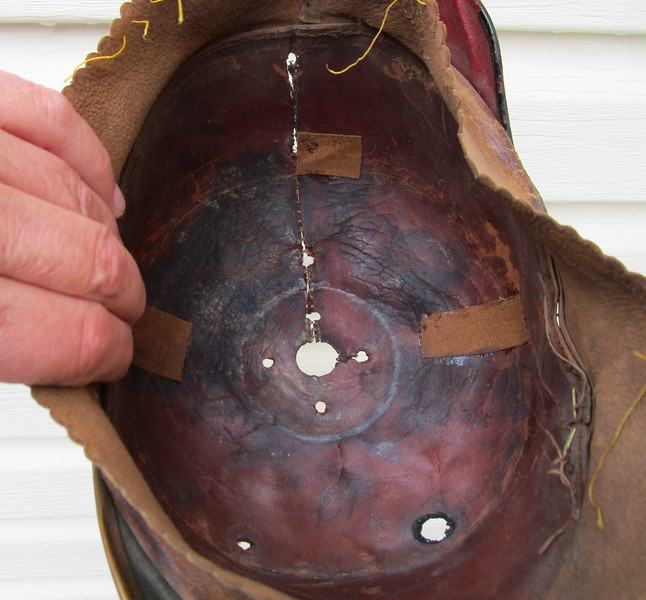
IMG_0438-L.jpg

The helmet was bagged and hydrated then blocked on a head form.
IMG_0426-L.jpg

There are 2 bags used, a small one located to the left of the helmet containing a ball of wet newspaper and then the larger clear one to keep in the humidity.
However, despite this, the top had to be wet using water soaked paper towel, then blocked in position and left to dry. This whole helmet especially the top is very "spongy". I had to glue backing strips of thin leather (taken from a scrapper officer sweatband). I don't like to do this but each of these patches represents a dent in the shell where the leather is almost cut through. In the case of the rear patch, the shell was cut through.
IMG_0437-L.jpg

The entire helmet except for visors was then sanded to eliminate any loose flakes of finish. A cotton ball soaked in shellac thinner was then used to melt in the dust. You can see how deep that dent is and how my hand is pushing up the spongy top of the shell. The next step will be to get working on the shellac finish crazing, dents and missing finish. This will take several months of work.
 
Correct Bryan. Here are the fittings:
IMG_0461-L.jpg

The spike looks bent in this picture but it is not. Notice, because of the size of this helmet, they used an OR's tin spike disc rather than the typical smaller officer disc. Other problems, 3/4 of female scale is gone, spine screw post needs resolder, one missing post on the wappen. Chin scale bosses are heavily patinated. I do have the missing star nut which was sent separately. Because of the helmet size 2 fittings on this helmet have to be longer...the rear spine and the scales. Here we have 17 scales plus end fitting which again is unusual. Unfortunately, the "T" on the full scale is gone, I will have to make one out of brass which I have done twice before. :cool: Not bad eh, for an unkilled History teacher Nerd. :D
IMG_0463-L.jpg

The Prussian Landwehr Officer wappen, note the tongue on the eagle, such fine die carving. I have never seen this before. This wappen is "the real deal" great craftsmanship! :thumb up:
IMG_0464-L.jpg

The reverse....a missing screw post, but fortunately, I have an original replacement to solder on. In many examples of this wappen, the 4 cross prongs are soldered but not so in this case.
 
A couple of pictures to illustrate the refinish process:
IMG_0484-L.jpg

Finish is applied, allowed to dry for 3-4 days then resanded. The " shellac dust" produced by the sanding is then melted and smoothed out using a cotton ball wet with shellac thinner. This process is repeated many times until all cracks and areas of missing finish are filled in.

IMG_0485-L.jpg
 
With the owner's permission, I have lightly cleaned the wappen. I wanted to take off about 60 years of tarnish but not make it look "brand new". This was done using a sonic cleaner and Hagerty Silver Foam. I think things turned out well:
IMG_0492-L.jpg
 
Very interesting to see how a nearly dead Helmet comes back to life :D
Hard to imagine this Helmet with a crack free finish...But I still believe in your Magic :bravo:
 
Still working away at this project...adding finish and sanding between each coat, slowly filling things in.
IMG_0602-L.jpg

This will never be perfect, all we can hope to do is improve things from where they were.
IMG_0603-L.jpg

You can really see the difference here between a new layer of shellac and the original visor finish which has been exposed for 100 years. This is why when I am finished, the new areas will be sanded with 000 steel wool and every surface will have black shoe polish applied and polished up. This is the only way to get a uniform colour to the helmet. We know from original photos, just how shiny our helmets were when new.
 
Some photos of this completed restoration. I am not thrilled with the way things have turned out but sometimes you have to accept that there is only so much that can be done to repair 100 years of abuse. The top of this shell was was totally compromised, with large dents and cracks in the leather which made it "spongy". :(
IMG_0997.JPG
IMG_0998.JPG
IMG_0999.JPG
A set of rebuilt chinscales was also put on this helmet. This is the largest helmet I have ever worked on and consequently, there are 17 scales on each side here. I use the "number of scales" as a measurement when dealing with pickelhaube chin scales.
IMG_1000.JPG
IMG_1001.JPG
 
Your work is amazing Brian.

I know how good it feels to bring stuff back to life and seeing beyond the current condition. I have a 1938 Mills Jukebox that was in rough shape when I got it. Veneer ruined, covered in crappy layers of awful paint and a few mechanical issues. At first glance my wife said there is no way that is coming in the house. Fast forward to fixed up jukebox and it now sits in our antiques living room and plays like a dream. Wish I had taken before and after pictures.
 
My thanks to all for their kind comments. To finish the story on this project, I tried my best but was never really satisfied with the results of my efforts. I met up with the owner of the piece at the SOS to deliver it so to speak. After examining the helmet, he decided that it was not suitable for his collection and he offered it to me at his original cost. I bought it for parts. You can’t save them all unfortunately. :(
 
Back
Top