Tin ersatz helmet repair.

USMC-EOD

Active member
A true Gentleman contacted me via PM awhile back after reading my posting on Wotjak's thread about his restoration of a tin ersatz Ulanen tschapka. He offered me an identical one at a very fair price, but it required some repair.

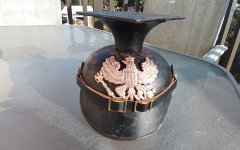
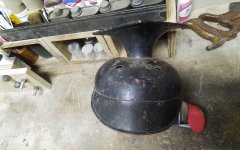
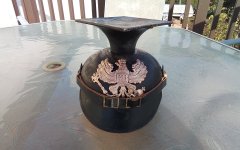
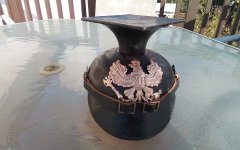
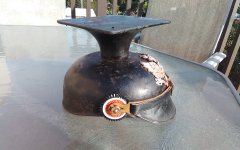
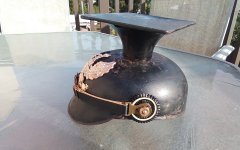
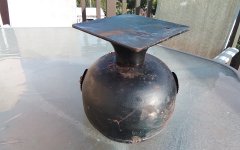
In the photo below, you can see the finished results.

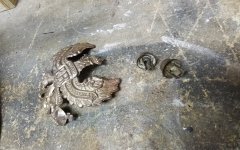
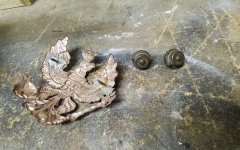
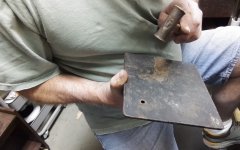
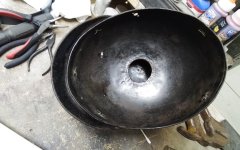
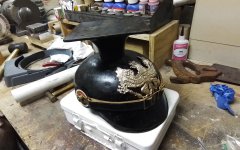
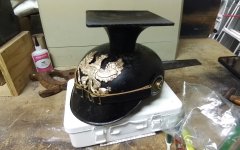
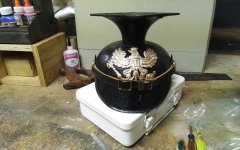
The helmet had a lot of dents and creases to the crown and brim, and the mortar board was kind of pushed over to the side, causing a crease on one side of the top of the crown, and a bent-up high point on the opposite side. The M91 sideposts were present but were "spinning" due to the wires being curled and bent back into the hollow portion under the knobs of each post. The wappen was also present.

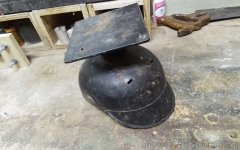
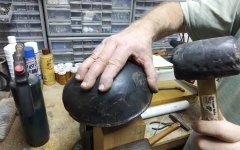
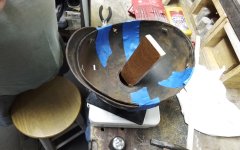
I will show some photos over the next few postings showing my buddy Lu and I working on it in his garage earlier today.
 

Attachments

  • 20221203_143536.jpg
    20221203_143536.jpg
    2.4 MB · Views: 30
You can see that the top leans to the left side on the crown.

The M91 side posts were carefully removed along with the wappen, and everything was straightedge and cleaned.
 

Attachments

  • 20221203_094936.jpg
    20221203_094936.jpg
    1.9 MB · Views: 22
  • 20221203_094957.jpg
    20221203_094957.jpg
    2.6 MB · Views: 22
  • 20221203_095011.jpg
    20221203_095011.jpg
    2.7 MB · Views: 22
A good p8cture of the helmet straight on.

You can see how it leans.
 

Attachments

  • 20221203_095047.jpg
    20221203_095047.jpg
    2 MB · Views: 19
Interior with liner removed showing surface rust over the paint.
 

Attachments

  • 20221203_095102.jpg
    20221203_095102.jpg
    694.9 KB · Views: 15
We very carefully removed the top in order to address the metal issues involving the crown and to gain access to the interior of the top to work on a bad dent.

Our primary mandrel was an old cut-off ball section of a staircase oak newel post. It worked better than the sandbag we were initially going to use.

The tin was very thin, and pretty easy to work back into place.
 

Attachments

  • 20221203_101355.jpg
    20221203_101355.jpg
    1.8 MB · Views: 23
  • 20221203_101401.jpg
    20221203_101401.jpg
    1.9 MB · Views: 22
  • 20221203_102235.jpg
    20221203_102235.jpg
    1.6 MB · Views: 23
  • 20221203_110819.jpg
    20221203_110819.jpg
    1.9 MB · Views: 22
A wooden wedge assisted in supporting the helmet top in the correct position while we carefully re-peened the top back onto the crown.
 

Attachments

  • 20221203_112819.jpg
    20221203_112819.jpg
    1.6 MB · Views: 16
The interior after using very fine steel wool and oil to clean up the fine surface rust.

Note the brass fittings around the edge which secure the liner in place.
 

Attachments

  • 20221203_115054.jpg
    20221203_115054.jpg
    1.7 MB · Views: 22
I wiped down the exterior, and rather than repaint, I cleaned it up. The helmet shell still has about 85% of its original paint, so I figured it should keep what it has for now. I just lightly cleaned, oiled and shined the exterior.

I had a couple of extra original cockades and a pretty nice repro chin strap that I put on this to finish it off for now.

A few glamor shots on my back deck in the sunlight for good measure.
 

Attachments

  • 20221203_115640.jpg
    20221203_115640.jpg
    2 MB · Views: 25
  • 20221203_115655.jpg
    20221203_115655.jpg
    1.7 MB · Views: 27
  • 20221203_115707.jpg
    20221203_115707.jpg
    2 MB · Views: 23
  • 20221203_143508.jpg
    20221203_143508.jpg
    2.2 MB · Views: 22
  • 20221203_143515.jpg
    20221203_143515.jpg
    2.2 MB · Views: 23
  • 20221203_143549.jpg
    20221203_143549.jpg
    2.3 MB · Views: 24
  • 20221203_143602.jpg
    20221203_143602.jpg
    2.3 MB · Views: 24
  • 20221203_143611.jpg
    20221203_143611.jpg
    2.1 MB · Views: 27
Lastly, the liner.

I removed it back at our home in Florida. I flew out here to SoCal with the helmet in my bag.

When we get back to Florida after the new year, I will do some repair work to the original factory liner and re-install it back into this helmet.

I will document my process for you guys to see when I do it.

Thanks for looking!

Bryan.
 
Thanks Brian!

High praise from the master hauben-smith!

Actually, the tin on these is very thin, and not too difficult to move. As my buddy who has worked metal for many years told me, "the metal wants to go back to it's shape it was formed in".

I think he is correct in that. I found with this helmet that the dropping of the metal hammer and allowing it to use it's own weight from a couple of inches was plenty to move the metal back and put this helmet right.

I may eventually strip this helmet and repaint it one day. For now, I am going to enjoy it like it is.

I will post the repair and installation of the liner that came with it when I get back to Florida.

Bryan.
 
Wow you guys took the top off of the shell.
What a gutsy ordeal.
I would never have done but you guys pulled it off !
The results look great !!!
Don't repaint it, try some black shoe polish on it and work it just like leather.
It will darken the metal a little but that little will go a long way.
Before you use the shoe polish try some 400 sandpaper on the rough paint areas.
 
That certainly was a brave move and I'll bet Woytek will add his praise to Brian's (and mine) especially since you have elected to keep it as original as possible. Well done Bryan.
 
Good pro-tips, Pickelhauben. I will look into that.

And thank you for the kind words, Seagull.

Bryan.
 
Back
Top