With the encouragement of my colleagues, I took it upon myself to complete the project of being able to repair the scrap .
.
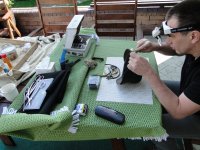
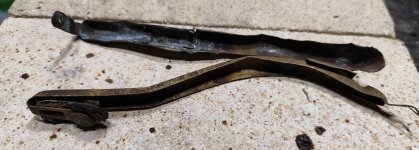
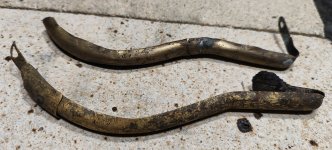
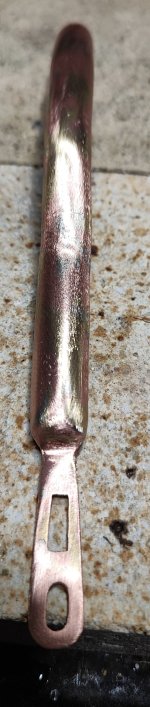
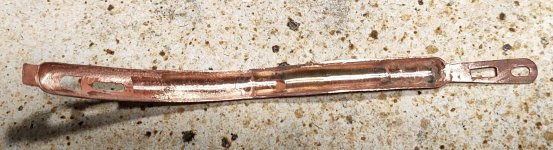
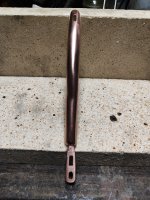
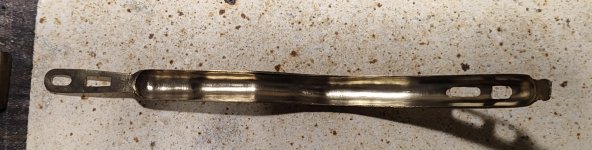
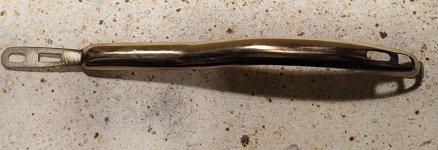
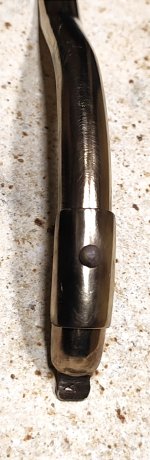
Unfortunately, I do not have preliminary photos. Instead, I can show another scrap. This rail was in deplorable condition. It had been chewed up by the time it lay in the ground. I had to give two inserts from the bottom of the sheet metal. I used the original sheet metal from a firefighter's helmet as an insert. I hard soldered (680-700°C copper solder, zinc, silver) and filled the smaller cavity. Later I sanded off the excess solder. Later, I laid copper using the electroplating method so that the cavities would not be visible. I prepared the rail for laying the brass. Today I laid and the effect can be seen . Repair time eight evenings.
I wanted to add that the method of laying copper and brass from the 19th century without potassium cyanide. The cyanide method was developed around 1845.
.Unfortunately, I do not have preliminary photos. Instead, I can show another scrap. This rail was in deplorable condition. It had been chewed up by the time it lay in the ground. I had to give two inserts from the bottom of the sheet metal. I used the original sheet metal from a firefighter's helmet as an insert. I hard soldered (680-700°C copper solder, zinc, silver) and filled the smaller cavity. Later I sanded off the excess solder. Later, I laid copper using the electroplating method so that the cavities would not be visible. I prepared the rail for laying the brass. Today I laid and the effect can be seen
. Repair time eight evenings.I wanted to add that the method of laying copper and brass from the 19th century without potassium cyanide. The cyanide method was developed around 1845.
Attachments
-
 IMG_20240317_182530.jpg2.2 MB · Views: 17
 -
 IMG_20240317_182511.jpg2.4 MB · Views: 16
 -
 IMG_20240317_182615.jpg1 MB · Views: 16
 -
 IMG_20240317_182641.jpg723.4 KB · Views: 15
 -
 IMG_20240316_235857.jpg5.2 MB · Views: 15
 -
 IMG_20240316_235857.jpg5.2 MB · Views: 16
 -
 IMG_20240317_000002.jpg3.1 MB · Views: 17
 -
 IMG_20240317_182108.jpg732.1 KB · Views: 14
 -
 IMG_20240317_182220.jpg513 KB · Views: 12
 -
 IMG_20240317_181434.jpg392.6 KB · Views: 12
 -
 IMG_20240317_185229.jpg745.9 KB · Views: 17
Last edited: