Anatomy of a Chin Scale #2

b.loree

Administrator
Staff member
Years ago, I made a post on this subject but of course the pictures are now gone thanks to Photobuckets' decision. Recently, customers have sent me a number of scales to rebuild so I have gotten back into this part of restoration. Members have requested further information, so here goes. This post will be far more comprehensive than the first one.
There are 2 basic types of officer chin scales and I am going to limit this post to them. There are of course OR's versions of these but I am not going to get into that. The M95 OR's have a special end fitting which hooks over the M91 posts and repairing those is way beyond my expertise. Back to the officer scales....2 types...flat scales for infantry and convex (curved) for mounted troops. If you encounter scales which are not obviously of either type, check out the chin scale boss which holds the scale to the shell. The convex boss will always be curved and the flat scale boss will always be flat

IMG_5729-L.jpg

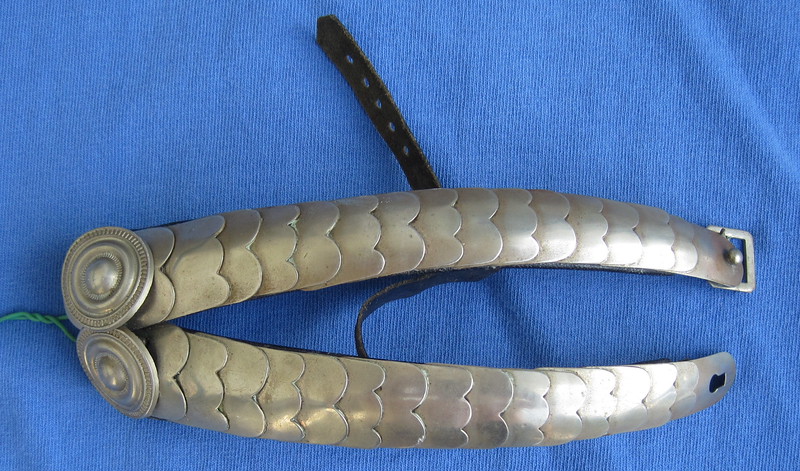
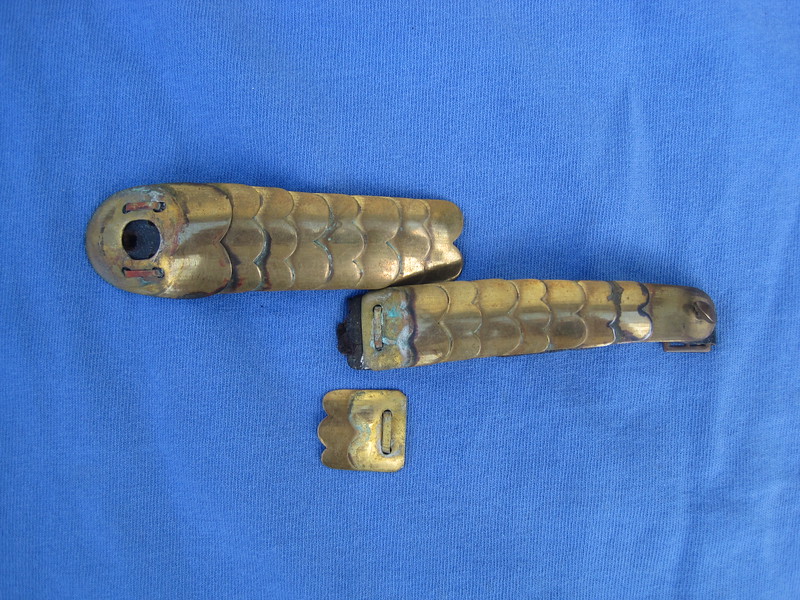
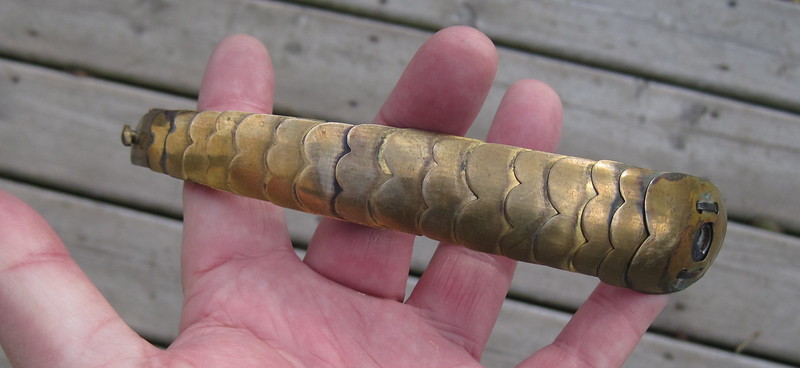
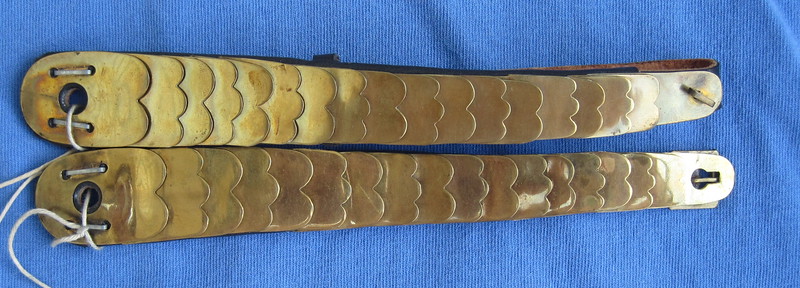
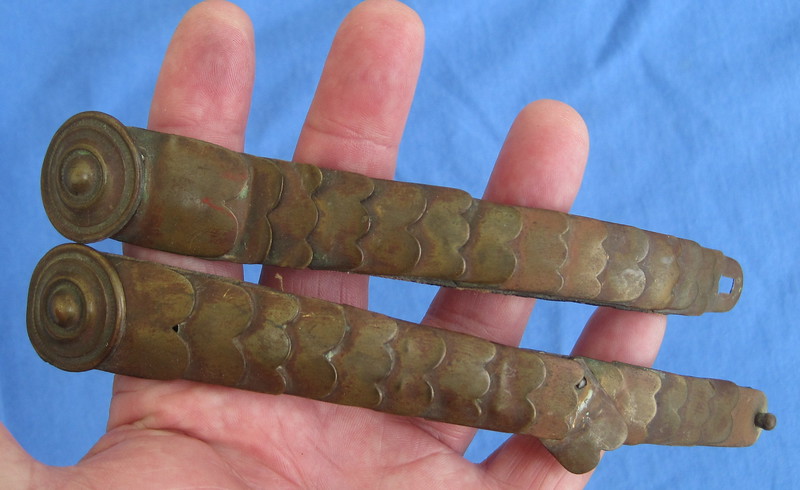
A pair of original neusilber convex scales and bosses. For our newer members, the fittings on any helmet matched the buttons on the regimental tunic. Some regiments for example, Pioneers had silver buttons and thus, their Pickelhauben have neusilber (nickel plated) fittings on them.

IMG_5730-L.jpg


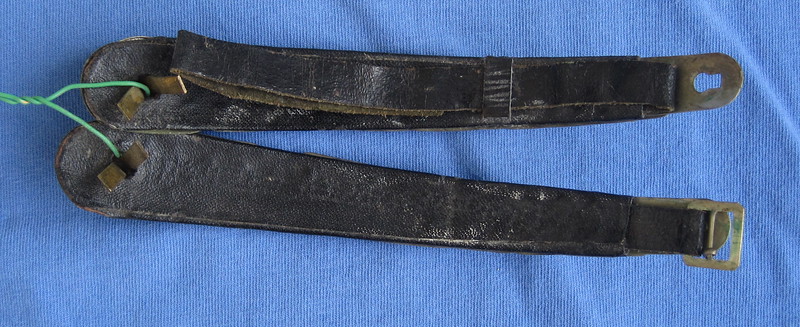
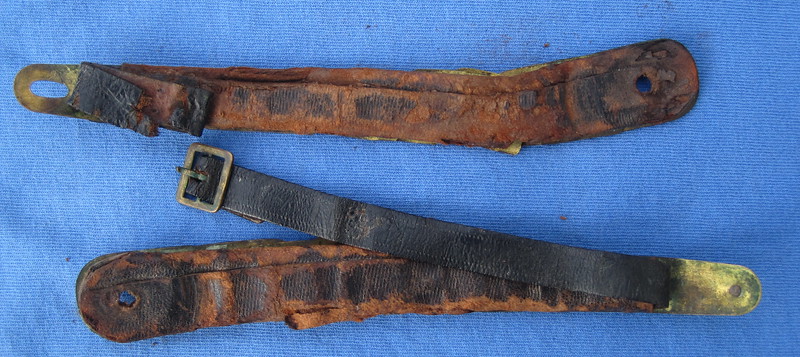
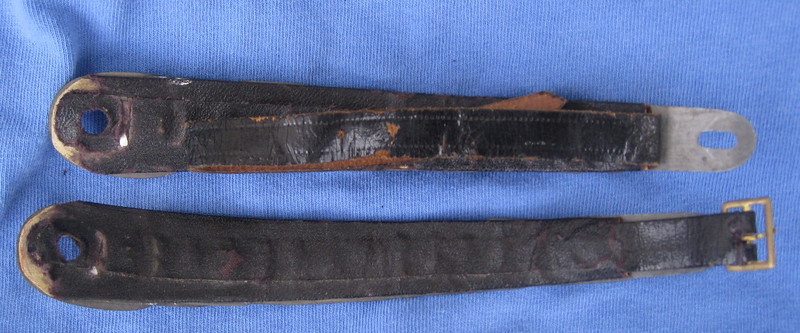
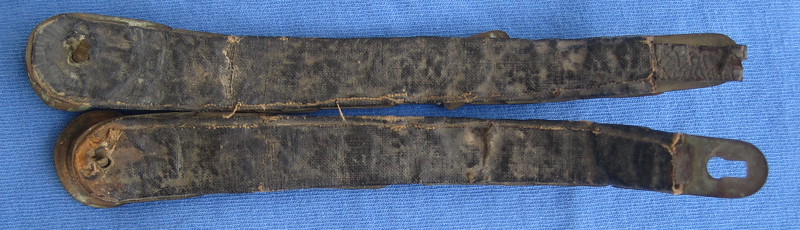
The reverse side of the neusilber scales. When worn on the helmet, the scales link together and on this original pair we see a round "button" on the male side and a "keyhole" opening on the female side. There is another male/female configuration which involves a "T" shaped male fitting and a simple slot on the female side. Note also the thin leather strap and buckle. The scales were intended to extend down the cheeks and supposedly protect that area. This goes back to ancient times. The thin strap was cinched up around the chin to secure the helmet to the head when supposedly going into battle.
Civilization occurred with the cultivation of grain, and then we see the development of helmets to protect the head and face of warriors. So if you choose to investigate these on the internet you can see what I am talking about. All for now.

IMG_5733-L.jpg

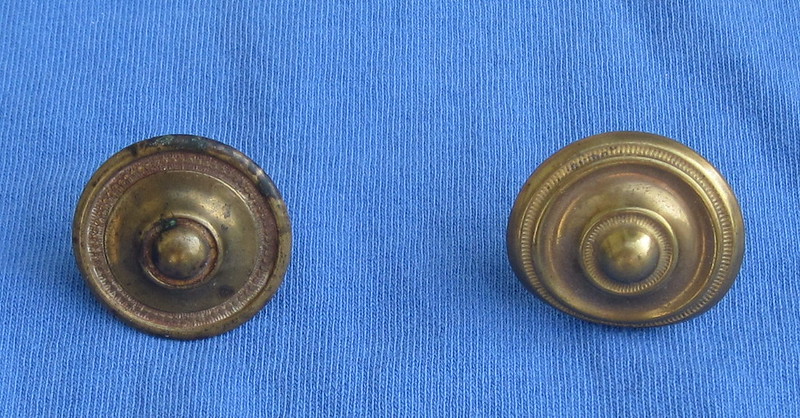
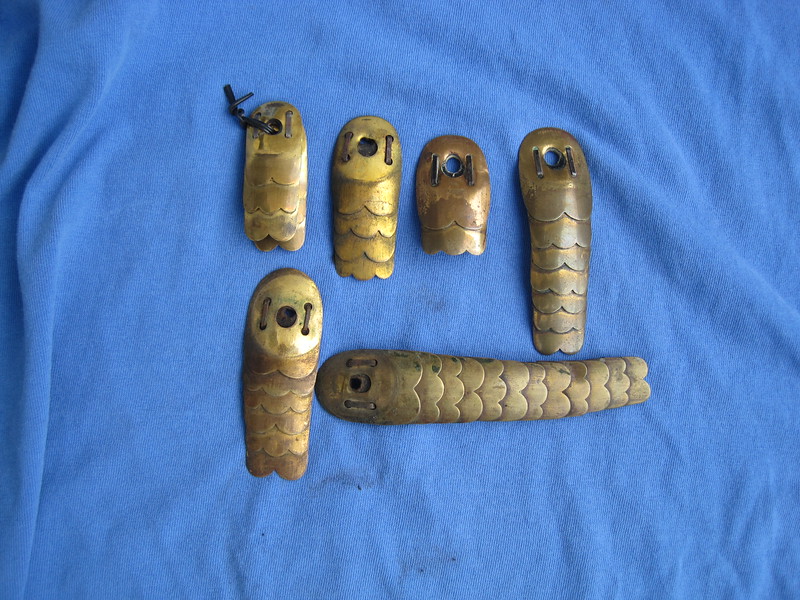
A picture of the 2 types of bosses....flat infantry on the left and convex cavalry on the right. The size of these varies with the size of the large first scale. The circular design and centre button can also be different from helmet to helmet.

IMG_5731-L.jpg

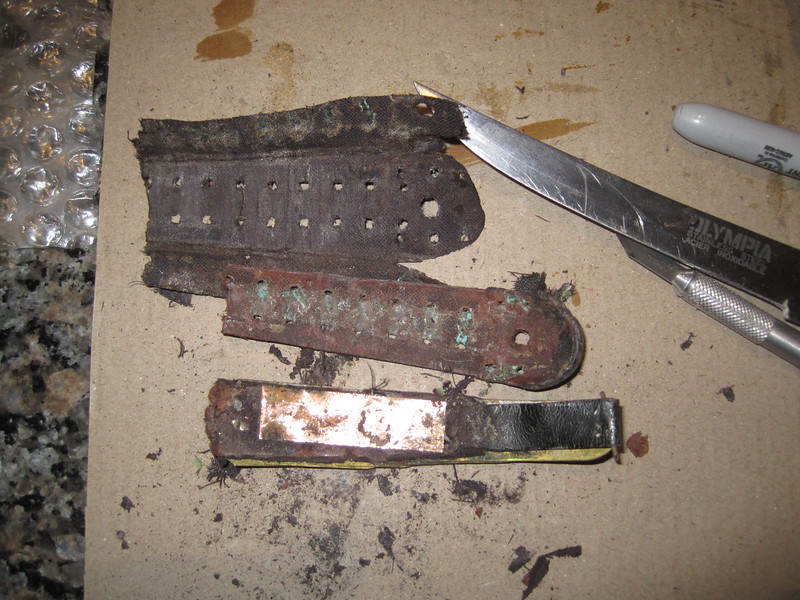
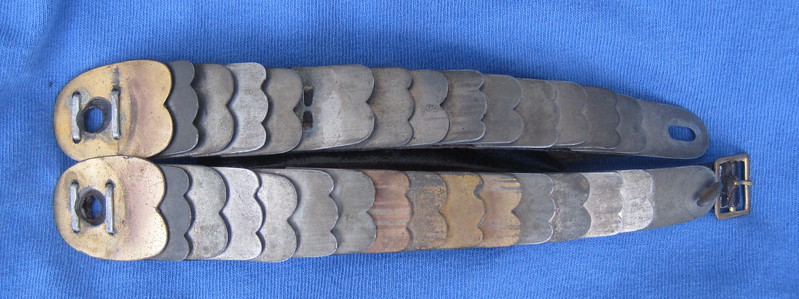
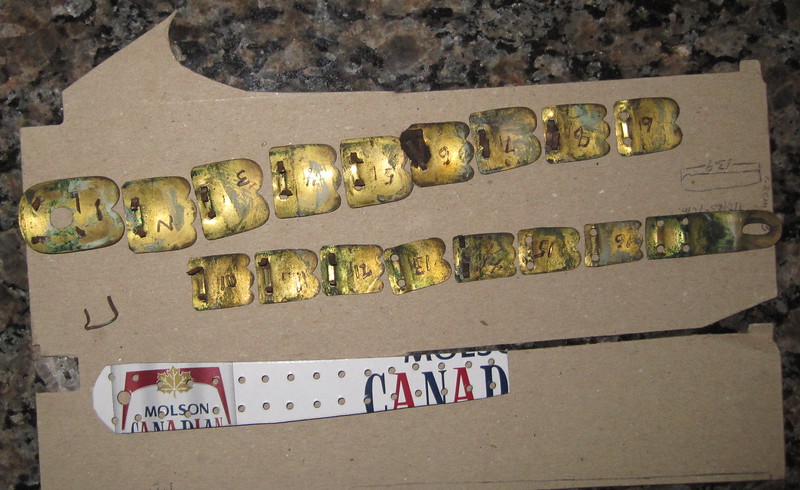
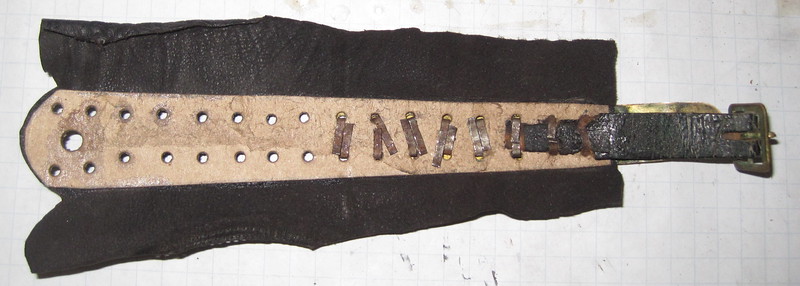
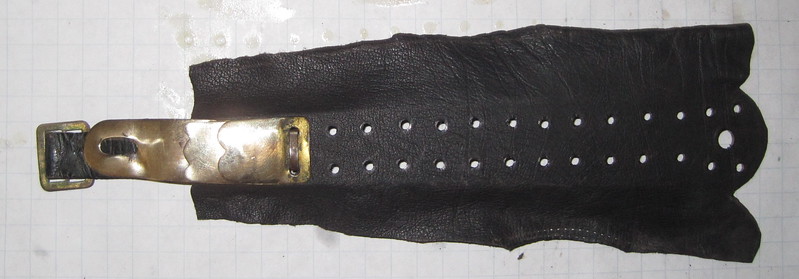
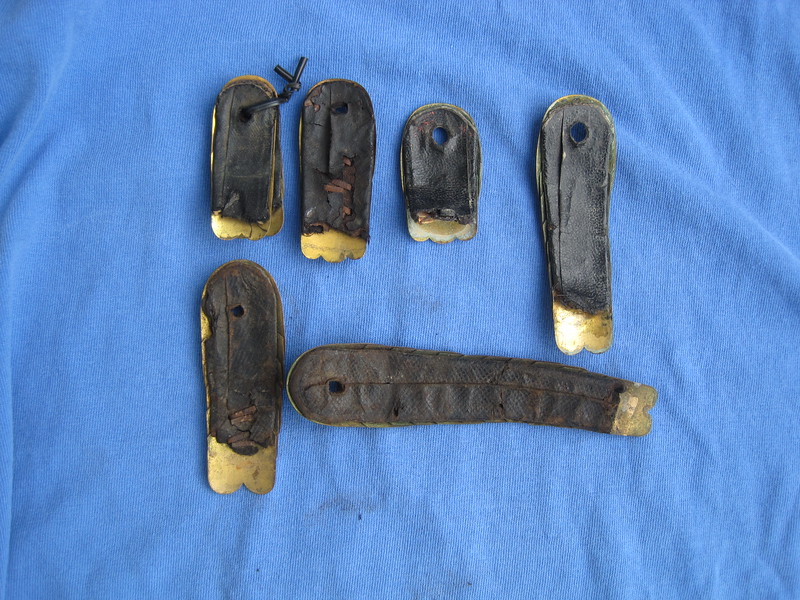
A pic of flat infantry scales rebuilt for me by the late George B. I sent him some bits and pieces and he had some parts and came up with these. Typically, the end fitting and the first 2-3 scales break off over time and are missing. In this case, the key hole end fitting is not strictly correct for this T fitting but it will work. Note as well the 2 end staples in the largest scale are always vertical, the rest of the scale are horizontal. When you take a scale apart, you start with the largest end scale and work back to the end fitting. The reverse is true when rebuilding a scale.
 
Thanks Sandy. This next picture shows the actual "parts" to a chin scale. We have in this case a cardboard strip to which the scales are stapled. a cloth backing which is glued to the strip before stapling and then folded over and glued again to cover the staples. You can also see how the buckle strap is fastened to the scale by the first 2 staples. This is a more modern scale because the backing is cloth and the staple strip cardboard. Older scales use a leather strip and leather backing although we can also find leather strip with cloth backing.
IMG_5699-L.jpg


The clips seen in the picture were there to keep the backing open for the shot.
Now, let's take a look at a rebuild in action.
IMG_5705%20-%20Copy-L.jpg

The scales are numbered as they are taken off, all staples if possible, are saved for reuse. The new strip has been cut out and punched using a template. The cardboard used came from the handle of a beer case (cans). Making this strip is proving to be the most difficult for me and it took 3 tries to finally get a proper one made. Three tries of punching out all of those holes, cutting and gluing the backing only to find that it was not going to work. The holes look fairly large but this gives you some wiggle room to line up the scales as they are stapled.

IMG_5710%20-%20Copy-L.jpg


IMG_5708%20-%20Copy-L.jpg

I have been using vintage ladies black leather gloves for my backing leather but I think I will see if my local Tandy store has what I need.
 
This is so great having the chance to see it al in detail and having it done by the haubemaster himself
I'l take my hat of for this

Jonas
 
Do you find the original gilding coming off of the scales during cleaning? Is there a way to limit this? What tool are you using to make your holes for the staples so perfectly round? Very intricate, exacting work. Your craftsmanship is outstanding and shows a minute attention to detail. Very nice.
 
Yes the original gilding is removed unfortunately. I do not know of anyway to preserve it. You might try a chemical clean rather than a mechanical one but this would add hours to the process. In the worst cases of oxidization, the brass takes on a "milk chocolate" colour. If the collector can
live with that then fine. I just do what the customer wants. However, when you are providing original replacement scales, cleaning everything makes sense so that the entire scale has the same patina/colour. The holes are punched out with a leather punch bought from Tandy. It has various punches on it so you can adjust for hole size. Below, a pair of original convex Bavarian scales, heavily patinated and showing the "chocolate" colour mentioned previously. These scales are very light and small, both leather straps are long gone and we see the knob and keyhole connecting fittings. The backing is black painted cloth.
IMG_5737-L.jpg


IMG_5738-L.jpg

Is there any gilding left under all that crud?? I doubt it besides, do we even know that the scales were gilt in the first place?
 
You are welcome Edwin. Some more pictures which are part of this "chin scale study" I have talked about the frustration involved in rebuilding scales and that they all seem to be different in size, there was no standardized manufacture. Here are a couple of photos which illustrate this point. We have 6 examples of convex chin scale ends, each of these is a different width! The largest of these probably came from the Kurassier, JzP type helmets.

IMG_5742-L.jpg


IMG_5743-L.jpg
 
It's very cool to see all the necessary steps to restore a Chinstrap. I love this post :)
Do you know a good Book about Restauration of Pickelhaube's? Or did you lern leatherwork and everything else by doing?
 
Good to hear everyone is enjoying these posts. I do not know of any book on Pickelhaube restoration. You have to research other disciplines in order to gain information and then learn by doing it. For example regarding shellac.....I went on YouTube to watch furniture finishing with shellac, I contacted a US importer of shellac and asked for his advice. I sent him pictures of helmets so he could see the problem. I watched video on how shellac is harvested and processed in India. So there is a lot that goes on in this restoration process.
Below, a couple of photos showing a pair of Infantry officer scales that I have to fix.

IMG_5770-L.jpg

The rear view showing red rot in the backing cover. The small buckle has been saved because it stuck to the long leather tongue. Both cardboard staple strips are broken.

IMG_5769-L.jpg

Note also, heavy oxidization and the shiny areas which were protected. Two scales are missing. You can see how shiny the scales were before 100 years of exposure. European fakers try and age their fake modern fittings by using some liquid chemical to achieve this colour. I say European, because I have only seen it on helmets for sale on the Euro and UK ebay sites. It is easy to tell when this has been done, but I am not going to announce it to the world here.
 
What type of glue are you using to adhere the leather together when you fold the edges over on the backside of the scales?

I have had a certain amount of luck with plain Elmer's household glue for certain items, but I have never used it on leather. What is your "go-to" adhesive?
 
Tanner's Bond Contact Cement, purchased from Tandy Leather. You need something with flexibility plus adhesion.
 
Tanner's Bond..., thanks. I will look that up when I get back state side next year. Good pro-tip.

I pulled apart a set of reproduction cuirassier scales several years back in order to remove a couple of links on each side in order to make them fit properly on an original cuirassier helmet. (Still looking for an original set... :-k )

I found the staples that the repro-manufacturer used to be very cheap and they broke easily under stress when I bent them straight.

I ended up taking some large staples from my rifle range bag staple gun and bending them to the proper "U" size with some needle-nose pliers to work in place of the original crappy staples. I actually used regular old Elmer's glue to stick it all back together.

Do you ever use alternate replacement staples like that in your builds for these otherwise original scales?

And scales; do you ever cut down a reproduction scale to fit an original set in order to complete a job? I would think that with the variety of scales out there and the scarcity of partial scale-sets available would necessitate something along these lines...
 
Bryan: Yes I have used modern staples and bent them into proper shape when I had to. I always try and reuse the old staples for rebuilding if at all possible. I have never had to employ modern repro brass scales on any rebuild as yet. Randy Trawnik from Age of Kings kindly gave me hundreds of scales both convex and flat at the last SOS. There was one repro used in the last Tschapka rebuild but it was obvious.... wrong patina and thickness. I replaced it with an original.
 
The chin scales shown in my Sept 20th post directly above are now on the Garde Eisenbahn Officer helmet shown in the restoration section. One last hint on rebuilding scales. As of now, I do not pre punch the holes in the staple strip. It is much better to place each scale in proper position, mark where the scale holes are and then punch the two holes. This allows much more accurate positioning of each scale. I will also in future, measure the distance between scales before taking them apart. Rebuilding chin scales as has been said, is very exacting and intense work, it is always a relief when they go back on the helmet and look proper.
 
Thanks Brian; awesome thread as usual. I will be rebuilding a couple of sets of scales when i get back Stateside. S/F-Bryan.
 
One of the latest projects, completed today, a one piece convex scale with a surprise inside.
IMG_5856-L.jpg

For once, there was no cleaning of scales or missing pieces despite the scale is completely broken in two.
The backing strip was leather and the usual oilcloth covered the staples which were brass. Brass staples are a first for me as they usually are steel. You can bend the brass with your fingers but they are not as durable as the steel...4 of them broke during reassembly. They were replaced with original steel ones.
IMG_5864-L.jpg

Rebuilding scales is a dirty job, the leather and cloth tend to disintegrate into dust. You can see the surprise...a thin strip of copper epoxyed over the staples to fix another break. I have run into this before, usually it is a brass strip. Fortunately, it came off without spoiling the original buckle strip which is held on by the first 3 staples. In rebuilding, you must try and and preserve as much of the original staple strip as possible. This allows you to make a template for cutting out the new strip which will be cardboard. The first pictures shown on this post show the staple holes as prepunched, I no longer do this. Why? No holes in the strip allow you to position the scales properly as they were originally. As usual, as with any work, you learn by doing and you find easier ways of doing things.

IMG_5877-L.jpg

Done
IMG_5871-L.jpg

I am going to dye the freshly cut leather backing edges black and I hope to learn some way of centre seam more even.
 
A couple of pictures of a pair of mid war zinc flat officer chin scales. These are from my Garde Artillery officer helmet which is also mid war production. You can see a few scales which retained their "gold wash" but the majority have lost that. I have always called this ...gold wash but really I don't know what process was used to make the zinc look like gilt brass. We all know as well that the Germans turned to zinc pot metal once again during WW2 for their badges, sword hilts etc.
IMG_5964-L.jpg


IMG_5965-L.jpg

The reverse. Construction is card board staple strip with black painted linen cover.
 
Found this: Polished iron, steel and other metals are gilded mechanically by applying gold leaf to the metallic surface at a temperature just under red-hot, pressing the leaf on with a burnisher, then reheating when additional leaf may be laid on. The process is completed by cold burnishing.
But I would believe that they actually used fire gliding. Which is something you don't want to try at home.
Fire-gilding or Wash-gilding is a process by which an amalgam of gold is applied to metallic surfaces, the mercury being subsequently volatilized, leaving a film of gold or an amalgam containing 13 to 16% mercury. In the preparation of the amalgam, the gold must first be reduced to thin plates or grains, which are heated red-hot, and thrown into previously heated mercury, until it begins to smoke. When the mixture is stirred with an iron rod, the gold is totally absorbed. The proportion of mercury to gold is generally six or eight to one. When the amalgam is cold, it is squeezed through chamois leather to separate the superfluous mercury; the gold, with about twice its weight of mercury, remains behind, forming a yellowish silvery mass with the consistency of butter.

When the metal to be gilded is wrought or chased, it ought to be covered with mercury before the amalgam is applied, that this may be more easily spread; but when the surface of the metal is plain, the amalgam may be applied to it directly. When no such preparation is applied, the surface to be gilded is simply bitten and cleaned with nitric acid. A deposit of mercury is obtained on a metallic surface by means of quicksilver water, a solution of mercury(II) nitrate, the nitric acid attacking the metal to which it is applied, and thus leaving a film of free metallic mercury.
https://en.wikipedia.org/wiki/Gilding" onclick="window.open(this.href);return false;
 
Back
Top