You are using an out of date browser. It may not display this or other websites correctly.
You should upgrade or use an alternative browser.
You should upgrade or use an alternative browser.
Another Bavarian Schirmmutze
- Thread starter b.loree
- Start date
Kaiser Wilhelm II
Well-known member
I look forward to seeing the end result of this one.
HatEnjoyer
Active member
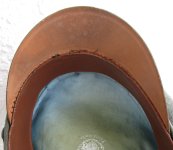
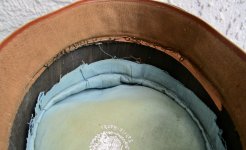
The previous "restorer" was obviously not very handy with a needle and thread. Looking forward to seeing how you save this one!
John Josef
Well-known member
So much for this one being much easier, on a positive note it's a fibre visor which I'm praying will be at least much easier to work with. 
Back from the SOS...time to get down to work on this cap. All that old thread seen above, has to be cut out and disposed of.

Visor removed.
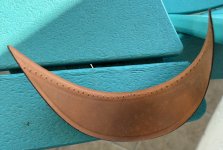
The more typical fibre visor.
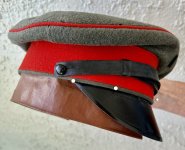
The visor is then pinned into proper position ready for stitching. My usual formula of counting the total number of stitch holes in order to find the central one did not work for some reason. The distance between the visor tip and the side button must be the same on both ends. This toook me 3 tries to get the visor ends in the correct position relative to the strap button. However, everything must be done correctly! One last thing, which may seem obvious.....always wash your hands before working on these "cloth objects"! It is another sunny day here in Florida and perfect for stitching!


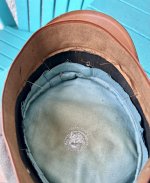
Ugh!! This is like sticking your hand into the mouth of a Dune sand worm!

Visor removed.

The more typical fibre visor.

The visor is then pinned into proper position ready for stitching. My usual formula of counting the total number of stitch holes in order to find the central one did not work for some reason. The distance between the visor tip and the side button must be the same on both ends. This toook me 3 tries to get the visor ends in the correct position relative to the strap button. However, everything must be done correctly! One last thing, which may seem obvious.....always wash your hands before working on these "cloth objects"! It is another sunny day here in Florida and perfect for stitching!


Ugh!! This is like sticking your hand into the mouth of a Dune sand worm!
Last edited:
John Josef
Well-known member
This is going to be GREAT 

Finished!
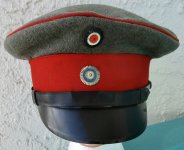
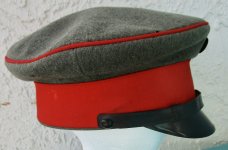
On the third try I did get the visor ttips equidistant from the strap buttons.

The stitch line is not perfect but it will be hidden by the chin strap. You are actually stitching through 3 layers of material here...the sweat band, visor and the feldgrau wool exterior. I will be mailing this out to you tomorrow John.


On the third try I did get the visor ttips equidistant from the strap buttons.

The stitch line is not perfect but it will be hidden by the chin strap. You are actually stitching through 3 layers of material here...the sweat band, visor and the feldgrau wool exterior. I will be mailing this out to you tomorrow John.
John Josef
Well-known member
WOW that was fast, I think you did a wonderful job.
Kaiser Wilhelm II
Well-known member
Well done.


