Dragoner Regt 16 Restoration

b.loree

Administrator
Staff member
2 Hanover Dragoner Regt Nr 16 just arrived here for a bit of work. Here are the "before restoration" pictures:

IMG_5938-L.jpg

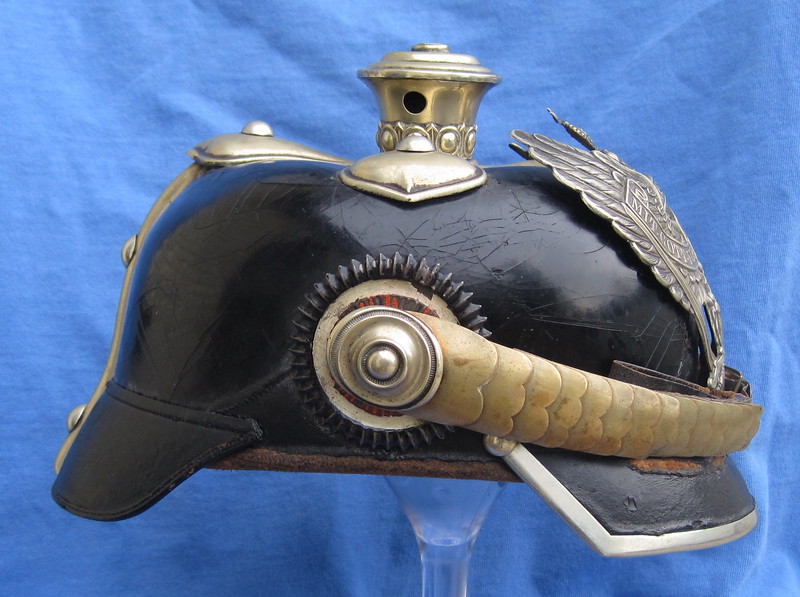
The spike is missing but Scout 17 who owns the helmet tells me there is one on the way from Germany.

IMG_5939-L.jpg

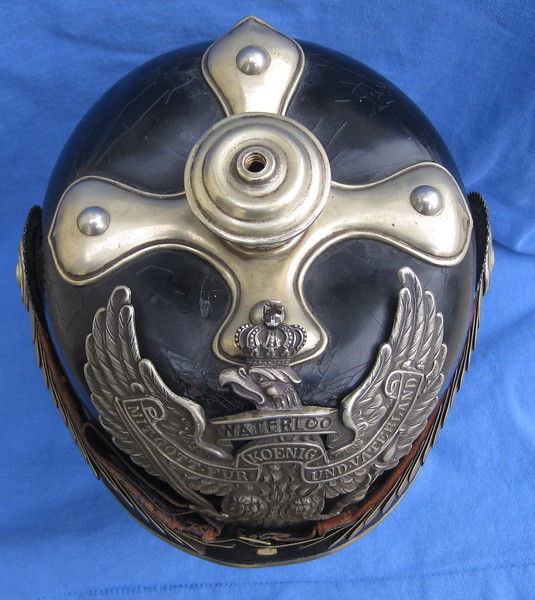
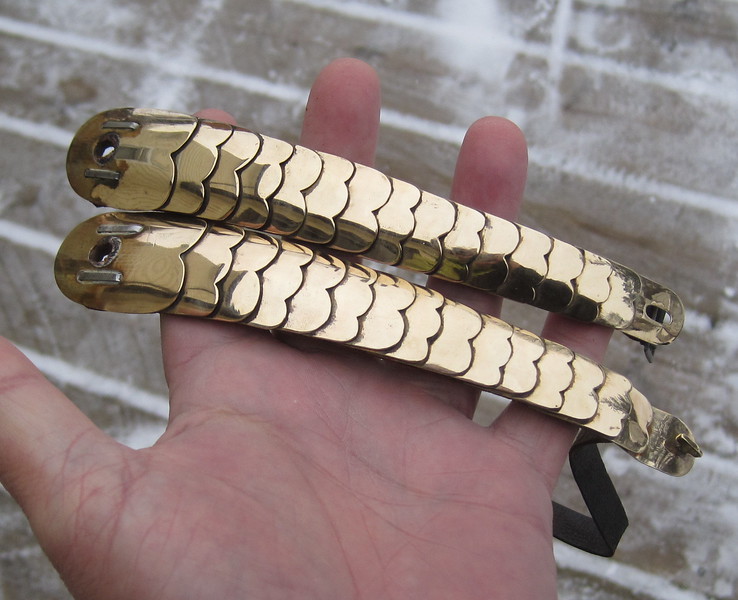
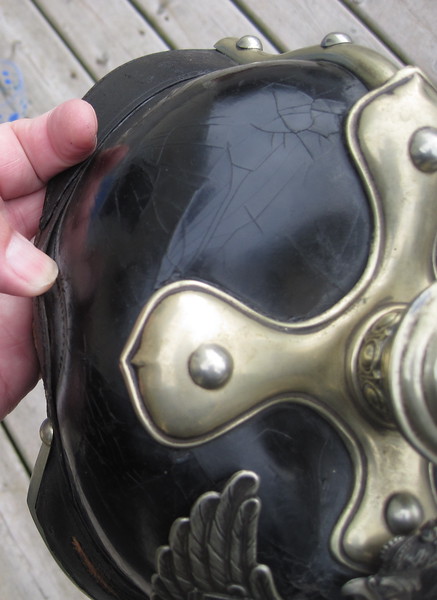
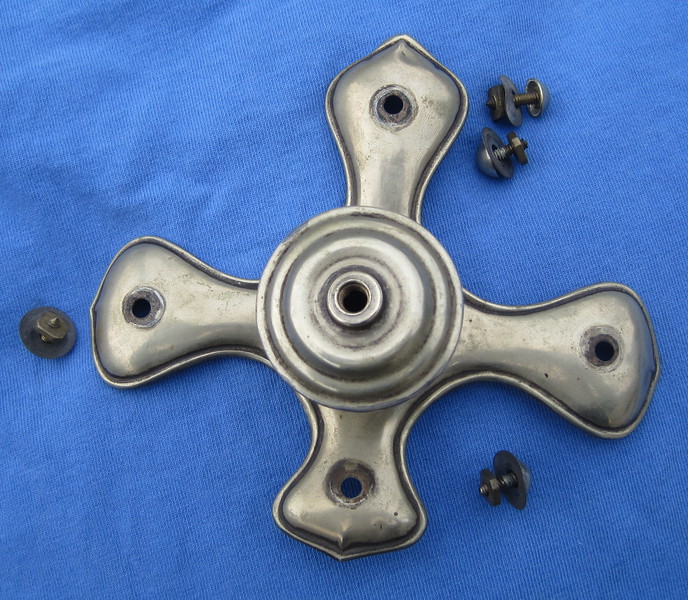
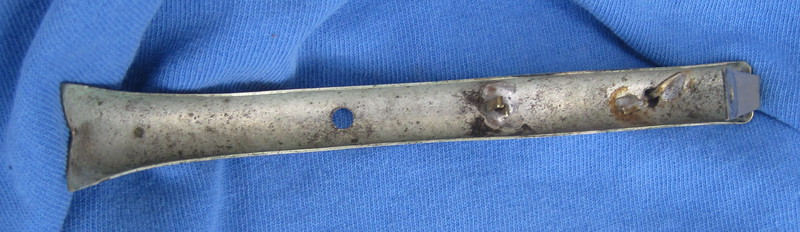
The typical Dragoner cruciform base which has sunk in a bit over time. There is no large Hessen style support disc nor the Bavarian cruciform support sometimes seen on their helmets.

IMG_5940-L.jpg

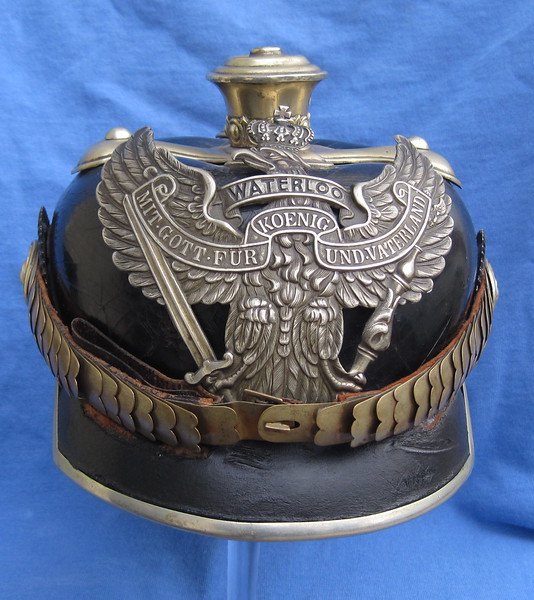
The helmet although private purchase/officer,
comes with OR's kokarden and wappen. This might indicate a OYV helmet.

IMG_5946-L.jpg

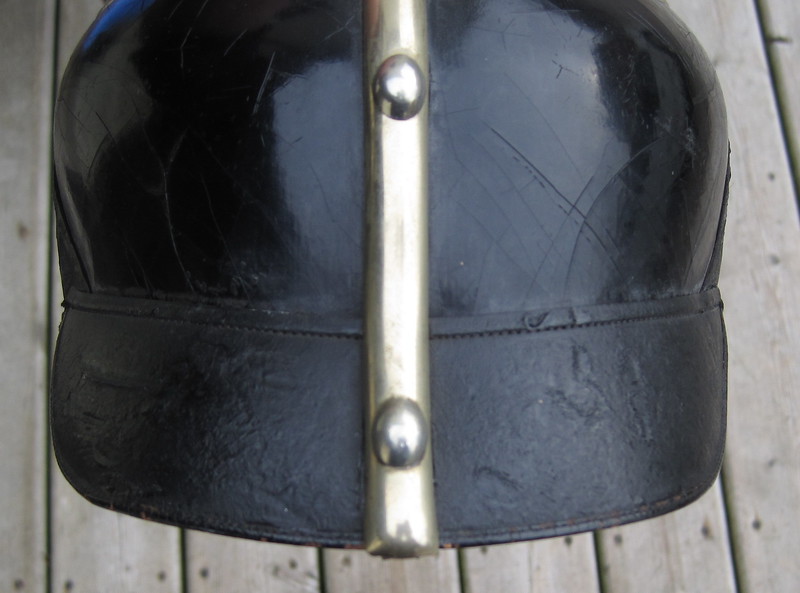
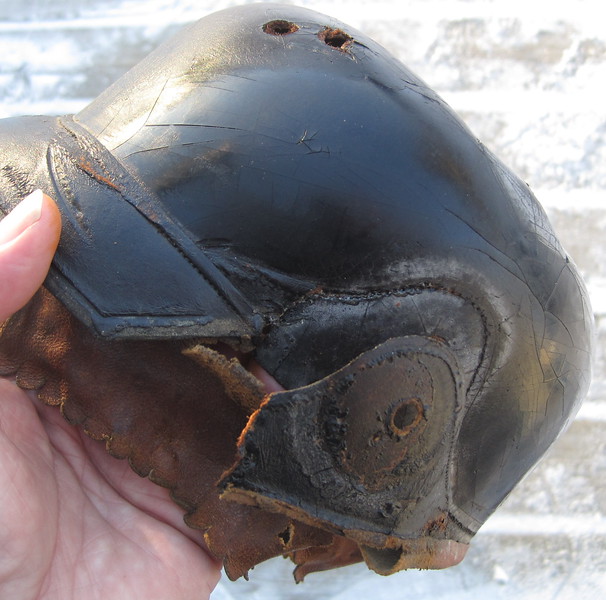
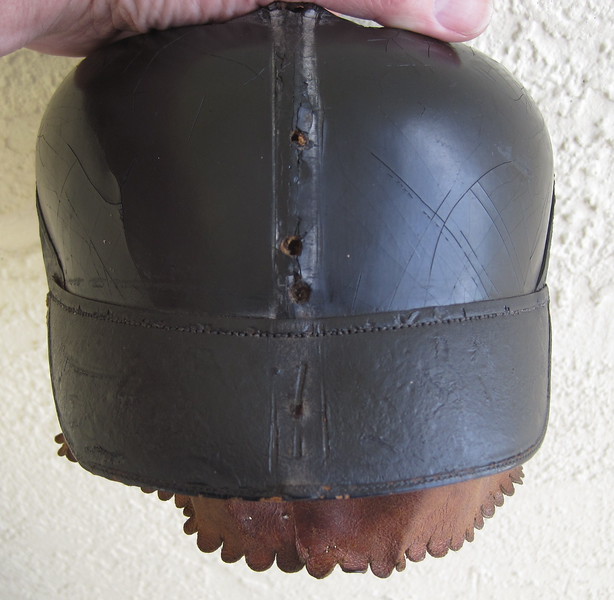
A shot of the rear showing the typical Dragoner spine with the extra dome split brads.

IMG_5942-L.jpg

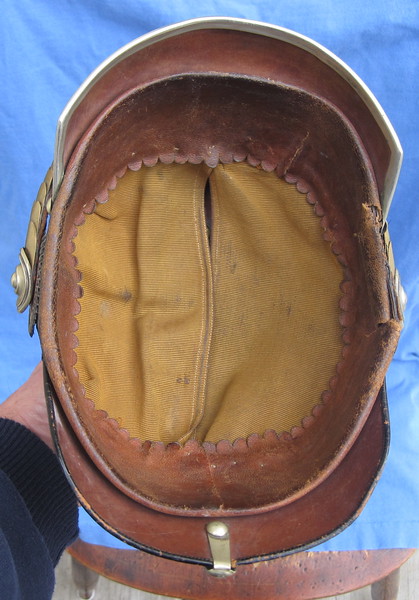
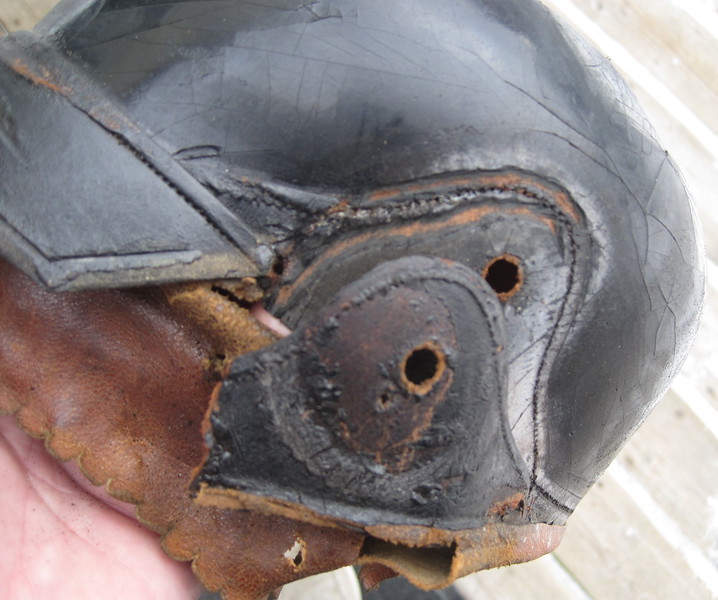
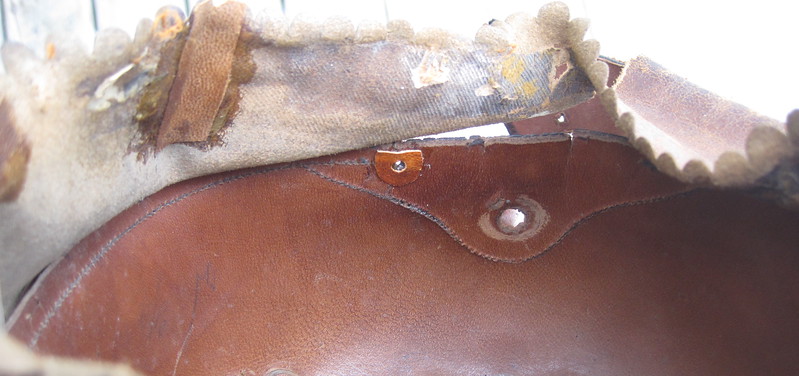
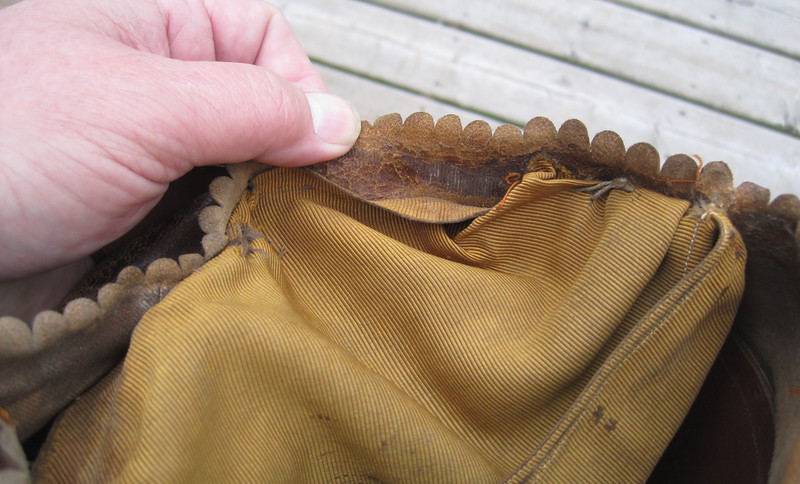
The interior showing the officer liner but the visors lack the usual red and green linen coverings. This is the second time I have seen this on a Dragoner helmet. I have a neusilber Baden Dragoner (My own) which is in pieces right now, it has the officer liner and wappen chin scales but no pearl ring. Kokarden despite the chin scales are OR M91's.

IMG_5943-L.jpg

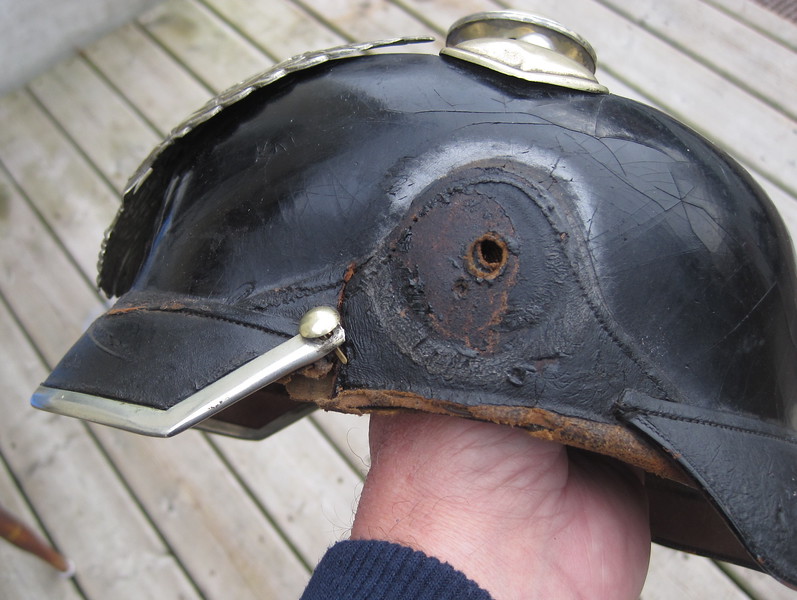
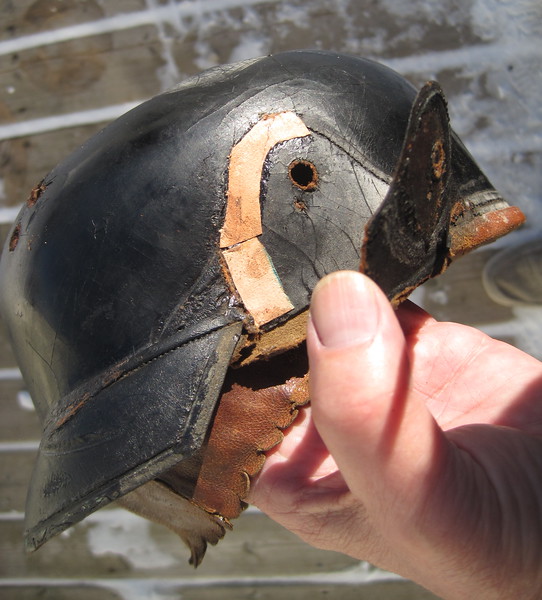
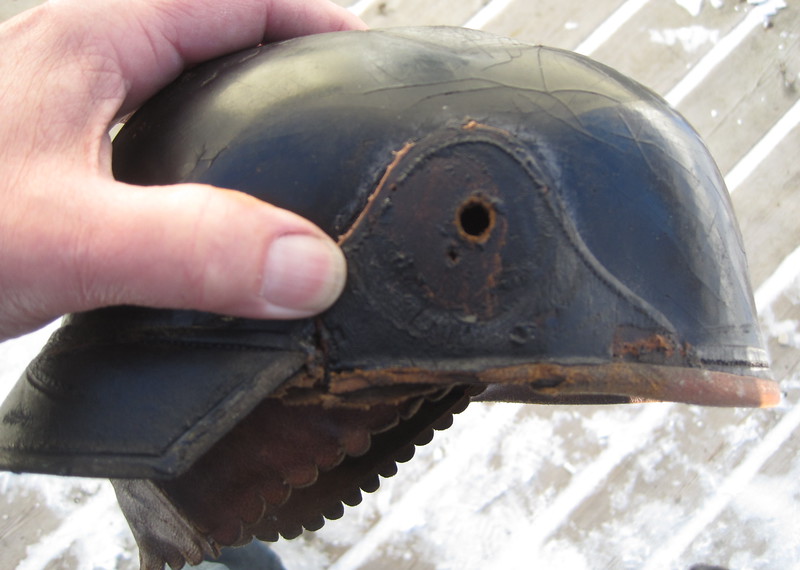
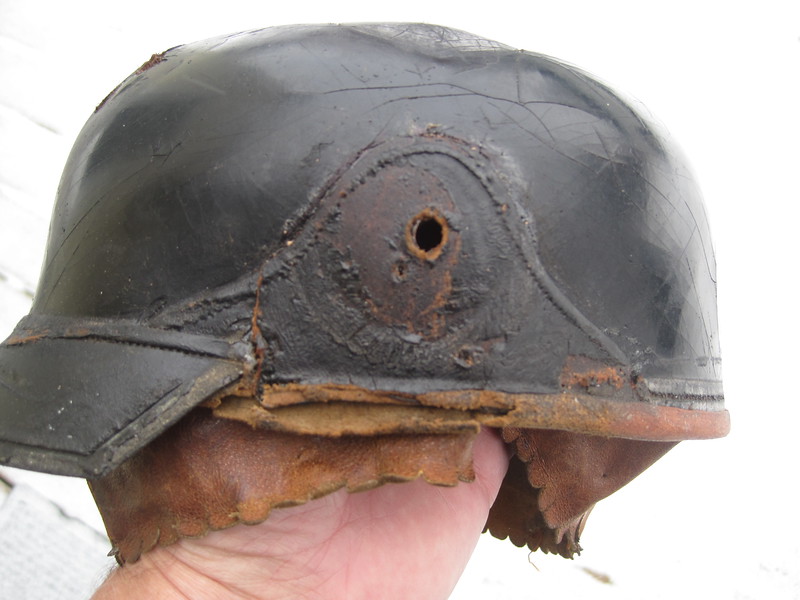
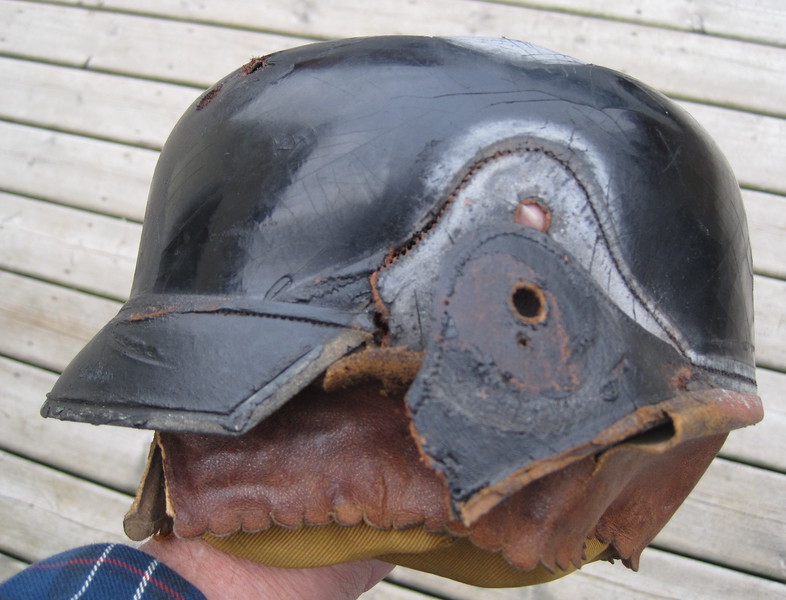
Here we see the main issue with this restoration...a split in both shell and left side reinforcement. The right reinforcement has also got to be restitched because the thread has rotted.
IMG_5944-L.jpg

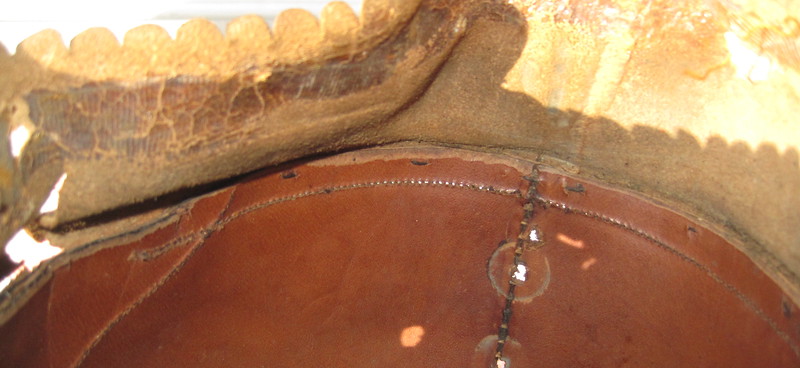
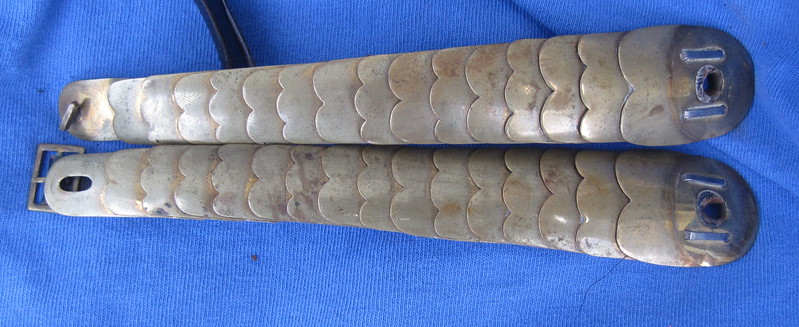
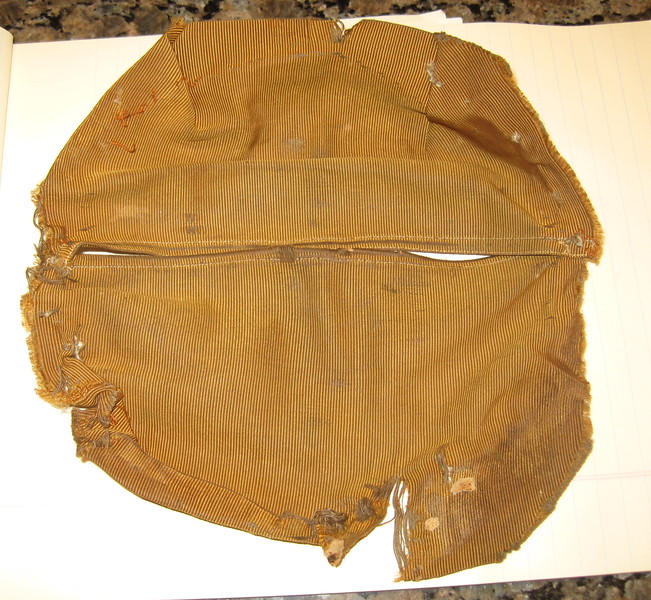
Other tasks...restitch rear visor, clean all fittings, smooth out marks in visors and stabilize tears in sweatband.

IMG_5951-L.jpg

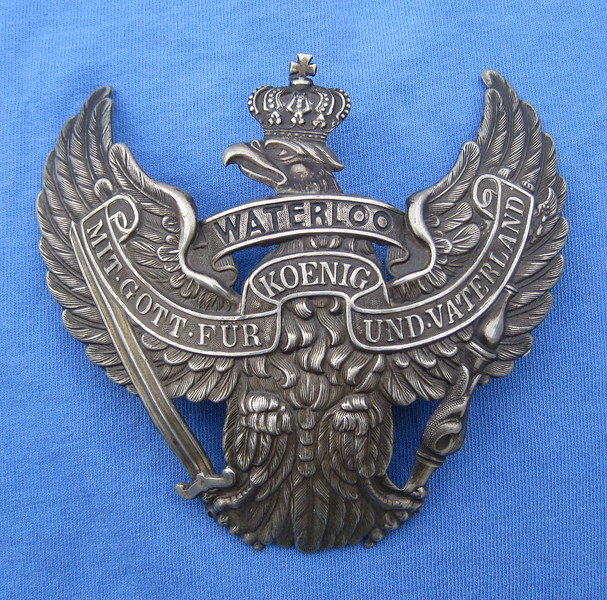
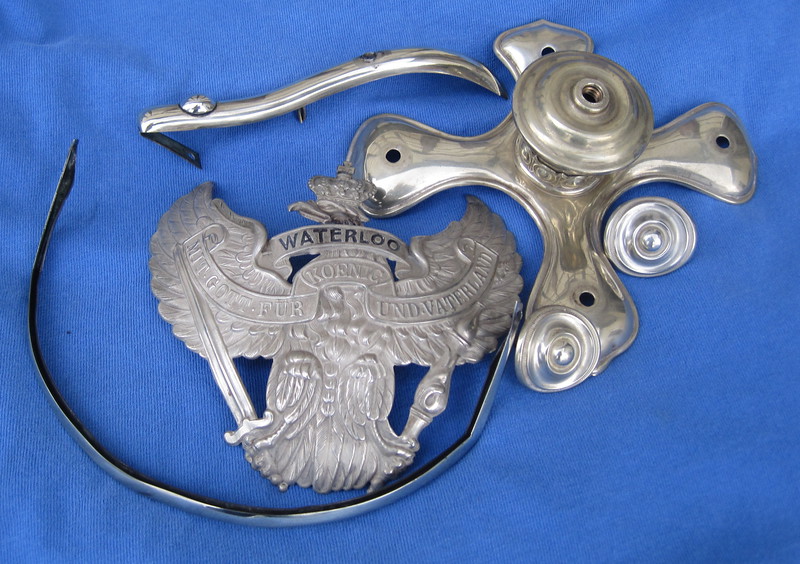
The wappen before cleaning today.

IMG_5960-L.jpg

After cleaning, all that 100+ years of black grunge disappeared! To be continued.....
 
Looking forward to seeing how you repair that tear in the leather at the visor brad junction. I have a tschapka with the same issue I would like to repair.
 
Another nice job! Love the Wappen!!

27th August 1907: King Albert I of Belgium became Regimentschef to this Regiment!

This is his helmet: Kokarden and Wappen are covered with a thin black fabric (silk?) mourning veil. (picture taken in the Brussels Army Museum 2014)

Francis

http://pickelhaubes.com/bb/viewtopic.php?f=45&t=11054&p=77806&hilit=Veil#p77806" onclick="window.open(this.href);return false;
 
Thanks for the link and information Francis. Here are some before and after pics of the fittings which have now been cleaned.
IMG_5949-L.jpg

Things to note here....screw post spike base brads which usually indicates an older helmet plus another Dragoner characteristic.....the post for the arm that goes over the spine is longer than the rest. This brad is on the upper right top in the picture.

IMG_5970-L.jpg

The fittings cleaned up very well. The spike base bolts trim brads are not shown but they cleaned up just as nicely. The chin scales have not been done yet.

IMG_5966-L.jpg

The brass convex scales which are part of this Regiment's hauben. The brass will show up better once they are cleaned.

IMG_5969-L.jpg

Here is a shot of the underside of the special Dragoner rear spine. I doubt few collectors have ever seen this....one of the advantages of being forced to take these helmets apart for restoration. This picture shows that the bottom domed brad prongs are simply soldered on. Next, soldered prongs which do go through the shell and last, a hole where the top brad fits and it also goes through the shell to secure the spine.
 
I had to take out the cloth liner on this piece as it was partially loose but more importantly, I could not get at the areas which need restoration with it in the way. You have to realise that restoration "beats up" a helmet and places stress on the old materials. This can't be helped as hands and fingers have to go into the shell and fittings have to be removed. For example, on this piece there are a few substantial tears to the sweatband, these have to be patched from the inside so that the tear does not get longer. This has to be done before dealing with the split in the side of the shell. However, back to the liner...In removing it, I discovered, that one side of the silk had been glued to the sweatband! :x Fortunately, the glue was not modern and with a bit of persuasion, I got the cloth removed. Some pictures as usual:
IMG_5979-L.jpg

With the trim removed you can really see the damage to the shell. Part of the problem here was caused by manufacture...the stitching is so fine and there were so many stitch holes, that it weakened the shell in the process.

IMG_5980-L.jpg

A shot of the area that was glued on. In the first picture, you can also see the tears in the sweatband that must be stabilized before we go any further.

IMG_5981-L.jpg

Fortunately, I was able to remove the entire liner without destroying it. Some areas of it had also been crudely restitched.
 
Oh dear, oh dear! It's a good thing I don't have to do something like that! With me, the sequence of the pictures would be the other way around: "before" would probably look better than "after" :D!

Brian, hat off to you, and lots of success with the present project!
 
Brian ;
That D R 16 eagle looked to me just like
it was made of steel until you cleaned it up .
Great job .
I love the front plates with battle honors .

Also note that Leopold II of Belgium was
Chef of Dragoon Regt. 14
I have his pair of shoulder straps
as General d. Cavalry to D R 14 .
Black velvet underlay .

Steve
 
Indeed great patina!!
Thank you Steve for this info on King Leopold II.
Would you mind to post some pics of these shoulder boards?
Thank you!
Francis
 
The step by step explanation of the restoration process continues :)
IMG_5985-L.jpg

The convex chin scales cleaned up nicely.

IMG_5988-L.jpg

In preparation for the patches which are going to be applied along the broken stitch line, the edges of the split are glued together using contact cement.

IMG_5991-L.jpg

Next a dremel tool and small sanding drum are used to clear the finish from around the stitch line. As can be seen, I took it right down to the leather in order to have a great bond between the shell and patches.

IMG_5993-L.jpg

The thin leather patches have been glued to the broken part of the stitch line.

IMG_5997-L.jpg

This is approximately what the end result will look... my thumb is holding the side piece in place. The edge of the patch will be coloured in with a black marker so it blends in. The crack at the visor trim brad hole will be filled in. A small patch was also glued in around the brad hole on the inside to make sure the shell will not split when the brad is put back in.
IMG_6000-L.jpg

To be continued....
 
A heroic endeavour! I wish I was as good and as brave as you, Brian... then I wouldn't have to make improvisations like "glue rivets" as described in my thread about the recently acquired Wappen for the old Prussian lady! :D
 
Great job!
Back then: the sewing machine was more like a chainsaw...
Return it to the factory: money back!!
Francis
 
My thanks to everyone for their encouraging comments. The side reinforcement was glued back in place today. I had to clean out the last stitch holes where the rear visor is stitched and make certain that these were not filled in with glue. The crack seen in the picture will be filled in and I am going to stabilize that last rip in the sweatband. Next, the other side reinforcement will be stitched back on. The rear visor will be smoothed out before being re stitched to the shell. This is going to require a fine needle and thread.
IMG_6004-L.jpg
 
So I completed the restitch of the rear visor on this helmet today, I was rather nervous about this despite having done probably 100 of these so far. The stitching on this helmet is so fine....1/32 or 1 mm between holes. Fortunately, all went well and it was not the nightmare that I thought might happen.
IMG_6011-L.jpg

I like to stitch only in natural light on sunny days, because, you can turn the helmet so that the light falls directly on the stitch line. The above pic shows how you know that all the old thread has been cleaned out of the holes....light shines through them. Note also, the tack stitches along the shell rim which attaches the sweatband to the shell. In haube construction, they began with the shell perfectly formed and given a water proofing of shellac finish. Officer shells are stitched up the back as seen here. The side reinforcements for M91 posts or chin scale bosses are stitched on. Next the sweat band (officer helme) or the liner (OR"s) was stitched to the rim. Officer is tack stitched while OR is stitched right round the rim. Then, the visors are stitched onto the shell and all metal fittings are locked on the shell using split brads or screw posts which have been soldered onto the fittings. Wappen of course can be either applied with loops or screw posts. The majority of officer wappen have screw posts however, war time models can have soldered split brads. This also applies to officer stars...war time production can have split brads as well. As to the cloth part of the officer liner, I can not be certain as to when it was tack stitched but I would think that it was the last piece of the puzzle to be put on in order to avoid soiling it during production. The edge of the sweat band is scalloped and the small tack threads are always located between the scallops.

IMG_6027-L.jpg

The finished restitch. The lines in the finished caused by the rear spine are very helpful in checking to see whether the stitch holes in visor and shell are actually lined up.

IMG_6028-L.jpg

The thread used (100% cotton) was waxed with beeswax during stitching but an application of black shoe polish will be applied along the stitch line in order to seal it/protect it and to fill in any minute areas of missing shellac. One last word of advice.....wax the thread frequently as you stitch and change the position of your needle along the thread as you stitch. A great deal of stress is placed on the thread where it passes through the eye of the needle and it can break if you do not move your needle.
 
One last word of advice.....wax the thread frequently as you stitch and change the position of your needle along the thread as you stitch. A great deal of stress is placed on the thread where it passes through the eye of the needle and it can break if you do not move your needle.
Now you tell me. I recently restitched the visors on an enlisted M'15 helmet (inspired by your work), took about 6 months. Only took me two months to figure out about the wax and moving the needle.
Keep the write up coming, your work is wonderful and inspirational.
 
Back
Top