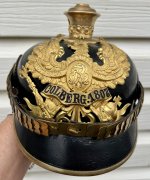
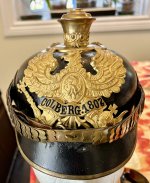
I posted photos of the unique wappen that comes with this helmet and those have generated some good discussion. Now lets take as look at the more mundane aspects.....restitching the front visor.
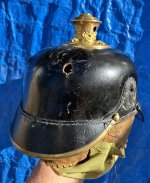
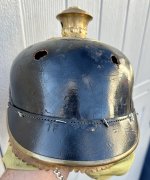
The helmet was shipped UPS and here we see it as it came out of it's wrappings and box. I have no need for the kugel so I asked Doug to remove it for shipment. The helmet lacquer is in excellent condition but does show signs of 100+ years of exposure. The scales are complete in every detail to include the thin leather chin strap and it's elastic retainer which are often missing. Although not visible in this photo, the thread holding the visor on has completely let go and is broken. This is a small size helmet and marked 54 up in to top of the shell....54 cm.
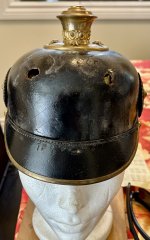
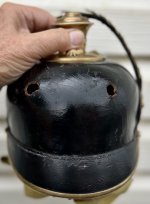
Wappen removed showing a couple of large holes in the shell and the typical scale marks in the lacquer. I have not removed the scales yet.
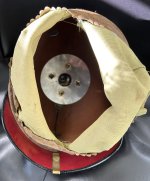
A interior shot showing the aluminium support disc and liner. The liner is actually "lime green" in colour but appears beige because of the lighting conditions. Pulling the liner up out of the shell is nerve wracking but must be done to access the stitch lines. You also DO NOT want to have to do this many times because the thread holding the silk to the sweatband is ALWAYS in a very delicate condition.
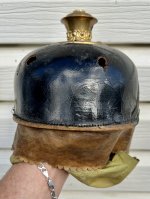
Visor removed and the next step is to clean out the shell stitch holes.
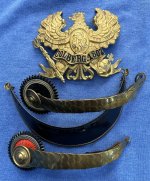
The fittings. Usually I would remove the visor trim but this one is on tight and I do not want to mess with it. The brass trim covers up 2 stitch holes on each end preventing access so I can not start stitching from the absolute end of the visor. However, the trim brads and new thread are going to secure the visor tight to the shell so no worries!
The visor is carefully pinned back on to the shell, all holes matching up. Great care MUST be taken to ensure that these holes line up! The distance between holes on this helmet were "average" for a custom order helmet. However, you can encounter very fine stitching where using this example, there would be an extra hole between each of the ones shown here! The visor here is made of some sort of stiff cardboard material. To be contd.

The helmet was shipped UPS and here we see it as it came out of it's wrappings and box. I have no need for the kugel so I asked Doug to remove it for shipment. The helmet lacquer is in excellent condition but does show signs of 100+ years of exposure. The scales are complete in every detail to include the thin leather chin strap and it's elastic retainer which are often missing. Although not visible in this photo, the thread holding the visor on has completely let go and is broken. This is a small size helmet and marked 54 up in to top of the shell....54 cm.

Wappen removed showing a couple of large holes in the shell and the typical scale marks in the lacquer. I have not removed the scales yet.

A interior shot showing the aluminium support disc and liner. The liner is actually "lime green" in colour but appears beige because of the lighting conditions. Pulling the liner up out of the shell is nerve wracking

Visor removed and the next step is to clean out the shell stitch holes.

The fittings. Usually I would remove the visor trim but this one is on tight and I do not want to mess with it. The brass trim covers up 2 stitch holes on each end preventing access so I can not start stitching from the absolute end of the visor. However, the trim brads and new thread are going to secure the visor tight to the shell so no worries!

The visor is carefully pinned back on to the shell, all holes matching up. Great care MUST be taken to ensure that these holes line up! The distance between holes on this helmet were "average" for a custom order helmet. However, you can encounter very fine stitching where using this example, there would be an extra hole between each of the ones shown here!
Last edited:

