
pickelhauben
Well-known member
Hey Guys,
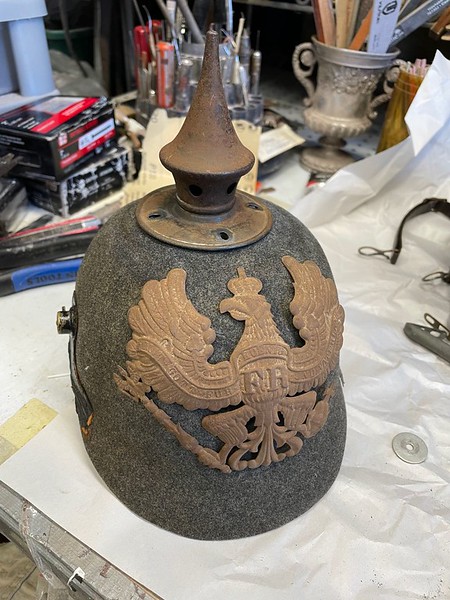
I am working on a couple of felts now and one helmet's parts were rusty.
So here is a quick and easy way of painting the parts so as not to make then look monochromatic.
To those who might be interested..
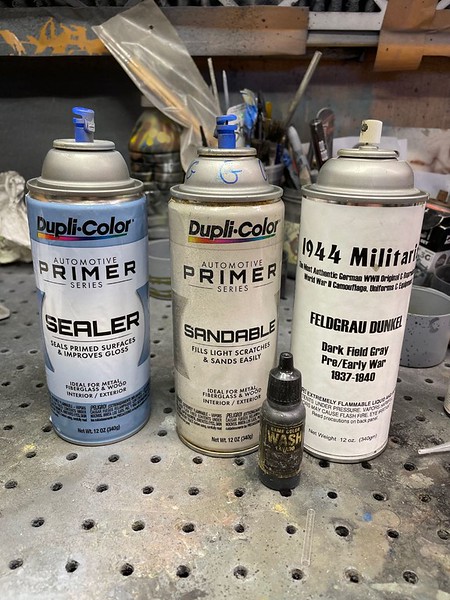
Paints used :
Light gray
Dark gray
Field green
I got the first 2 paints from my local O Reillys auto store.
The 1944 militaria paint I got on line.
It is German WW2 field paint but it works. for this project.
Black wash, I got the wash from my local hobby shop
 .
.
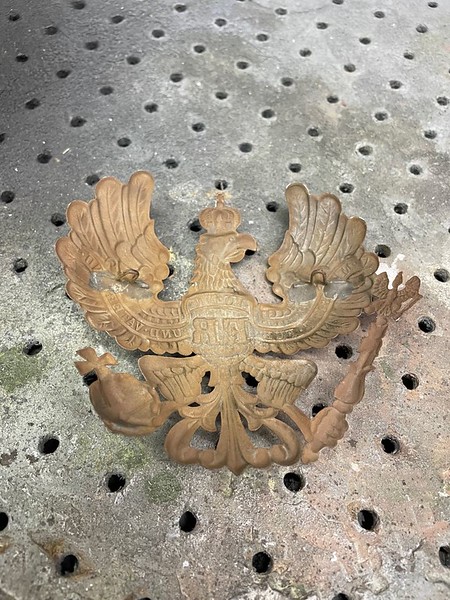
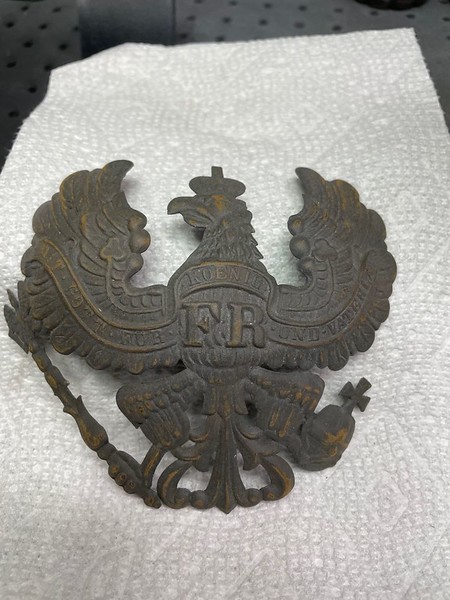
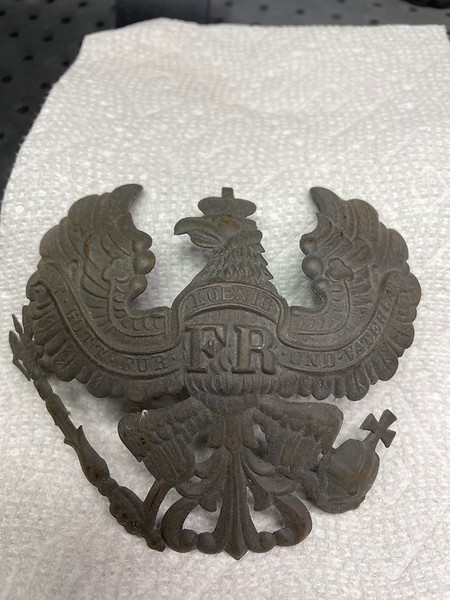
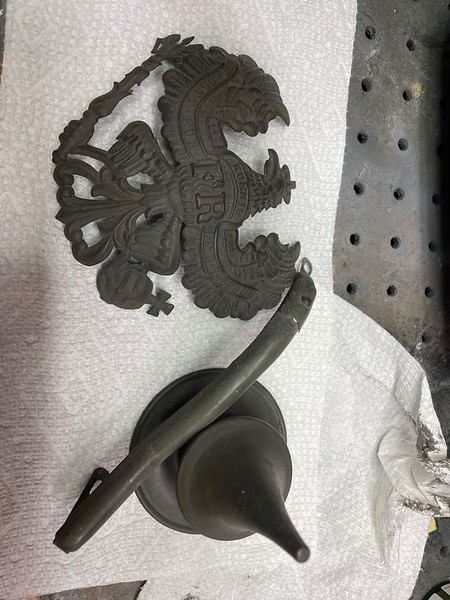
Here are the original parts before treatment

Holding the paint can 6-8 inches away, Spray with the light gray and using paper towels immediately wipe off with med pressure
Start spraying off of object spraying past the object.
The idea is to go thin with the paint .
On the wappen I made a pass on the top half one way and came back covering the bottom.
Then as quick as you can wipe and dab the paint off.
This is a layering process.
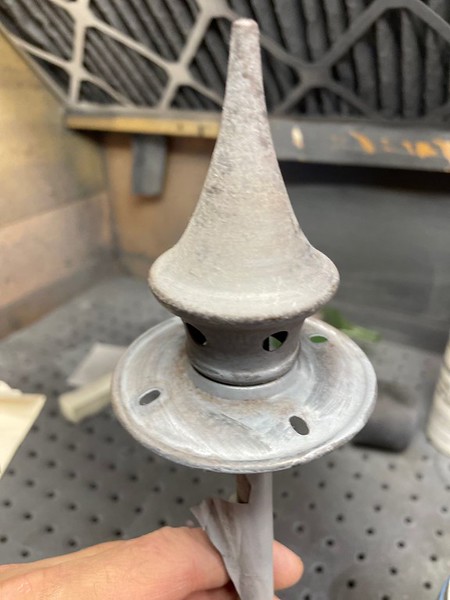
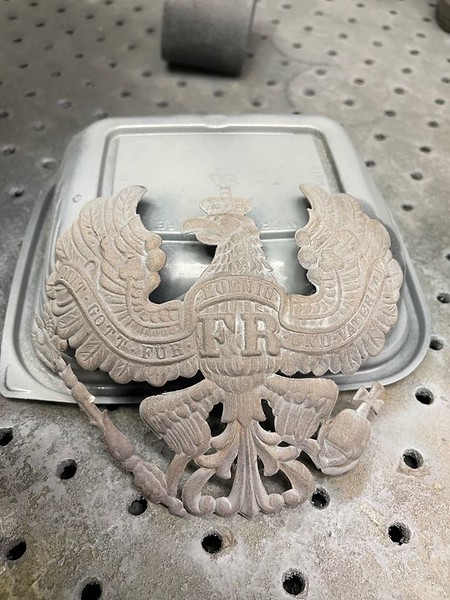
Then use the dark gray the same method.
 [url=https://matthewhiggins.smugmug.com/Pickelhaubes/i-Lg77RMq/A]
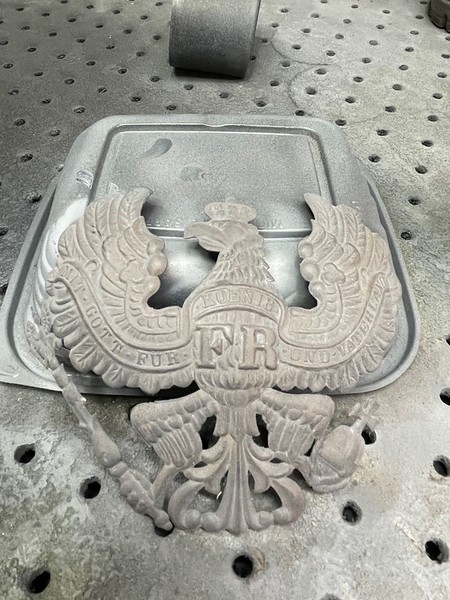 [/URL]
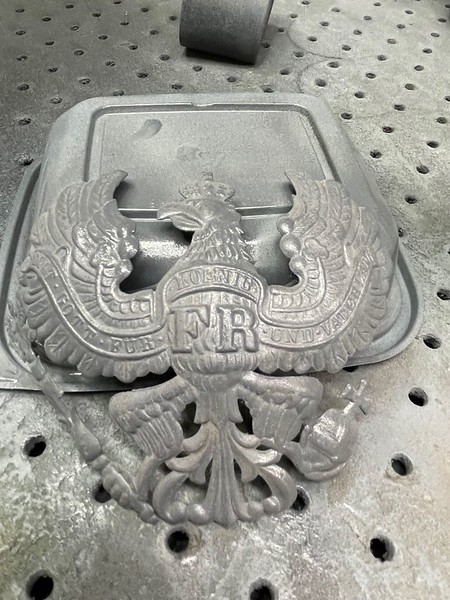
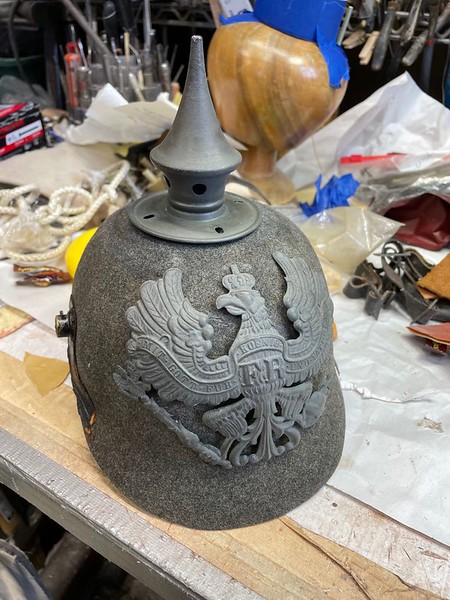
Then holding the green paint about 12 inches away lightly mist then dab with paper towel.
Then I hit the high lights with 600 grit sand paper then I hit it again lightly with the green.
Finally I dry brushed the highlights with the black wash..
The wash I used comes in a small squeeze bottle . I used several drops in a water bottle lid.
I dipped my brush in the wash and wiped almost all of it on a paper towel and just hit the highlights
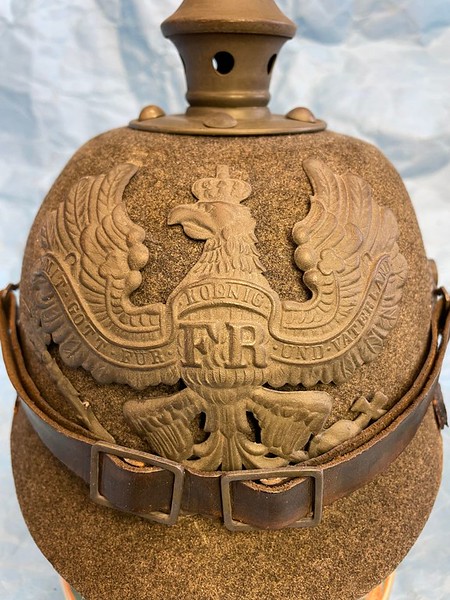
Using this method matched the original rear spine perfectly !
I am working on a couple of felts now and one helmet's parts were rusty.
So here is a quick and easy way of painting the parts so as not to make then look monochromatic.
To those who might be interested..
Paints used :
Light gray
Dark gray
Field green
I got the first 2 paints from my local O Reillys auto store.
The 1944 militaria paint I got on line.
It is German WW2 field paint but it works. for this project.
Black wash, I got the wash from my local hobby shop
.Here are the original parts before treatment
Holding the paint can 6-8 inches away, Spray with the light gray and using paper towels immediately wipe off with med pressure
Start spraying off of object spraying past the object.
The idea is to go thin with the paint .
On the wappen I made a pass on the top half one way and came back covering the bottom.
Then as quick as you can wipe and dab the paint off.
This is a layering process.
Then use the dark gray the same method.
[url=https://matthewhiggins.smugmug.com/Pickelhaubes/i-Lg77RMq/A][/URL]Then holding the green paint about 12 inches away lightly mist then dab with paper towel.
Then I hit the high lights with 600 grit sand paper then I hit it again lightly with the green.
Finally I dry brushed the highlights with the black wash..
The wash I used comes in a small squeeze bottle . I used several drops in a water bottle lid.
I dipped my brush in the wash and wiped almost all of it on a paper towel and just hit the highlights
Using this method matched the original rear spine perfectly !
Last edited:

")