It is rare in my experience, to find a clearly hand printed name of a soldier/owner in a pickelhaube of any kind. Sometimes we have a cloth laundry tag glued into a shell. On other occaisions, some officer may scrawl his name up in the shell in the old German script which can be very hard to read. Anton's name is clear and his helmet is also regt marked. This piece is in excellent condition with the only problem being both visors need restitching. The pictures:
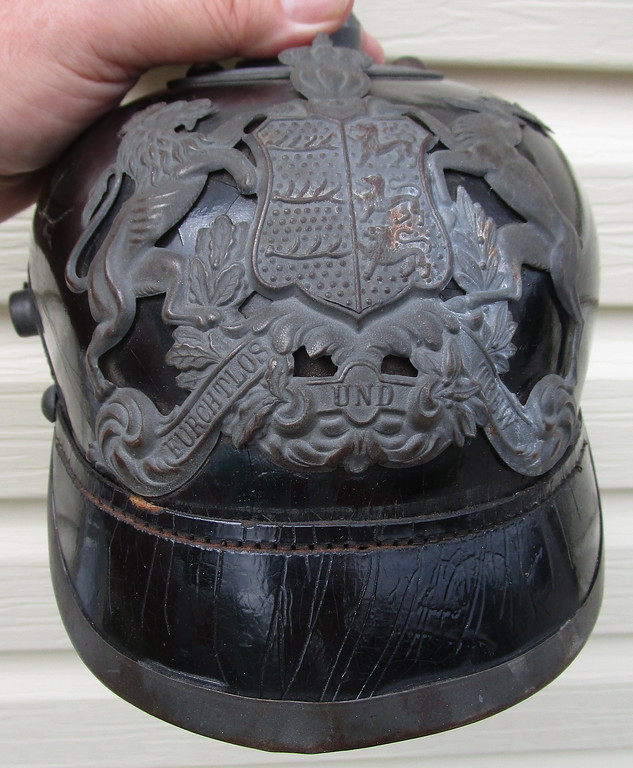
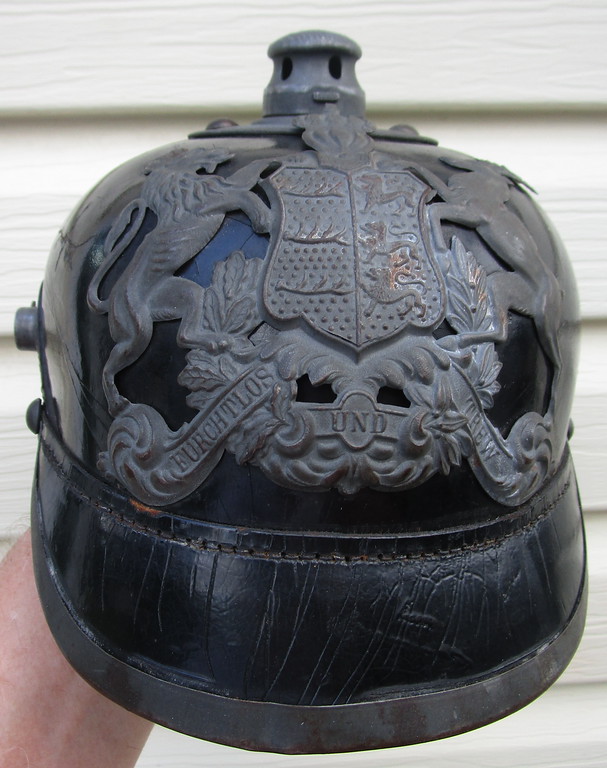
Most of the cotton thread has rotted away. The wappen is tight to the shell, factory original!
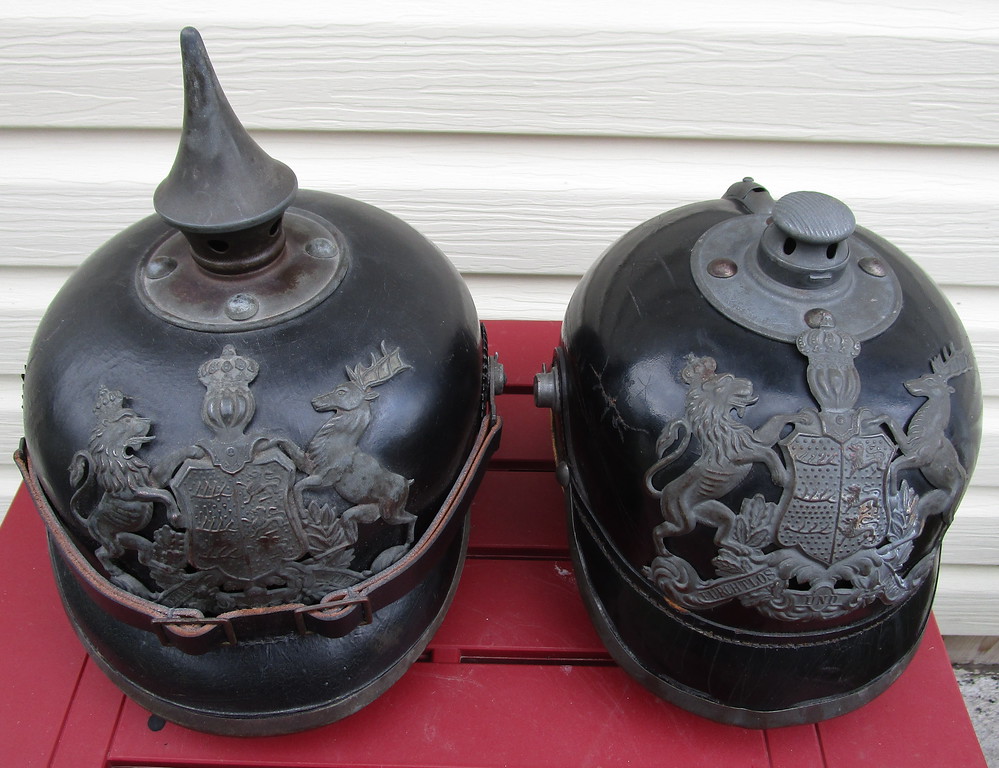
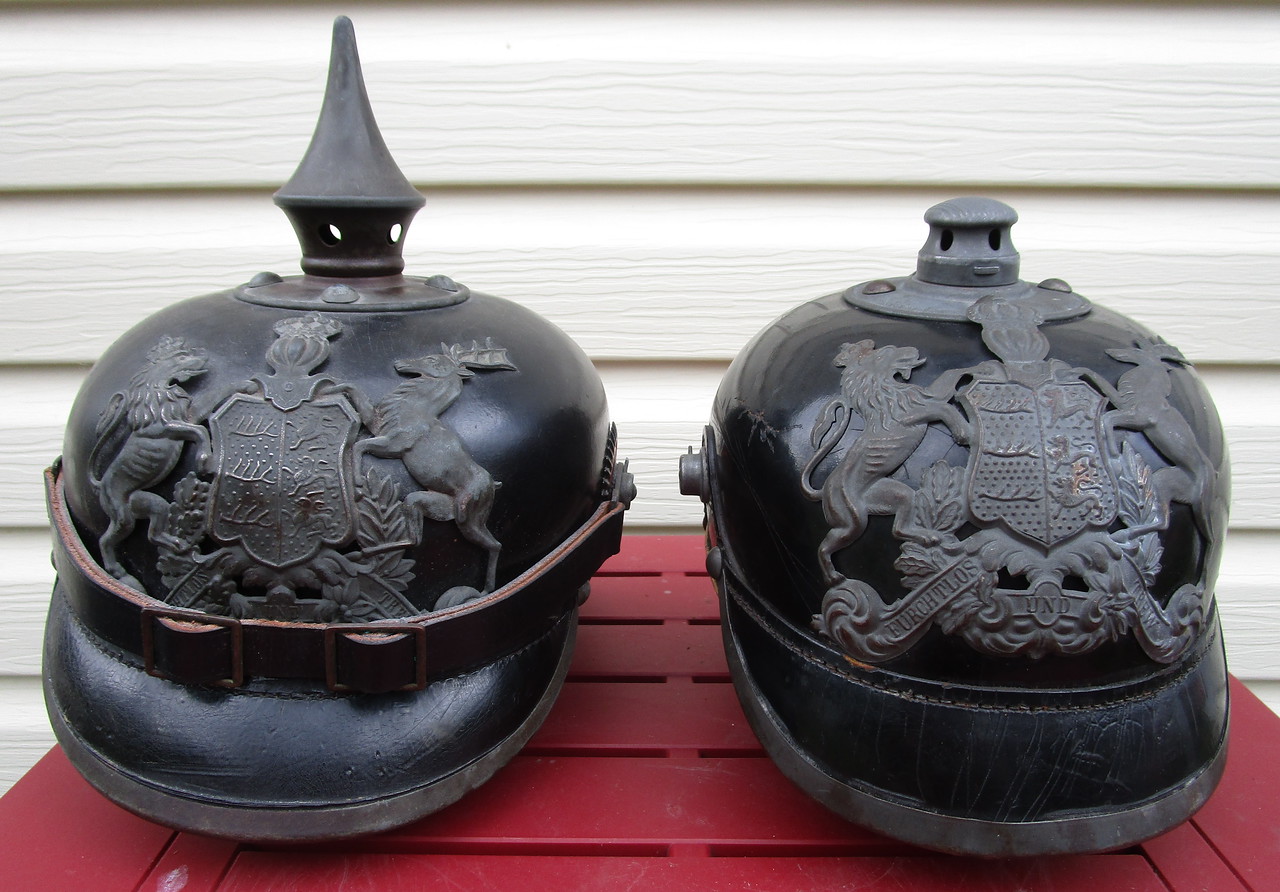
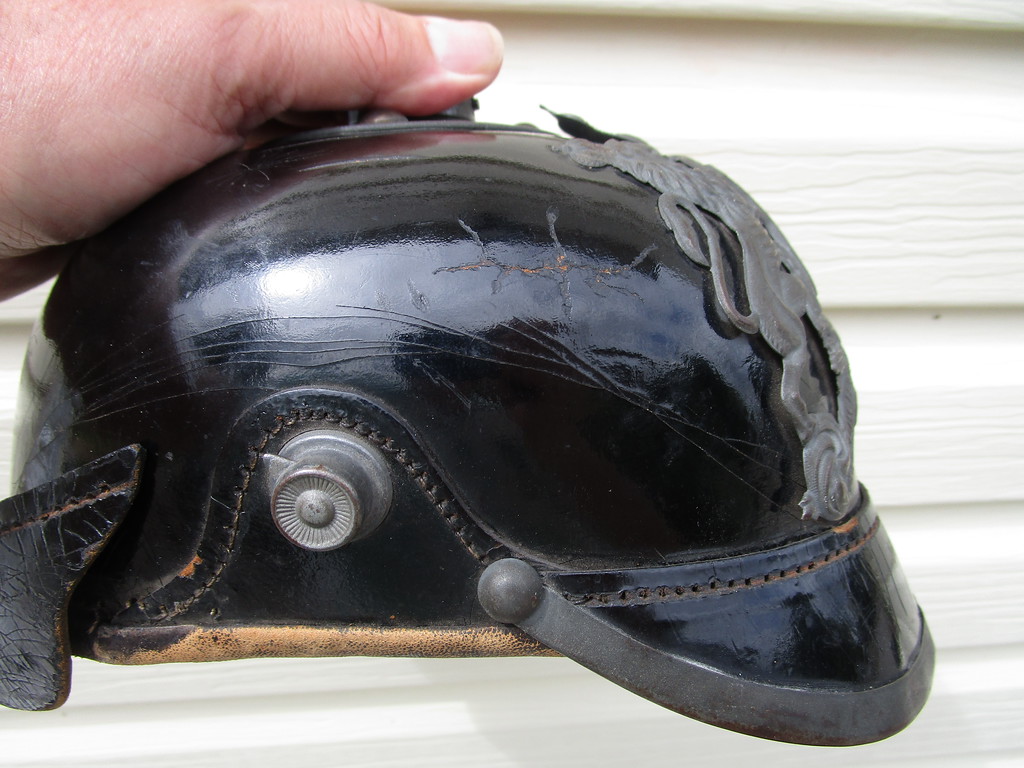
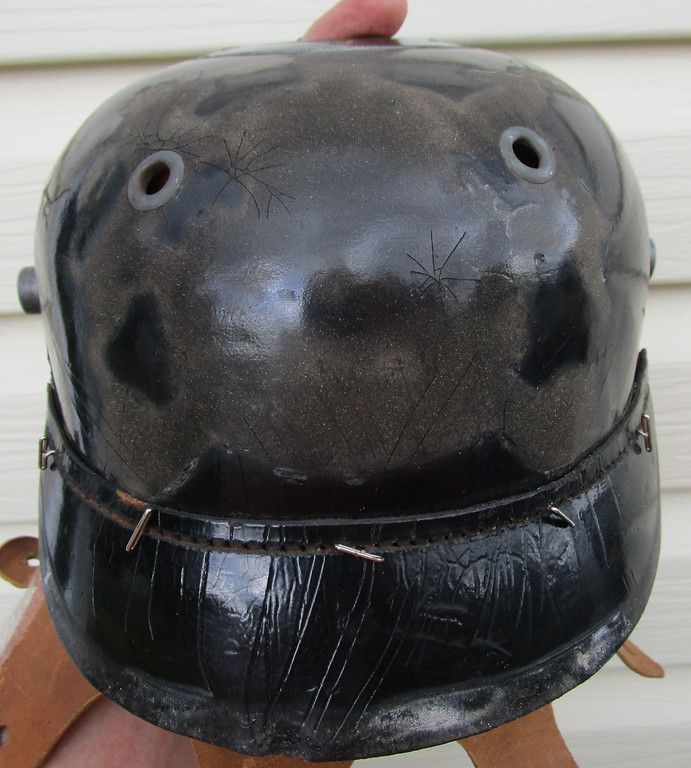
As can be seen, the finish on the shell is remarkable for an issued helmet.
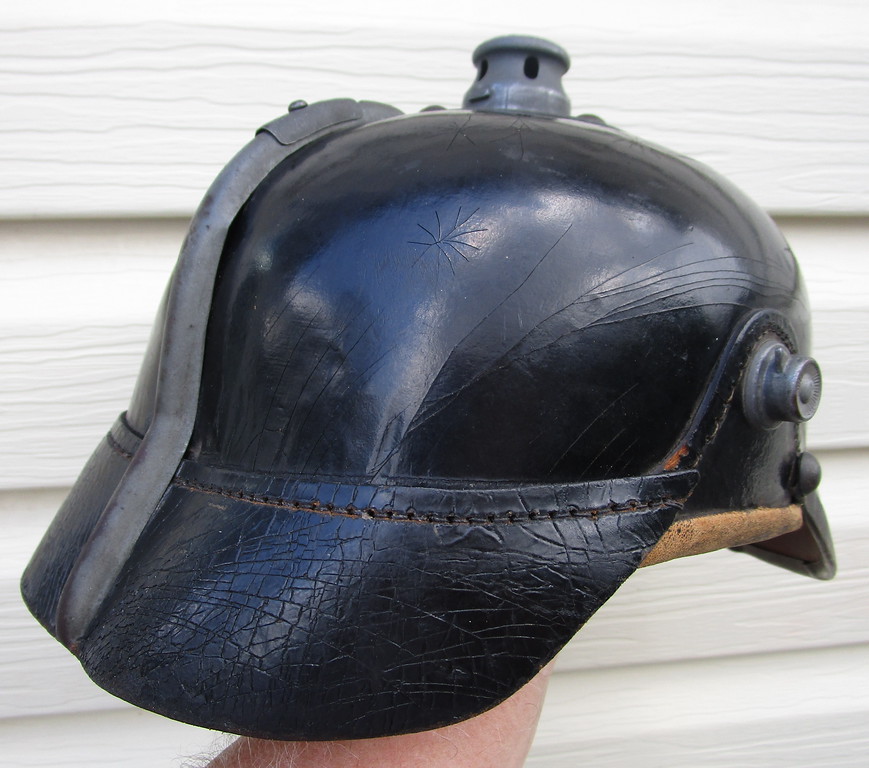
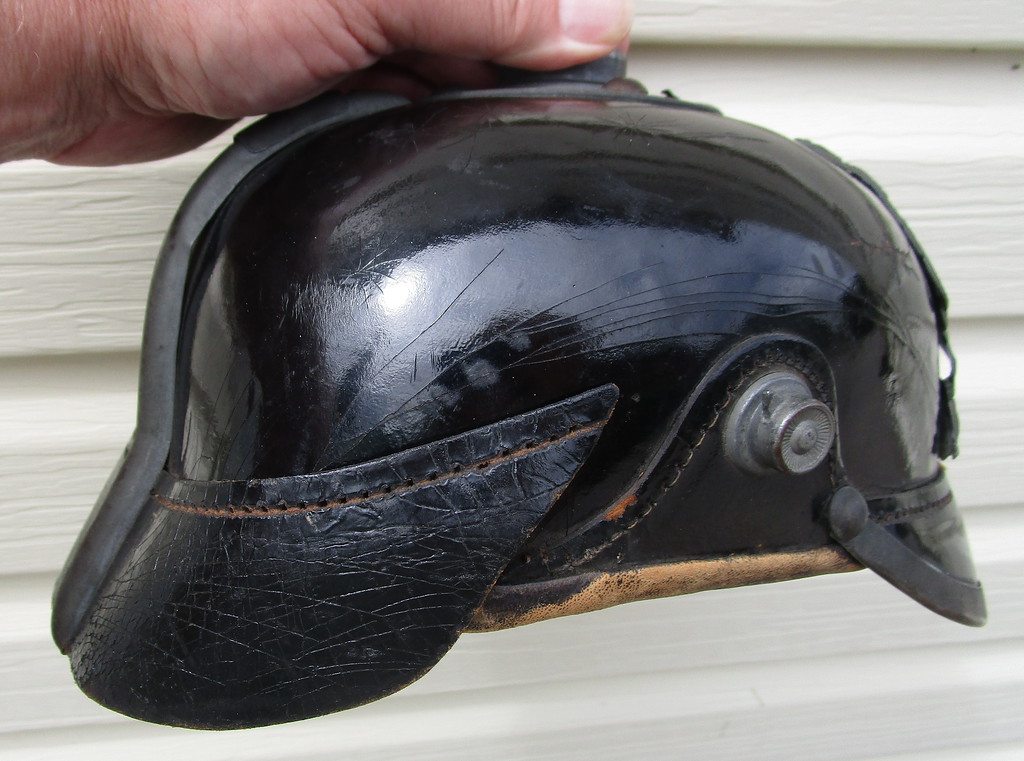
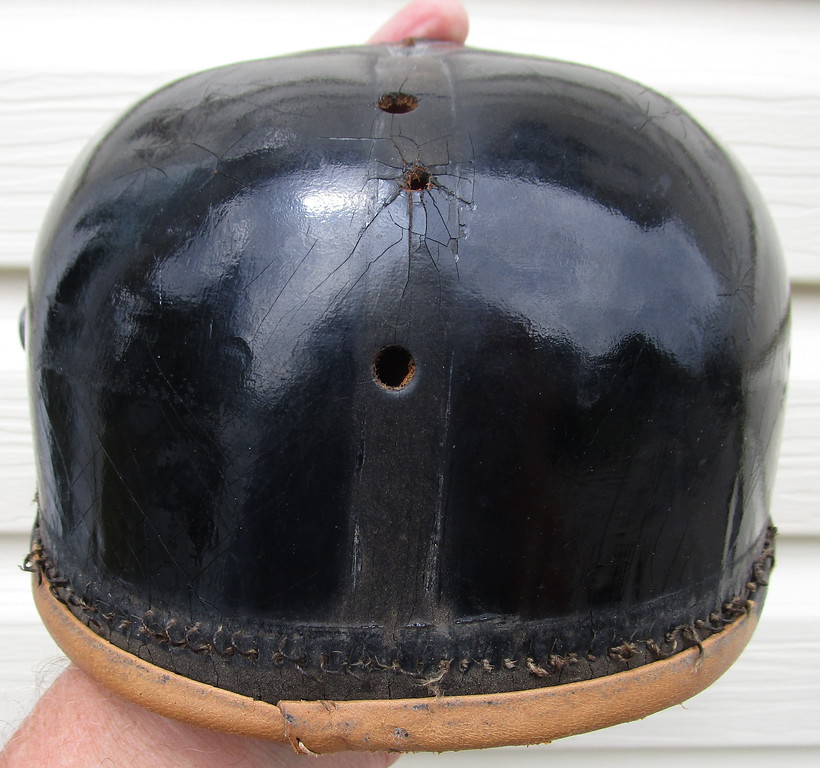
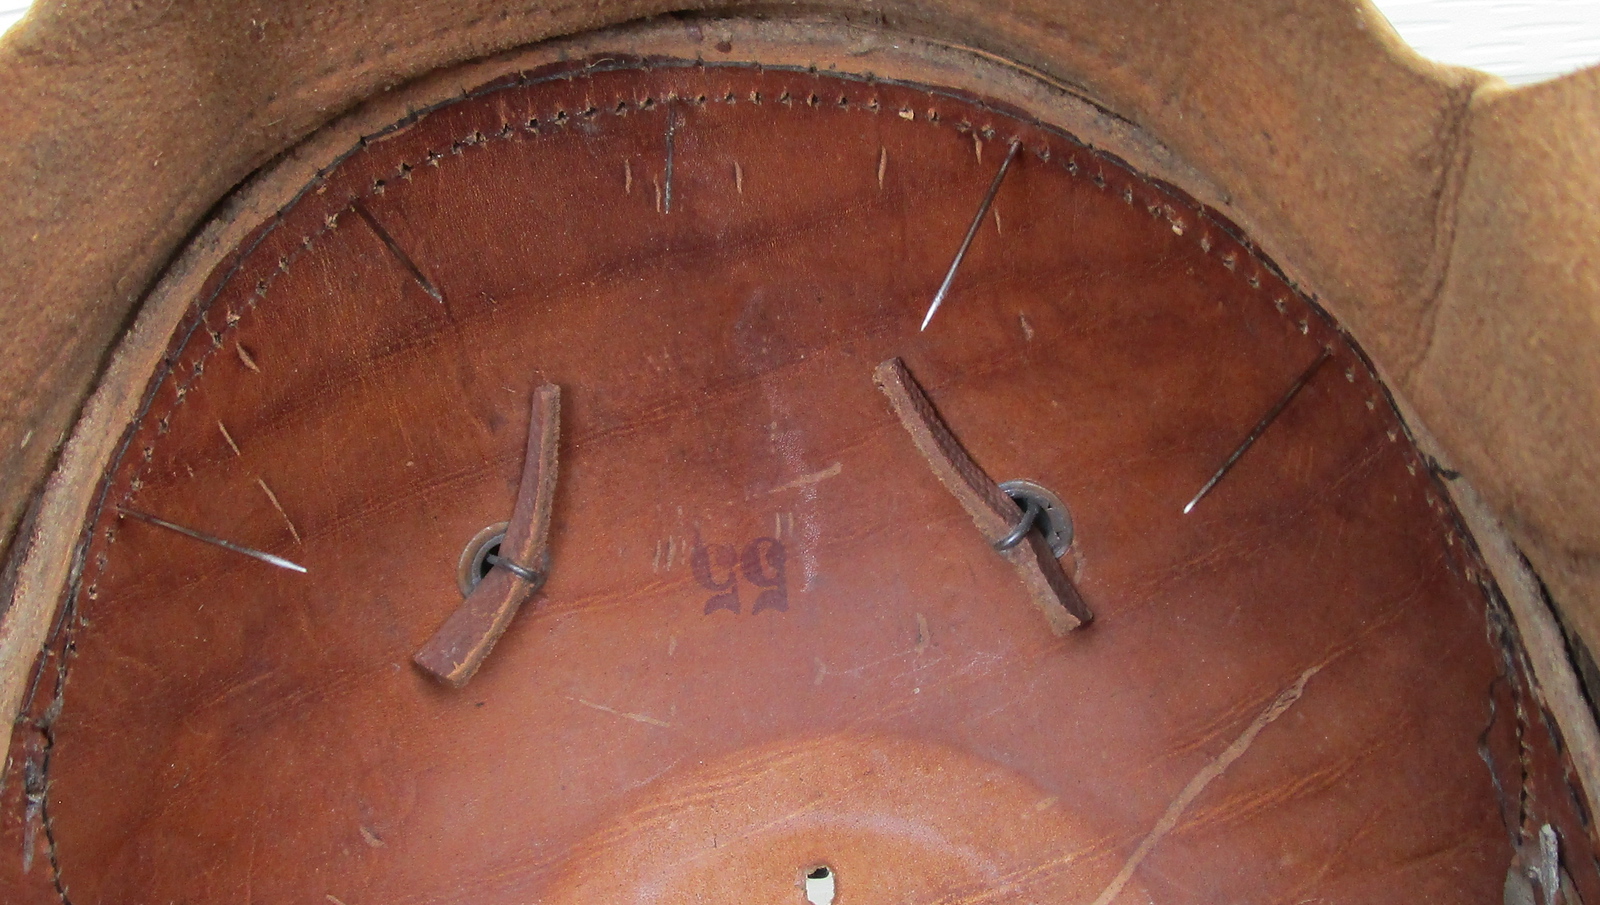
Even the liner is in excellent shape! :thumb up: I would rate the condition of this helmet as one below the "Bond Prize" category where the piece was never issued or used. This photo also shows us the typical shrink effect which causes the visor trim to pucker/bend. In this case, we have bends in 3 places. The shell is clearly inked stamped 55 (cm) but there has been some inward shrinkage. Maier printed his name on the front visor.
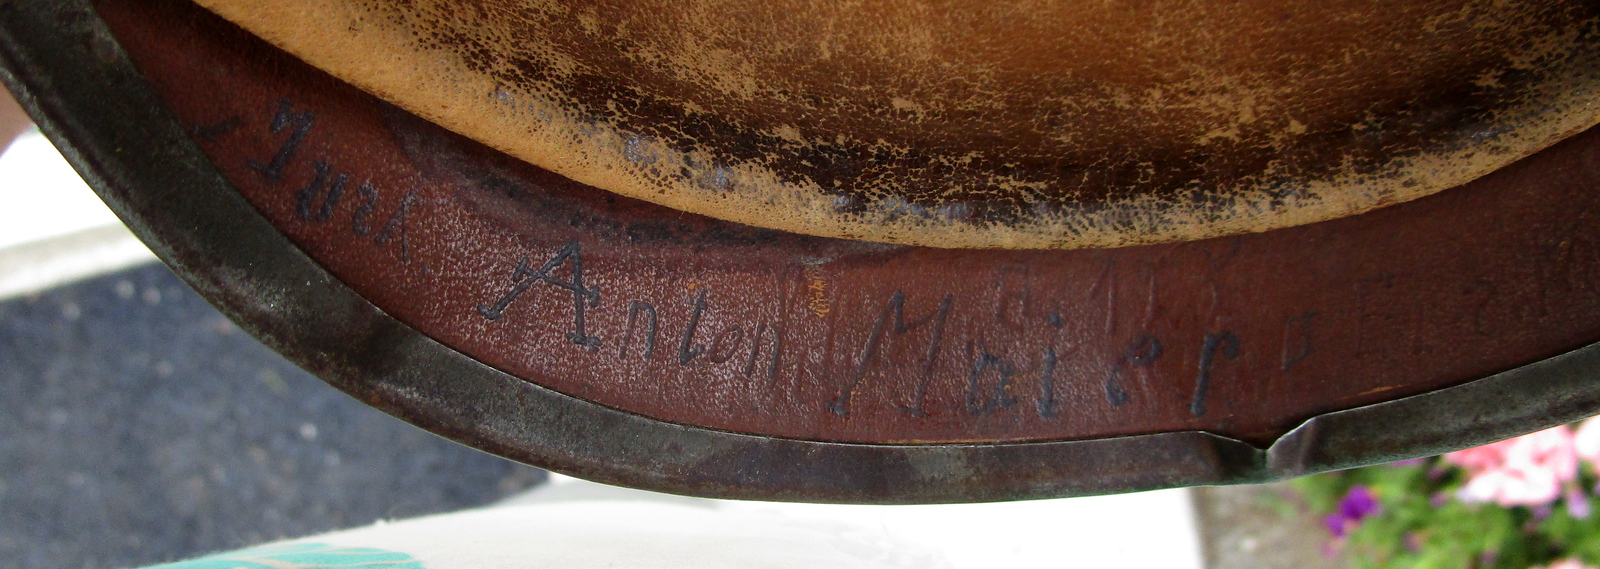
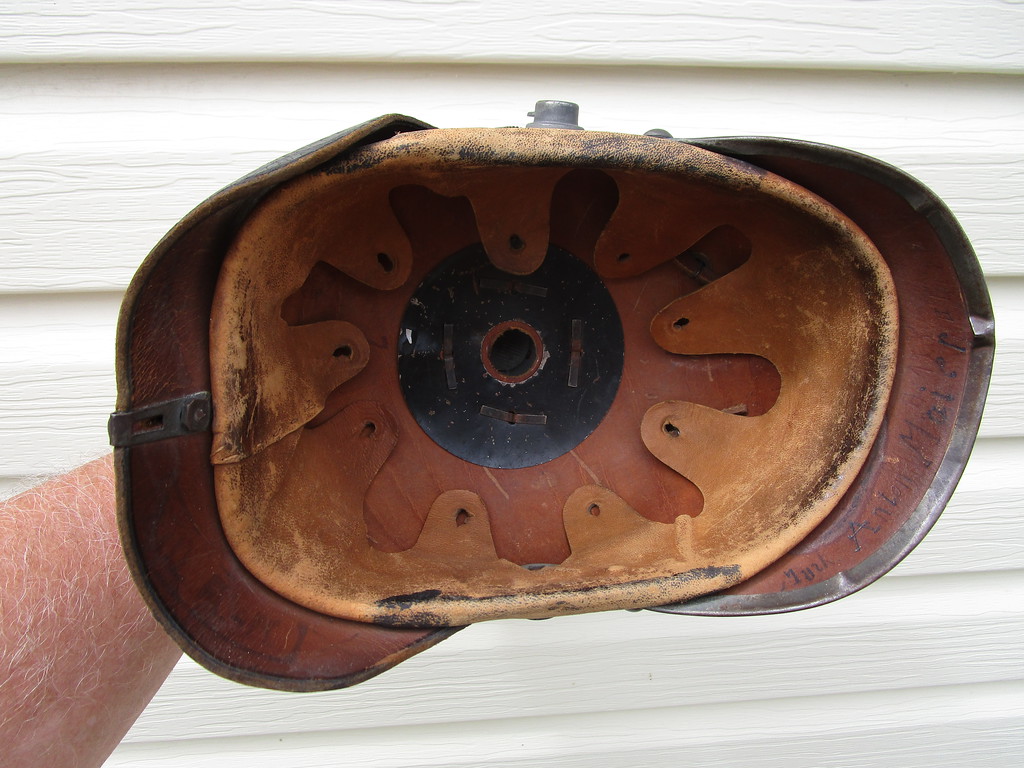
Imprinted in the leather above the name is R125 F.I 2 Komp. As we shall see, the rear visor is ink stamped 125 R and XII BA which are correct.
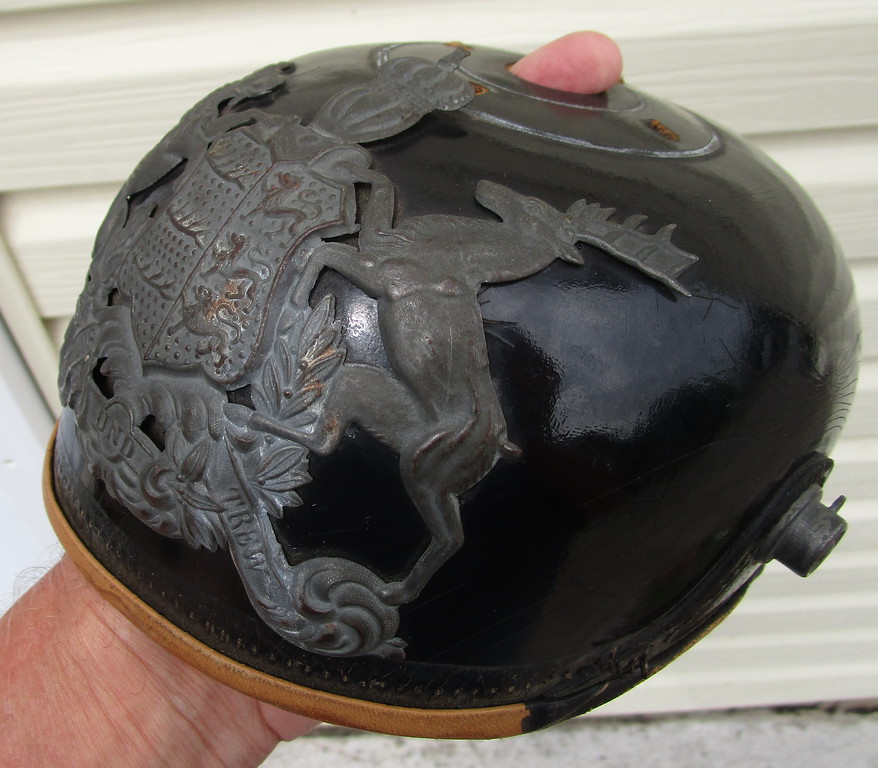
This helme has never been messed with until now. The thin stamped wappen has been soldered so that one loop is about 2 mm short of it's hole so that it has to snap into place tight to the shell! Note...the knights helme and crown are angled up to accommodate the spike base. Stitching the front visor, I had to remove the wappen as I kept snagging my hand and thread on this crown which is very delicate. . Obviously I have to remove the rear spine to stitch the back visor. Usually, I can just remove two of the spike brads, and get enough space to remove the spine...not in the case because no fittings had ever been removed on this piece....factory fresh!
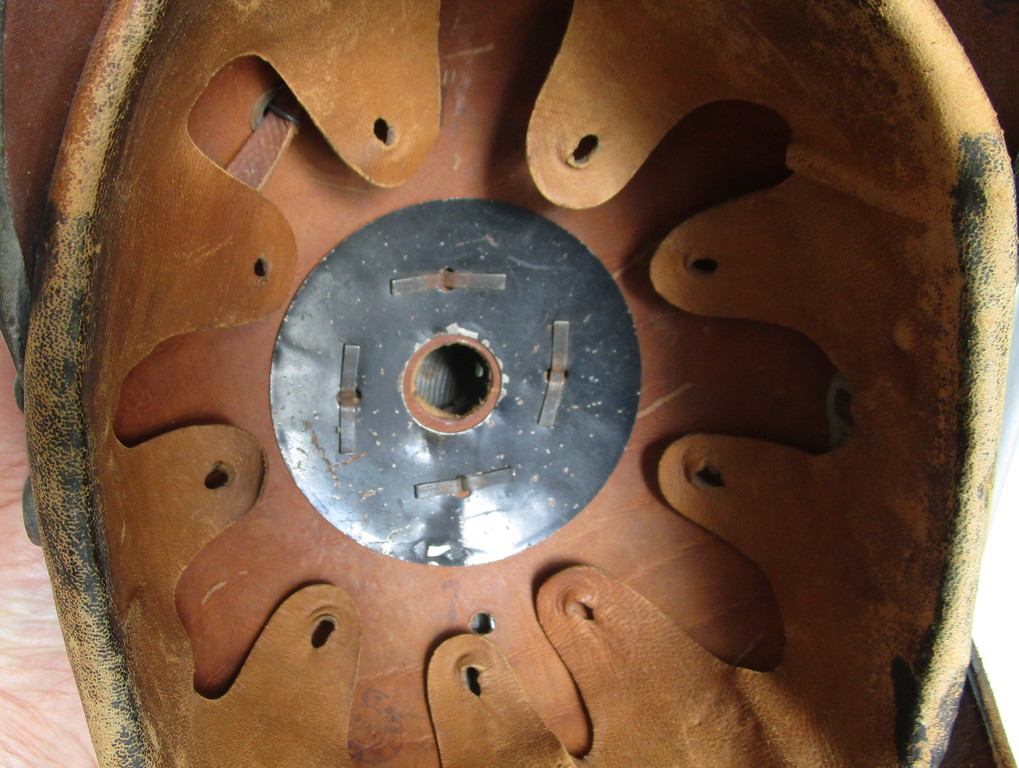
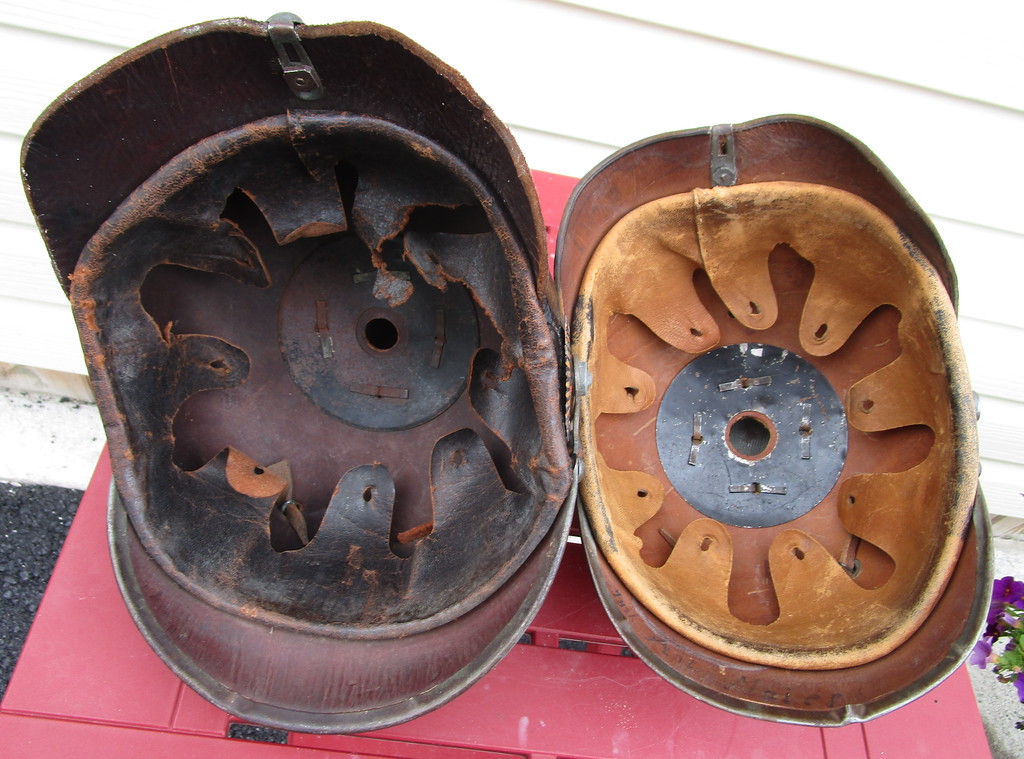
An interior shot showing again no fittings have been touched.
I have taken to using the spine lines on the shell to line up the visor for restitching. This I find is much easier than starting at the end of the visor and counting across to pin it. Find the middle hole between those lines, line up the corresponding hole in the visor and pin them together. Next count 12 holes left, insert pin...12 right, pin and so on until you reach the end tip of the visor. If you do this, then hold the helmet up to the light you will see light coming through the holes as they have been cleaned out and are now matched up! :thumb up: On a front visor, I look for one stitch hole in the middle which is slightly out of line with the rest, something different, even a mark on the shell. This is where my first pin will go . Once pinned check to see the visor holes on the tips and the shell match perfectly. The helmet was finished today, more pics tomorrow.
Most of the cotton thread has rotted away. The wappen is tight to the shell, factory original!
As can be seen, the finish on the shell is remarkable for an issued helmet.
Even the liner is in excellent shape! :thumb up: I would rate the condition of this helmet as one below the "Bond Prize" category where the piece was never issued or used. This photo also shows us the typical shrink effect which causes the visor trim to pucker/bend. In this case, we have bends in 3 places. The shell is clearly inked stamped 55 (cm) but there has been some inward shrinkage. Maier printed his name on the front visor.
Imprinted in the leather above the name is R125 F.I 2 Komp. As we shall see, the rear visor is ink stamped 125 R and XII BA which are correct.
This helme has never been messed with until now. The thin stamped wappen has been soldered so that one loop is about 2 mm short of it's hole so that it has to snap into place tight to the shell! Note...the knights helme and crown are angled up to accommodate the spike base. Stitching the front visor, I had to remove the wappen as I kept snagging my hand and thread on this crown which is very delicate.
. Obviously I have to remove the rear spine to stitch the back visor. Usually, I can just remove two of the spike brads, and get enough space to remove the spine...not in the case because no fittings had ever been removed on this piece....factory fresh!
An interior shot showing again no fittings have been touched.
I have taken to using the spine lines on the shell to line up the visor for restitching. This I find is much easier than starting at the end of the visor and counting across to pin it. Find the middle hole between those lines, line up the corresponding hole in the visor and pin them together. Next count 12 holes left, insert pin...12 right, pin and so on until you reach the end tip of the visor. If you do this, then hold the helmet up to the light you will see light coming through the holes as they have been cleaned out and are now matched up! :thumb up: On a front visor, I look for one stitch hole in the middle which is slightly out of line with the rest, something different, even a mark on the shell. This is where my first pin will go . Once pinned check to see the visor holes on the tips and the shell match perfectly. The helmet was finished today, more pics tomorrow.

")