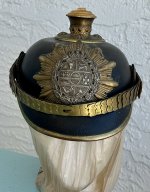
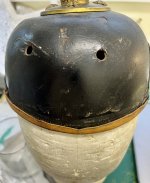
Mecklenburg Officer JR 90

b.loree

Administrator
Staff member
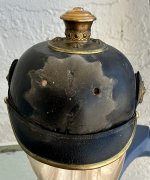
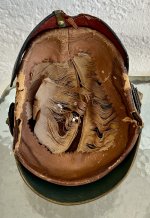
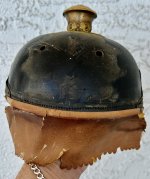
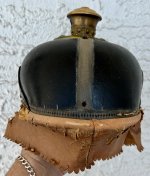
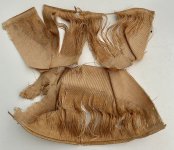
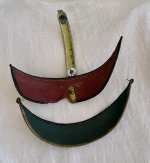
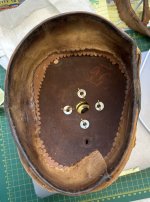
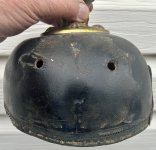
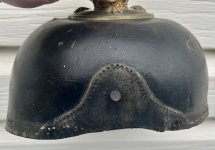
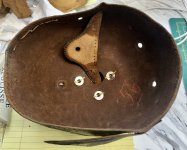
This helmet arrived for restoration today. The main problems here are that the stitching in both visors has rotted out and restitching these is what I am being asked to do. Unfortunately, the interior silk is rough and tattered. The sweat band is also torn, dry and in a very delicate condition. Restitching requires a lot of "handling" of the helmet shell so I am going to have to be very careful with this piece. 🤞
IMG_3342.jpeg
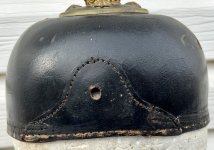
IMG_3350.jpegIMG_3349.jpegThe interior has seen better days! :( The silk in fact has no stitching left holding it to the sweatband. In addition, I think Mickey Mouse has had a go at the rear visor.
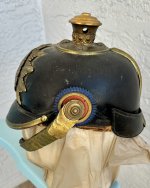
IMG_3348.jpeg
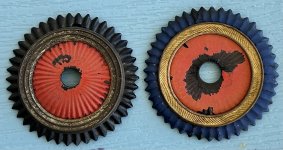
The colour combination on the kokarde tells us that this helmet is from Fusilier-Regt. No. 90 founded 1788 stationed... Rostock, II Wismar IX AK (Laine pg. 60). There is still lots of very nice gilding left on all the fittings as well. 👍
More to come.
 
Last edited:
Amy, that decision has to be made by the owner of the helmet. I just do what the customer wants but I might have original replacements back home. Any move to instal these has to be done before putting the visors back on.
 
Last edited:
My apologies Philippe, I rechecked Laine and I read his description incorrectly. The helmet could very well be from JR 89. My customer has now decided to restore this helmet with original silk and sweatband replacements. :) 👍 In my opinion this is a very good decision. Steve, it is much easier when you are restitching the original visors back on! So the helmet will be going back home with me for further work.
I took the helmet apart yesterday, some photos:
IMG_3373.jpeg
Front visor removed, the sweatband is very dry and delicate. So delicate that I could not stitch in a replacement silk if that were the plan.
IMG_3367.jpeg
The visor restitch on this piece should be fairly easy, as the stitch holes are not as closely spaced as some that I have dealt with. We can also see the remains of an attempted repair.
IMG_3375.jpeg
The silk has some obvious problems. It seems that the officer used some sort of hair cream which has stained and damaged the cloth.
IMG_3378.jpeg
All old rotten thread has been removed.
IMG_3356.jpeg
 
Brian:

Regarding your comment about the re-stitching being easier when the visor being replaced is from the same helmet. No kidding!!

I just finished stitching on the replacement visor you provided, and the holes did not align. The new visor holes were about 3/32" on centre and the helmet holes were about 1/8". A bit frustrating and I had to skip a hole here and there, but the helmet now has a rear visor and it looks great!!
 
Well done Steve 👍I did tell you that it would be a tough job especially on an officer helmet! Can you post some before and after photos? Yes, very frustrating!
 
Well done Steve 👍I did tell you that it would be a tough job especially on an officer helmet! Can you post some before and after photos? Yes, very frustrating!
I'll do that tomorrow.

I'm putting the cruciform base back in place as well as the Kokarden and the chin scales. So now the only item missing is the rear spine which we'll deal with in the New Year when we're both back home.

I also re-lacquered the two areas of the shell that had flaked off exposing the raw leather. It has the makings of a good looking helmet.
 
Got home today after a 14 day vacation, time to get to work! The first step is to remove the remains of the sweatband. However, we need to know that the original replacement is going to fit:
IMG_3679.jpeg
The size of the helmet is 56 cm. and obviously the "donor" band is larger but this is a good thing as it gives us room to custom fit it to the Meck shell. The lack of an internal spike support disc and split prongs for the stars suggests "wartime" production in my experience.
IMG_3800.jpeg
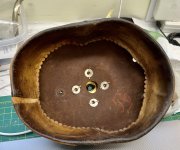
The old dried out Swb. has been cut off and the rim of the shell sanded to get rid of any remains of old leather. Shown are the nice clean, punched holes for the Meck wappen! :) 👍
IMG_3803.jpeg
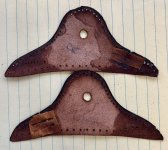
Unfortunately, the thread from both side re enforcement pieces has also rotted through, so these will have to be stitched before putting in the new Swb. Obviously, this is a surprise but at least these side pieces and the shell are solid.
IMG_3804.jpeg
Some one in the past has tried to tack stitch the rear visor. To be continued...
 
Thank goodness for solid leather! Its interesting to see how these things were made originally. Looking forward to seeing it re evolve. Rob
 
I have to pause on this until Thursday, there are two splits in the side re enforcements where the visor trim brads were. I want to glue some thin pieces of leather over these to secure them. Unfortunately, my leather glue dried up over the winter and I my new glue wont arrive until that day. These thin patches on the back side will also prevent any further damage during the re stitch.
 
The work on rebuilding this helmet continued today:
IMG_3806.jpeg
Thin leather patches installed over those splits. Always mark one piece to show location!
IMG_3807.jpeg
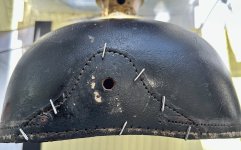
Pins in place, ouch!
IMG_3808.jpeg
Right side done.
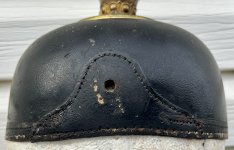
IMG_3809.jpeg
Left side. So this initial set back has been dealt with. Next, we finally get to the install the Swb.
 
Back
Top