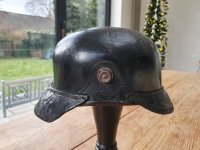
My third pickelhaube restoration (1916)

Drewwerks

Member
Hi this is starting to become a habit.
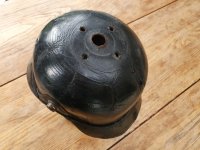
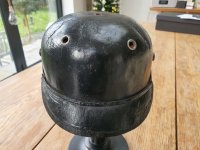
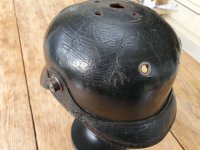
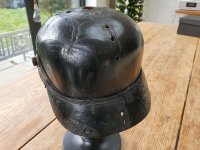
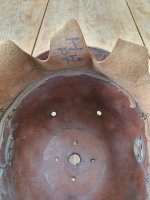
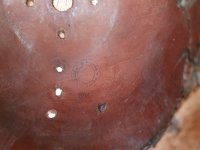
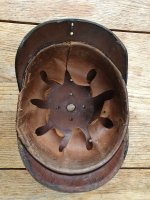
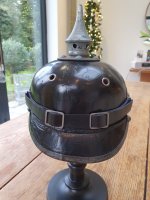
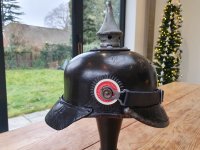
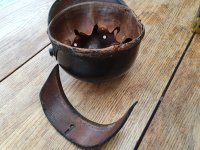
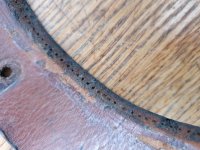
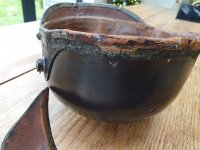
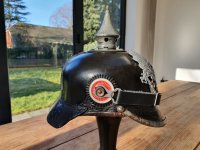
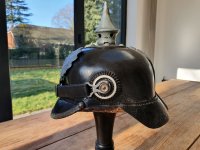
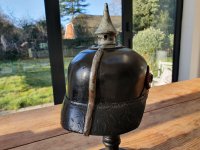
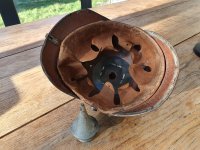
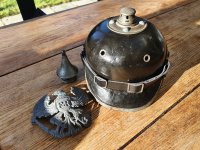
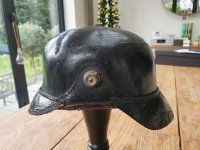
My third project is in pretty good order with it's original steel grommets and no extra holes to fill.
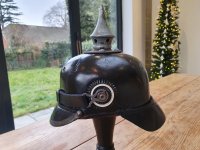
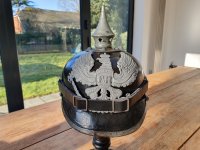
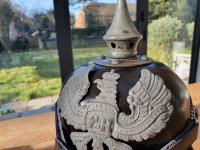
I have found a late steel wappen (thanks Freikorps1919) with the correct distance between loops (78mm).
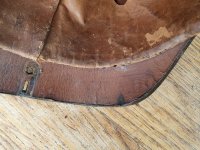
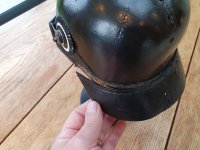
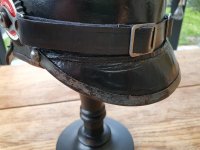
An original piece of steel visor trim has also been sourced, I think this will be quite tricky to fit so any advice would be gratefully received.
Of coarse the whole shell will need a fair few coats of shellac to get it looking good again.
Will keep you posted on my progress.
Regards and Merry Christmas
Drew20211208_125612.jpg20211208_125618.jpg20211208_125631.jpg20211208_125637.jpg20211208_125651.jpg20211208_125659.jpg20211208_125413.jpg20211208_125434.jpg20211208_125519.jpg20211208_125555.jpg
 
No known cure for Haubitis Traumens USN! Wow Drew, how do you wangle the time off from "household duties", ie: "the management" ?
Good luck, Steve.;)
 
As requested, some advice on visor trim. First run a large thick straight blade screw driver along the channel of the trim. This spreads the edges obviously and makes it easier to fit it to the visor. Second, sand the edge of the visor to remove any melted finish or the remains of glue that some previous collector may have applied.....smooth it out. Get the centre of the trim onto the visor and then work your way out to the ends. If you are putting an original piece of trim back on its original visor do not straighten out any crimping or breaks. These have been caused by the visor shrinking, if you correct these, the trim won’t fit. Whenever you are applying pressure to the visor to get the trim on, make sure you are holding it along the stitch line, avoid putting stress on the stitch line and it’s thread. This applies to anything you are doing to any visor, always put your thumb on the stitch line and hold it firmly. You never want that old thread to tear, or you will be in a world of hurt.
 
Last edited:
Hi Guys. It's been a busy couple of weeks with some really good luck and some not so good luck.
Firstly thank you Brian for your visor tutorial, I was not looking forward to doing this BUT...
When the visor trim and rear spine arrived (I bought them from the same French guy I got the shell from) the trim slotted straight on, same shape even the pin holes lined up perfectly.
I can only assume that this piece had been removed from this shell.
It was all going too well... as I offered up the rear spine (perfect fit again) the rear neck guard pulled away it had been glued on, badly.
So now I'm in "a world of hurt" I have never stitched anything so again I need some help.
I have read Brian's informative posts and I think I have most things covered I just have a couple of stupid newbie questions.
1st What weight thread and what colour should I buy?
2nd What size needle? (I seem to remember Brian used it blunt).
Here are a few pictures of the 'almost finished' Haube mocked up with spike, hopefully next update will have the neck guard firmly back in place.


20211217_102403.jpg20211217_102420.jpg20211217_102453.jpg20211217_102516.jpg20211217_102534.jpg
 
Looking really good so far. Good luck with re-attaching the neck guard. Brian will provide lots of great advice. I am sure you can do it no problem, depending on the state of the leather of course. Looks to be pretty solid from the pictures.

Cheers.

Peter
 
First Drew, there are no "stupid newbie" questions here, so don't put yourself down. Getting the right thread is always a problem. I use vintage 100% cotton thread bought off eBay. Despite some research, I have yet to figure out the size/weight labels on thread spools. Any modern thread of suitable thickness is going to have polyester or some other synthetic in it to give strength so I can't use that on other people's helmets. As this is your piece, you can decide....modern VS vintage. The vintage thread I use is Dorcas 2oz. 12 cord machine thread #40. I also have a #35 from the same company which is slightly thinner. The colour used is black. Another alternative to use is "Binder's Thread", unbleached linen made by Lineco Inc. MA, USA again available on the net. This is specially made for those who rebind books by hand. You would have to dye it black but it is a natural thread and won't "light up". The item # is 402-0050. It takes about 1.5 M or 40" of thread to stitch a visor. You may have some left over when you finish but it is far better to have that then run out of thread in the middle of the visor. I am sure there would also be UK companies that make this. I have not had good luck with vintage linen thread as it quickly frays and breaks when used on leather for some reason. This binder's thread however, does work.
Regarding needles, I don't use blunt ones, you can use any sewing needle bought in those multiple packs. The important things is that the "eye of the needle" is large enough for the thick thread you are going to be using. If you want to get more specialized, I can recommend glovers needles made by John James ........sizes 3/7 #JJ18037. These are made in the UK and it is a 3 pack with 3 different size needles specifically designed for leather. I find that I use their #3 needle the most. Again you can order these on the internet.
Last, just a quick repeat of what I have listed in previous posts TOOLS: pin vise drill and bits, bee's wax, curved needle nose pliers, rubber finger tip and T pins. The rubber finger tip goes on the middle finger and allows you to really grip the needle and protects when you are pushing it through the stitch holes. Even so, you will probably shed some blood :) while doing this! WAX your thread before and during the restitch!!
Regarding your visor trim...I have no doubt that both it and the spine were taken off this helmet. In 3 decades of doing this I have only had one piece of replacement trim that fit perfectly with the holes matched up. That happened this year! Feel free to ask any further questions Drew.
 
Last edited:
Dorcas is an old UK company and there is a partial spool of black Dorcas 12 cord, 2oz machine thread on eBayUK right now, 4 quid. After some thought, I think the 30, 35,40 numbers on the spool labels simply tell how many yards of thread are on the spool. Another source which I have cruised is local antique stores but in truth I have never seen any suitable thread. Ninety eight percent of vintage thread on eBay is the common 6 cord thread used to stitch up cloth or sew buttons on. My Mum left me my first half spool of the Dorcas in her sewing kit when she died in the 90's, that's how I clued on to it. Perhaps it came over the pond with her from Scotland as a War Bride on the Georgic?
 
Last edited:
Thanks Brian for your great advice.
I have just bought that Dorcas thread on Ebay.co.uk so will use that on this helmet.
I am cleaning out the stitch holes following your tutorials, but there is a lot of nasty glue which is making the job difficult.
I'm going to try and soften the old glue with Methylated Spirit.
Quick question, does it have to be Bees wax or could you use candle wax?
20211218_103335.jpg20211218_103347.jpg20211218_103356.jpg
 
(I bought them from the same French guy I got the shell from) the trim slotted straight on, same shape even the pin holes lined up perfectly.
I can only assume that this piece had been removed from this shell.
Hi,

You may be absolutely right, if the guy you are telling from is from Dijon and is the same I am thinking of 🧐 He has a few ebay-names on ebay.fr.
He disasembles helmets to then sell the parts alone, because replacement parts are bringing more money 😌

Philippe
;)
 
I don’t know why Drew but all of the people engaged in stitching leather use bees wax not paraffin wax . Perhaps it is because it is a natural product? Maybe paraffin effects the thread? I have never tried candle wax.
 
Regarding the glue you can try meth spirits but I have always just been able to carefully scrape it off. The meth will definitely harden the leather and dry it out. I have only run into two types of glue white carpenters and contact cement. Pretty nervy of the eBay dealer to sell you the shell and then sell you the parts he took off it. 😳
 
Last edited:
Hi Guys
It took a little longer than expected to finish this one but here it is.
Stitching the neck guard back on took plenty of patience and sticking plasters but it's not going to go anywhere for a while.
When the guard was off I also took the opportunity to fix a split in the leather liner.
I just want to thank everyone who talked me through this tricky restoration.
I have been looking around for the next project but everything seems to be getting more expensive, even the real messed up shells, so I'm thinking of passing this one on to fund something new.
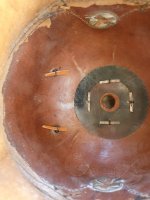
What would you say this one might be worth?
20220211_100452.jpg20220211_100504.jpg20220211_100511.jpg20220211_100525.jpg20220211_100536.jpg20220211_100651.jpg20220211_100846.jpg20220211_101427.jpg
 
Back
Top