Prussian Parts M15 Tschako Part 2

RustieNZ

Member
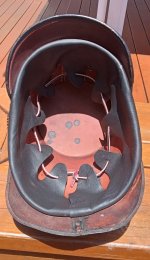
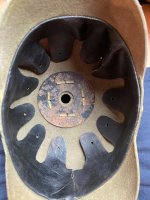
Firstly i removed the front visor. Using soft and thin black leather i made a liner copying an original example.

Its a tricky business trying to keep the liner tight whilst stitching it in !

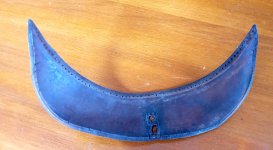
As the Tschako has a uniquely shaped rear visor, i trimmed a Haube one to fit. The rear spine mounting holes were plugged up with leather from another scrap visor. Once sewed in place, this Tschako started looking more presentable.

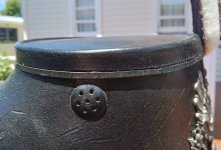
I also fitted a small piece of trim leather to a missing section of the top.
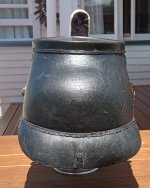
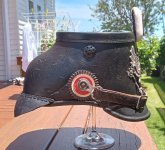
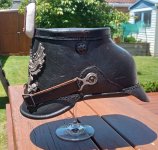
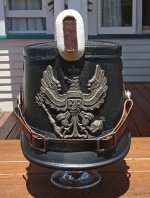
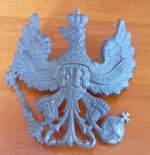
20251129_131041.jpg20251129_131143.jpg20251129_131055.jpg20251129_131026.jpg20251129_131014.jpg20251129_131007.jpg20251129_131423.jpg After a bit of a polish, fitting the chinstrap and cockade, this rescue effort is now complete.
 

Attachments

  • 20250916_111243.jpg
    20250916_111243.jpg
    1 MB · Views: 1
  • 20250916_111301.jpg
    20250916_111301.jpg
    521.2 KB · Views: 3
Whenever I stitched in a repro liner in the past, I wet it so that I could pull it tight to the rim as I stitched. This gives a nice crisp fold line when finished. Ideally you take the M91 posts off as well because they interfere with the new liner as it’s stitched in. However, I have stitched both ways. Originally the liners were stitched to the shell, no visors or fittings….obviously.
 
Whenever I stitched in a repro liner in the past, I wet it so that I could pull it tight to the rim as I stitched. This gives a nice crisp fold line when finished. Ideally you take the M91 posts off as well because they interfere with the new liner as it’s stitched in. However, I have stitched both ways. Originally the liners were stitched to the shell, no visors or fittings….obviously.
Thanks for those tips Brian. I've purchased another M15 Tschako, which also requires a liner. That will give me a chance to improve my stiching methods.
 
I have always wetted the liner after sewing in place, and then placing the helmet firmly on a full form head display. This pulls the leather on the rim inward and tightens it up also. But, I like the idea of Brian’s method and will try it next time! Water, especially cold, will make the leather a bit stiffer once dry, which I like, as it makes the liner appear a bit older. Thanks for the information Brian!

Ron
 
I use Brian's method as well. Wet the liner and bend the edge over a thin metal ruler and clamp it in place with folded cardboard and clips. Works great. Here is a picture of one of Brian's liners in one of my ersatz felts.
 

Attachments

  • IMG_1933.jpeg
    IMG_1933.jpeg
    2 MB · Views: 10
Last edited:
I use Brian's method as well. Wet the liner and bend the edge over a thin metal ruler and clamp it in place with folded cardboard and clips. Works great. Here is a picture oof one of Brian's liners in one of my ersatz felts.
Thats worth trying also. Thank you all for the great tips.
 
The hardest part of this for me is dying the flesh side where you are tying to simulate the "air burn" of a century of exposure. Another hint....use a piece of sponge to apply the dye. The black on the hair side is easy and it looks shiny initially because you have to apply leather balm to stabilize the black dye. I only use the metal ruler to get the folded edge which is necessary for the filz helmets. To state the obvious...the filz liner is stitched to the inside of the shell whereas on a leather helmet the liner is stitched to the outside of the shell and then folded inside.
 
Although I admire the craftmanship and dedication that goes into this, I'm also left with a bit of an awkward feeling when it comes to restoring helmets with completely new materials. Restitching, reshaping etc. Is still another level than making a completely new liner and putting it in an old helmet. That hurts the historical value.

I know it can be a sensitive topic among collectors and don't want to take away from your fine work. But it's just my two cents on this topic.
 
Back
Top