Sunken tops

seagull

Well-known member
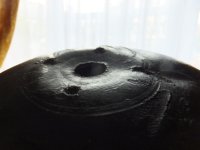
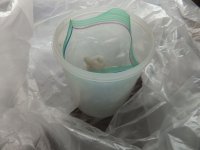
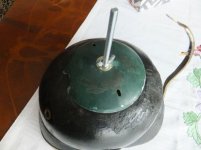
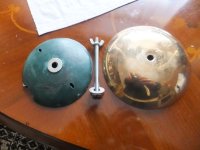
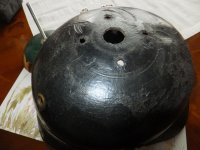
I needed something to pop out a sunken top on an M95 that I am quite attached to - but without hydrating the complete helmet as the old finish may be scarred and scratched but it is solid and I saw no sense in needlessly overexposing it to moisture. Also, from the inside, I did not want to risk the original liner which is complete with no rot, so I placed the wet kitchen towels in a plastic bag inside a kitchen storage jar and inserted it up into the skull before sitting the whole thing upright inside a sealed large clear plastic bag: the only part of the skull exposed to the moisture was directly beneath the sunken top. After a week I applied my secret weapon, a Heath Robinson device cobbled together from junk! A small bronze bowl, the equally curved top from a defunct bird feeder and a bolt with two washers and a wing nut. Left it clamped up for three weeks and the result was a perfectly restored dome that takes the spike base exactly as I needed. Maybe too much trouble for a helmet that most would pass by but it was my first and I love it! Before and after pictures attached.
Cheers, Steve
 

Attachments

  • Sunken top1.JPG
    Sunken top1.JPG
    132.5 KB · Views: 63
  • Sunken top2.JPG
    Sunken top2.JPG
    158.3 KB · Views: 65
  • Sunken top3.JPG
    Sunken top3.JPG
    34.9 KB · Views: 61
  • Sunken top4.JPG
    Sunken top4.JPG
    202.6 KB · Views: 61
  • Sunken top5.JPG
    Sunken top5.JPG
    242.2 KB · Views: 61
Very ingenious I must say. MacGyver would also be proud. I take it the ziploc bag was left open and the helmet just placed on top?
 
Yes Peter, bag open, jar open up inside centre of the skull. I considered lining the rim of the jar with putty to isolate the flow of damp air to just the 'target' area but it wasn't necessary. Hah! Wojtek, I should have known you'd got there before me!!
Regards to all
Steve:D
 
Thanks everyone. This was a conscious decision NOT to go the whole hog and hydrate the entire skull when it did not need it. Seemed like I could limit the effect to just the area that needed help and this weird little arrangement of junk parts did the job perfectly. The most sophisticated bit was the nut and bolt! Riemen, please PM me if you need help.
 
Smart move on your part Steve, that is a very common problem especially with officer helmets where the leather is thinner than OR's. The weight of the spike causes a depressed top after 100+ years. I am going to give this a try. Thanks for the post.
 
Brian, you are so right about the "cookie cutter" effect of the spike on Officer helmets, that was my first experience of using the 'McGyver' clamp!
My old Wurttemburg Officer helmet had depressed just like the EM helmet above so I used this method to raise it - when it was raised up the deep cut made by the spike just opened up for half its circumference, leaving the centre piece hovering in mid air. I quickly replaced the clamp and have left it in place until I can make a good supporting patch for the inside, hopefully filling the open gap with Wojtek's shredded leather/glue compound before making good the lacquer. The EM helmet was an absolute breeze in comparison because of the thicker leather. Anyone trying this method should be aware of this.
Steve
 
Steve, I posted a restoration with photos a couple of years back showing how I dealt with the issue you describe above. Like yours, the spike base had cut right through the top of the shell. A thin circular leather patch glued inside and covered by the tin support disc will fix the problem as you state. Have fun!
 
Back
Top