Detailed Chin Scale Rebuild: Infantry and Mounted Officers

b.loree

Administrator
Staff member
At least 10 years ago, I posted a chin scale rebuild thread. I have not searched for it but probably all of the photos are missing. A couple of our European members have posted on the same topic showing great results. However, as I am engaged in 2 rebuilds at the moment....one Infantry Officer and the other a convex (curved) Mounted Officer, I thought why not take numerous pictures of the process and create a post here? Simply put, this is how I do it. Both of these scales have characteristics which I have never seen before.
So let's take a look at the infantry flat scale first:
IMG_1802.JPG
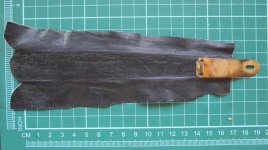
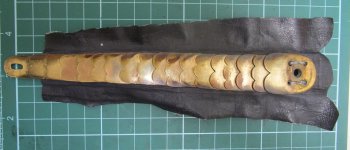
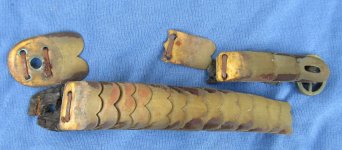
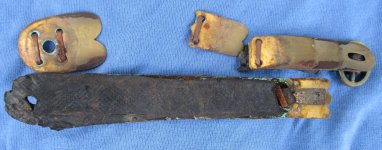
This is a typical example of a broken scale, you can see how bright they were when new in contrast to 100+ years of oxidization. Those original staples will be used in the restoration, most are still viable after a century.
IMG_1803.JPG
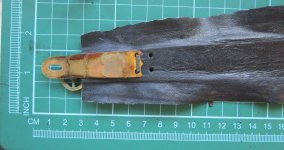
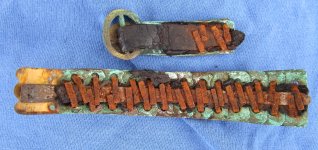
One unusual feature of this scale is the thin metal strip used in the scale backing. I have never seen this before.
IMG_1809.JPG
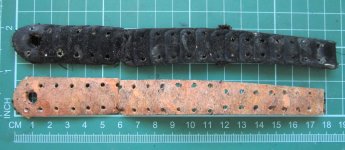
Severely rusted staples, again, unusual as is the thin metal strip and the fact that the scale backing has disintegrated. None of this is typical for an Imperial German scale.
IMG_1812.JPG
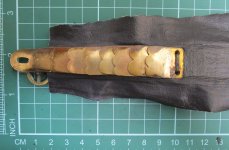
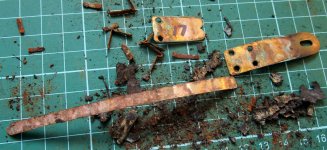
Broken rusted staples, green verdigris oxidization and the complete disintegration of everything except the thin brass strip! A complete mess! Usually, as we will see in our next convex scale the staple strip although broken, can still be used to make a new template for the rebuild. I blame this brass strip for somehow creating a chemical reaction which reduced everything to dust and broken rust. So, our problem is, we have no original template for the staple strip. However, after doing this for 20+ years I always saved and duplicated previous strips so I do have something that will work in this case. Note also the 4 holes punched into the female end fitting, this allows 2 scales to be fastened to this fitting, some will only have 2 holes for only one scale. Last, this original brass strip will NOT be used in the restoration. Second last, always number the scales as you remove them. To be continued..
 
Last edited:
Brian,
Do all officer chinscales have a brass strip in them as seen in this case or is it based upon the individual company that supplies quality pickelhauben?
Thanks,
John
 
Nice post Brian, very informative as always (y) But just for information, I checked my watchlist and the pictures of your post „Anatomy of the Chin Scale 2“ are still available.
 
No John, they do not have that brass strip, this scale is a total exception. In my experience, the older scales let’s say prior to 1890 use a leather staple strip, they are thicker especially the convex mounted troops version. The scales for kurassier for example can be massive. A few years ago, at the SOS Randy Trawnik Age of Kings gave me a large amount of individual scales of all types which he had gathered over a lifetime of collecting. Sorting them out I noticed some very large scales, I will post some pictures. I have no idea when, but at some time the staple strip changes to fibre board/cardboard ? As I have shown, the closest match that I can come up with are beer case handles! Some of these original strips are also reinforced with glued linen.
Sandy thanks for that information, I have learned much though about chin scales since that post, so I will continue to bore the membership 😊
 
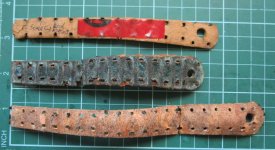
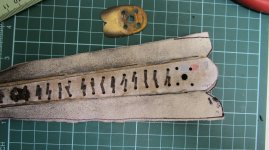
A photo showing 3 original backing strips, fortunately these could be used as templates for the rebuilds. Note the different lengths and the bottom scale is for convex.IMG_1854.JPG
 
Last edited:
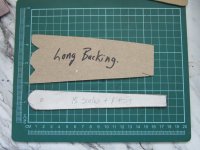
These are the two templates we are going to use for this rebuild. We had nothing left of the originals so I chose the largest that I have, you can always cut material off but you can not add anything. So go big!
IMG_1850.JPG
I have deliberately kept these pics large so you can get an idea of dimensions.
IMG_1827.JPG
The backing has been glued on to the staple strip. As I am using a beer case handle, I had to sand the paint off both sides before gluing.
IMG_1831.JPG
The back side. The thin leather we are using is cut from vintage ladies "opera style kid gloves", originally white kid but now dyed black.
IMG_1832.JPG
The end fitting and first scale have been stapled. Many times the fitting and first scale use the same first staple.
IMG_1835.JPG
We use the "oxidization shadow" of each scale to line them up properly, then we use an awl to mark each hole. Next we use a leather punch to to get our next set of holes. You have to be very careful in lining up the scale properly and getting the holes punched in the correct position.
IMG_1836.JPG
Things are progressing nicely, you can not rush this! There is enough play between staple and hole to line things up properly.
IMG_1838.JPG
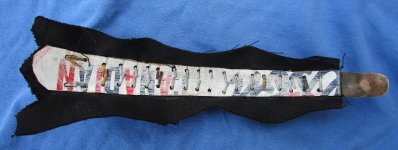
This is how things look from the reverse side....one scale to go! You can see that my staple strip and leather backing are too long and wide. These will be trimmed to fit.
IMG_1839.JPG
Stapling is complete...next we glue!
IMG_1869.JPG
IMG_1868.JPG
Complete!
 
Last edited:
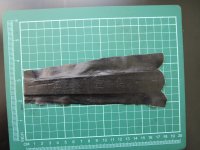
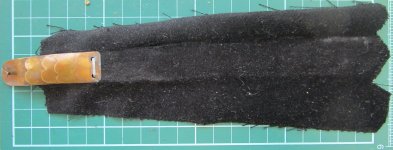
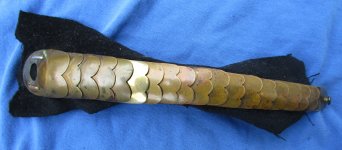
The second scale rebuild, is a convex scale for mounted troops. This is the longest I have worked on...18 scales + male end fitting. I had to make a new template for both the backing and staple strip as the ones I had were too short. The other exception with this piece is that for the first time in my experience the backing is black velvet cloth not leather. Both of these scales belong to James so naturally they are different and cause me problems :) First the original staple strip and velvet backing. Unlike our last piece, we can make a template from this staple strip. IMG_1873.JPG
 
IMG_1875.JPG
The process has begun. The original staples on this are aluminum, again something new to me, most could be reused but a couple had oxidized and broke. I must stress again here that we have to be very careful when doing this rebuild process. Templates tend to be wider that the original due to the fact that they have to be traced out. Consequently, on both of these scales pieces, I had to trim the cardboard strip after the backing was glued on. I would recommend a "dry " layout of the scales on your staple strip before you glue the backing on. Thus you, can check if the strip is too wide as happened to me on both pieces....I am a slow learner! Last, you have to be very precise in using the oxidization shadow on each scale to line them up properly and take great care when punching out the staple holes. One mistake, and your strip and backing become useless and you have to start all over again!
 
Last edited:
So this is where we are at right now:
IMG_1882.JPG
With a convex scale, when you crimp the staples closed, you have to press down on the cardboard to make it curve to match the scale. We can see that the backing and staple strip are too long at present but once everything is glued, the round end will be trimmed to match the last and largest scale.
IMG_1883.JPG
One scale was missing from this piece but fortunately, I had an original replacement. Obviously, the patina does not match. I recommended to James that he could get the chemical agent that the fakers use to oxidize/age new brass. His response: "Can u pee on it?" Of course, I should have thought of that before assembly .....duh! James has always been "at one with Nature"! It is his Quebecoise French heritage at work ;)
 
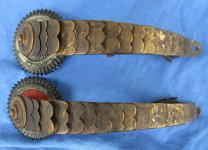
This set of flat infantry officer scales is complete and comes off Alan's Grenadier helmet which I have finished recently:
IMG_1885.JPG
Obviously, these are very dirty, probably from a smoker's environment. Fifteen scales plus end fitting...I really think that this should be the measurement for scales. If you are missing one scale from a helmet, count the scales on the remaining scale and that is what you should look for in a replacement. I know that I could build a missing one for a helmet providing I had the remaining original in hand. Another challenge to come.
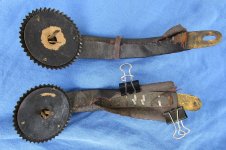
IMG_1884.JPG
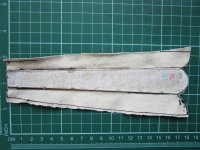
The original 100 year old hide glue on this set has given way, revealing a mixture of brass and steel staples. As usual, oil cloth backing and a fibre staple strip are present. The thin leather chin strap is long gone, all that is left is the small stapled piece. However, the elastic retaining loop is still there. This will backing be re glued. I have been highlighting the WW1 auto biography of OYV Fritz Nagel recently and one of the things he mentions about his kugel helme is that it had to be cinched up tight on his head during the Kaiser maneuvers of 1912. Fritz was in Feld Arty Regt 11 so he was mounted. There are quite a number of Fritz's original photos in this book as he came from a wealthy family and he carried a camera throughout most of his travels. The early pictures (1912-13) clearly show him wearing a private purchase kugel helme with chin scales.
 
Last edited:
Very good Wojtek I have some ammonia and will apply apply it to that scale....anything to keep James happy! :)
 
Great Post Brian :)

You can also use a mix of Hydrogen peroxide, vinegar and salt for aging. It works for every metal, but very fast for brass and copper.
 
Back
Top