Liner for tin ersatz tschapka

USMC-EOD

Active member
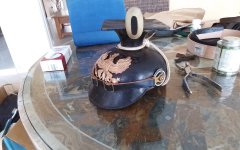
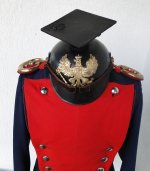
I posted over a month ago about working with a pal of mine to re-shape and repair the metal of a bent and dented tin tschapka.

Today, I'm posting about the liner.

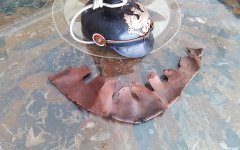
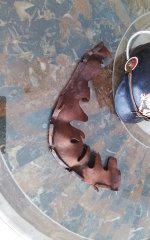
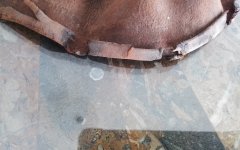
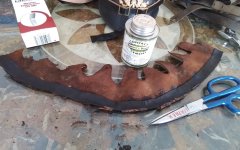
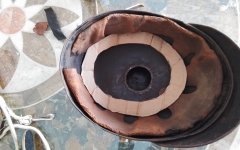
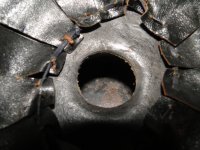
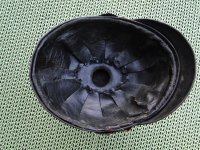
As seen in the photos, the liner is in bad shape. Red rot has creeped into the rolled edge, and bits of the liner are missing, especially at the old attachment points. The leather is very "crumbly".

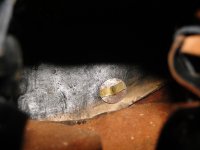
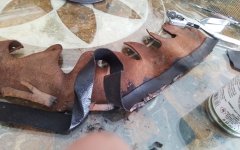
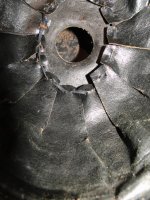
There are 5 attachment points inside which are made of bent brass tabs that are silver soldered onto the tin of the shell on the rim of the interior.

I believe the two types of metal caused a reaction that promoted verdigris to form and rot these leather sections of the liner away long ago. Red rot and time took care of the other "crumbly" issues with this liner.

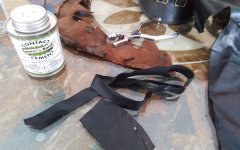
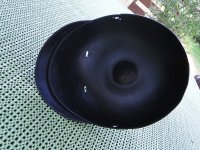
I had to decide whether or not this "repair" was really worth doing, but in the end I decided that since it would be staying in my collection, I would prefer to have the original liner installed, even if it was somewhat incomplete.

I could have made a new liner with this as a pattern, but decided to go this route instead...
 

Attachments

  • 20230104_134940.jpg
    20230104_134940.jpg
    1.9 MB · Views: 25
  • 20230104_134952.jpg
    20230104_134952.jpg
    931.4 KB · Views: 25
  • 20230104_134959.jpg
    20230104_134959.jpg
    1.9 MB · Views: 25
The leather glue works fairly effectively.

I am using a very thin strip of new donor leather, and am trying to line up the edges of the the old stitching as i glue it on. The majority of the old leather edge with the stitching is missing, unfortunately, so I tried to line it up where it seemed to need to be located...

The good thing about this "repair" is that the old leather will fold over itself, leaving the new leather mostly invisible at the attachment points.

As I was doing this, I realized that this liner was in worse condition than I initially thought. It will do for now, though.
 

Attachments

  • 20230104_135541.jpg
    20230104_135541.jpg
    1.7 MB · Views: 11
  • 20230104_140114.jpg
    20230104_140114.jpg
    1.9 MB · Views: 11
  • 20230104_140721.jpg
    20230104_140721.jpg
    1.8 MB · Views: 11
After marking and cutting slits in the new donor leather at the five attaching points, I went ahead and installed the liner onto the 5 brass tabs.

Due to shrinkage and missing leather, the fit is not perfect.

However, at the end of the day, it is the original round-fingered liner peculiar to this type of ersatz tschapka.

Finding another original liner of this type and size seemed like it would be impossible since i imagine these are fairly thin on the ground.

I figured it was better to use the rebuilt remains of this rather than throw it away.

I stuck a stiff cardboard cut-out into the crown of the lining to keep the fingers in place and to gently push the leather back into it's place over time as it sits on my shelf.

That's it! Helmet is finished as far as I am concerned. Thanks for looking!

Bryan.
 

Attachments

  • 20230104_142442.jpg
    20230104_142442.jpg
    1.6 MB · Views: 29
  • 20230104_142645.jpg
    20230104_142645.jpg
    1.8 MB · Views: 29
  • 20230104_142943.jpg
    20230104_142943.jpg
    1.7 MB · Views: 29
Recently, I did such a repair, but additionally I lined the helmet with leather, just like in the original.The inner skin fasteners were re-soldered.Regards
Wojtek
 

Attachments

  • DSC05720.JPG
    DSC05720.JPG
    1.4 MB · Views: 16
  • DSC05718.JPG
    DSC05718.JPG
    1.3 MB · Views: 13
  • DSC05598.JPG
    DSC05598.JPG
    1.4 MB · Views: 14
  • DSC05571.JPG
    DSC05571.JPG
    1.4 MB · Views: 18
  • DSC05601.JPG
    DSC05601.JPG
    702.5 KB · Views: 15
  • DSC05545.JPG
    DSC05545.JPG
    1.4 MB · Views: 18
Well, it actually was kind of disintegrating in my hands somewhat. At least around the edges.

But it mostly held together, and with its condition, I figured it was good enough.

Hopefully it will hold together for another 100 years.

Bryan.
 
Recently, I did such a repair, but additionally I lined the helmet with leather, just like in the original.The inner skin fasteners were re-soldered.Regards
Wojtek

Hey Wojtek,

Is the loop coming out of the top of your helmet made out of some type of black painted steel wire?

I saw a spot of solder in the inner, interior upper portion of the mortar board inside my helmet while I was repairing it.

It has me wondering if mine had a wire loop as well that is now missing.

I noticed the wire on yours in your photo.

Mine is missing and I was thinking about replacing it sometime in the future, but I figured it was probably leather with a toggle like you normally see.

I could not figure out why there was no attachment point inside of my mortar board near the base like you see on most tschapkas. If it is wire, this will make fixing it really easy!

If it is wire, can you get a photo of how it is attached or soldered onto the inner part of the mortar board on the top?

Also, if you wouldn't mind taking a photo ofthe loop on the exterior, I would appreciate it.

Do you know what gauge the wire is?

Thank you!

Bryan.
 
Hi Bryan!
First you need to take a sheet of leather and moisten it with water.Then use your fingers to form a flap of skin on the inside of the helmet.Then backfill the molded skin with damp sand.The steps should be repeated so that everything is perfectly formed.When dry, it looks like a pickelhaube body.The formed skin flap should be cut to the appropriate size.To this leather body we attach the liner.Only such a set is attached to the rest of the tschapka.The whole thing was attached to restored brass mustaches.In the photo you have the initial state.Good luck with your work.
Wojtek
 

Attachments

  • fasunek.jpg
    fasunek.jpg
    543.3 KB · Views: 17
  • DSC05588.JPG
    DSC05588.JPG
    1.2 MB · Views: 17
  • DSC05725.JPG
    DSC05725.JPG
    1.2 MB · Views: 16
  • DSC05723.JPG
    DSC05723.JPG
    1.2 MB · Views: 15
Back
Top