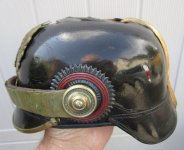
This is Amy's helmet sent to me from Singapore. It was damaged while being shipped from Australia. The before photos:


I didn't pack it well so I am to be blamed. Now that it is with Brian, I know miracle can happenReally hope that Amy will be compensated by the carrier for this damage. The only saving grace is that it is now in the hands of one of the very few people in the World who can fix it.


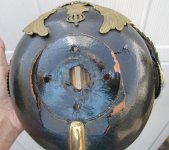
") Work continued today with gluing in the patch.
Work continued today with gluing in the patch.

")

 The outside view.

To bad...I didn't pack it well so I am to be blamed. Now that it is with Brian, I know miracle can happen