Rebuilding a Grenadier Arty

pickelhauben

Well-known member
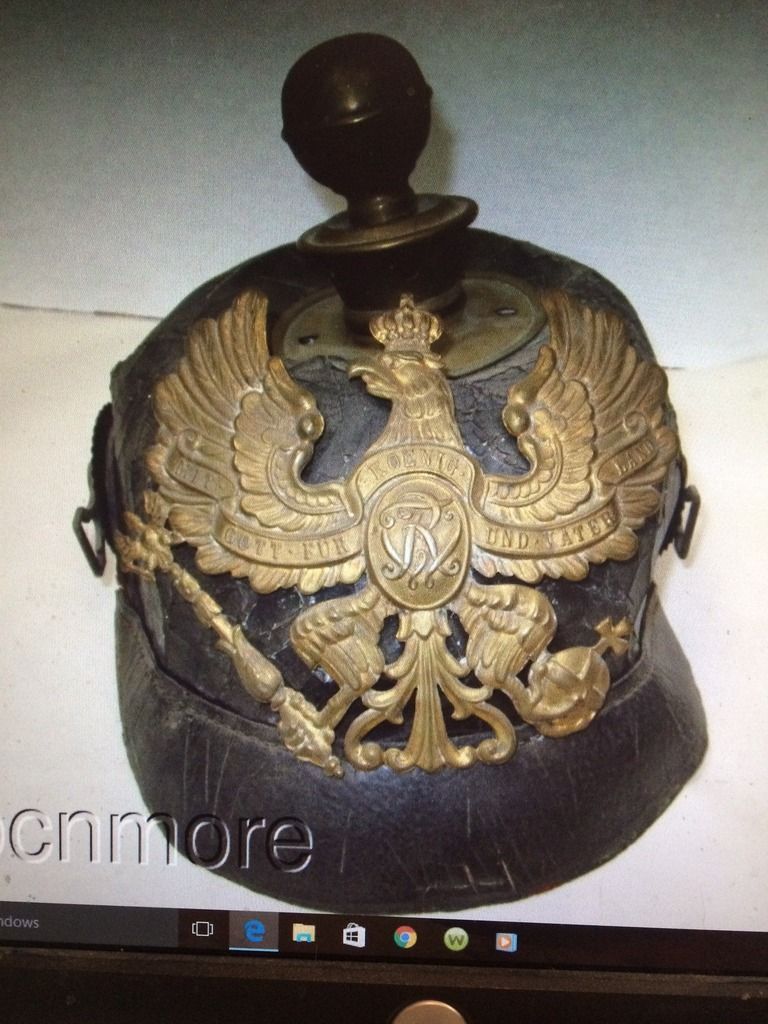
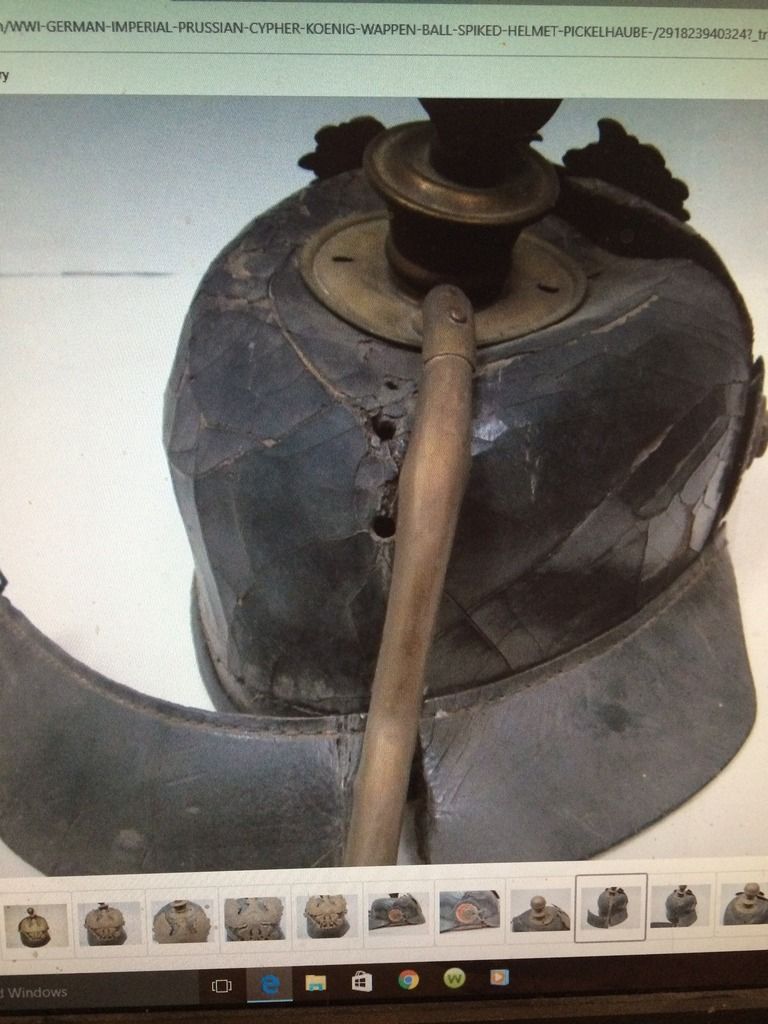
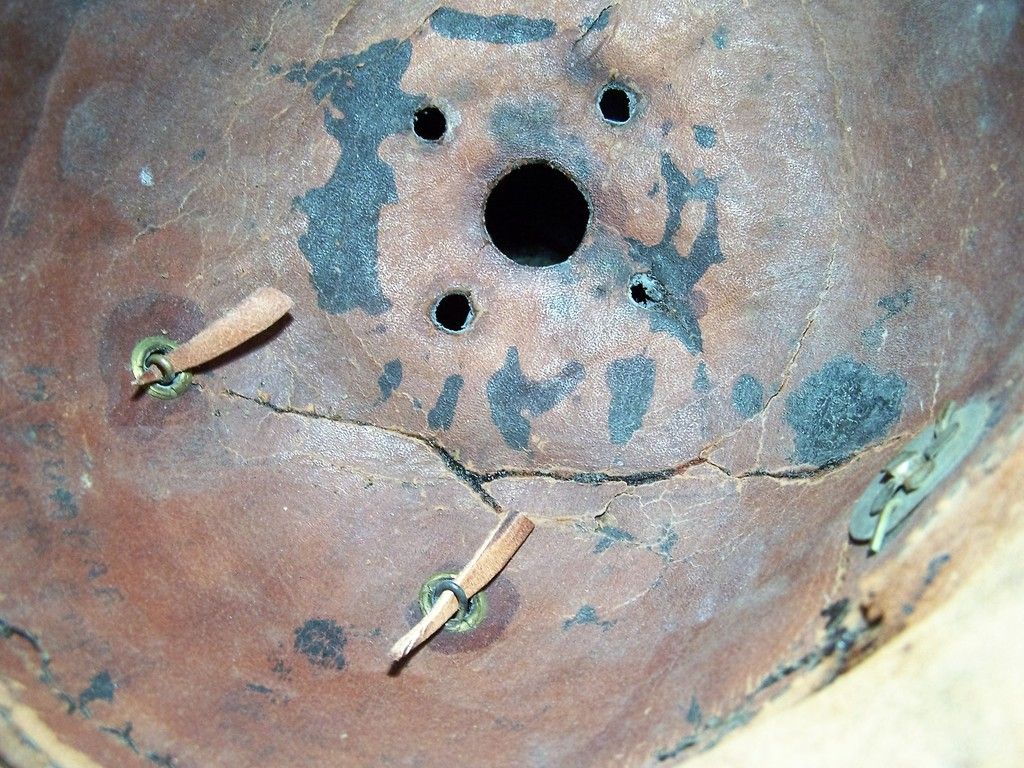
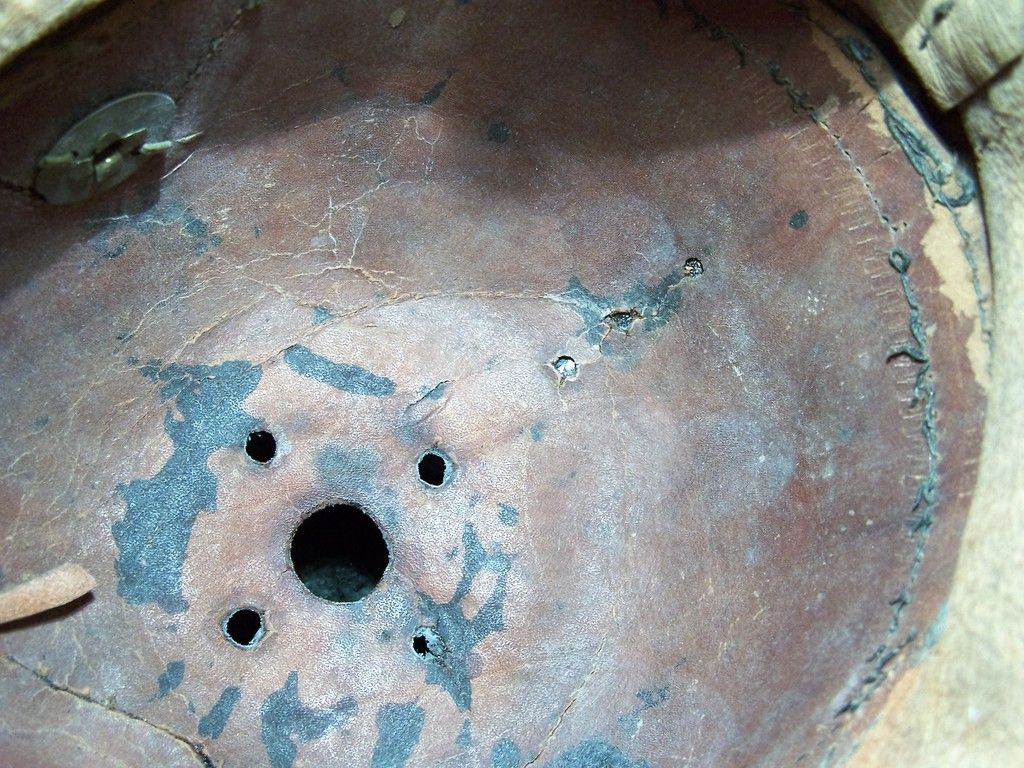
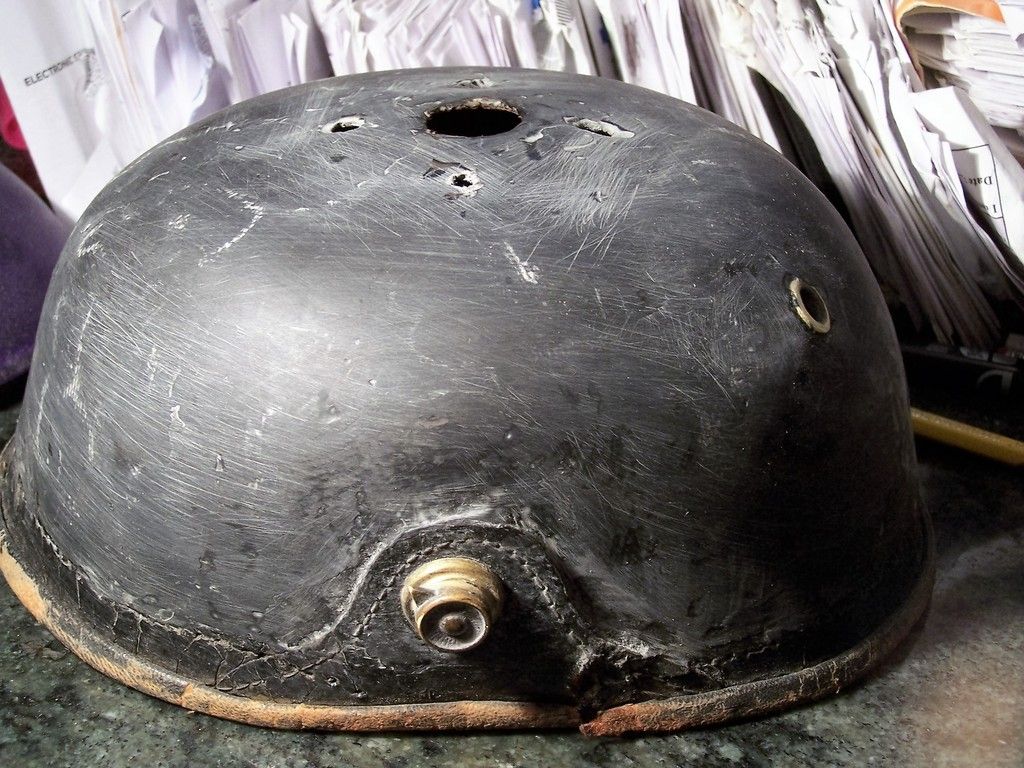
Here is my latest project . When I got it , it was missing the front visor trim both visors were detached from the body and the rear visor was broken in two. The dome was completely collapsed with a 4 inch rip that the ball spike was sagging/ falling into.

I didn't think of taking any pics before but I was able to retrieve this one.


Kind of tiny . I will try and take some pics as I progress.
 
Would love to see what you have done, a better photo would help. I know that you some of us (me in particular) photography isn't our thing.
 
aicusv said:
Would love to see what you have done, a better photo would help. I know that you some of us (me in particular) photography isn't our thing.

Yes you are right. I won this off of ebay a time before I joined the forum . When I started the restoration I did not think of taking any pictures . So when I tried to retrieve pictures off of ebay time expired and the the one I was able to retrieve is the one I used.

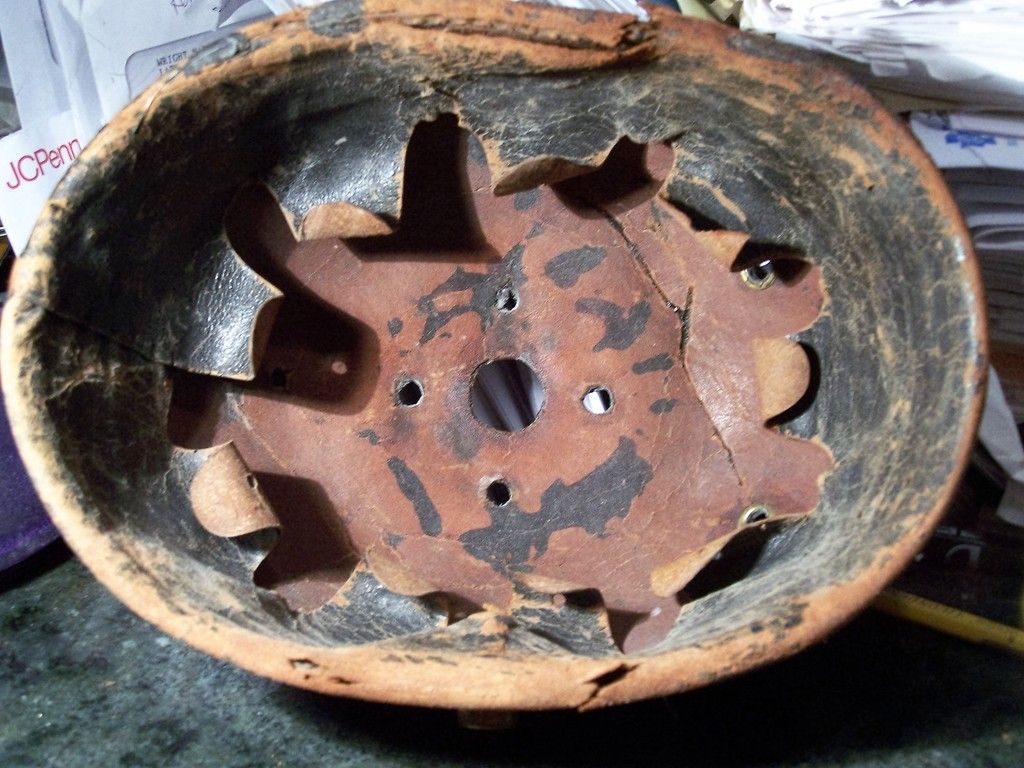
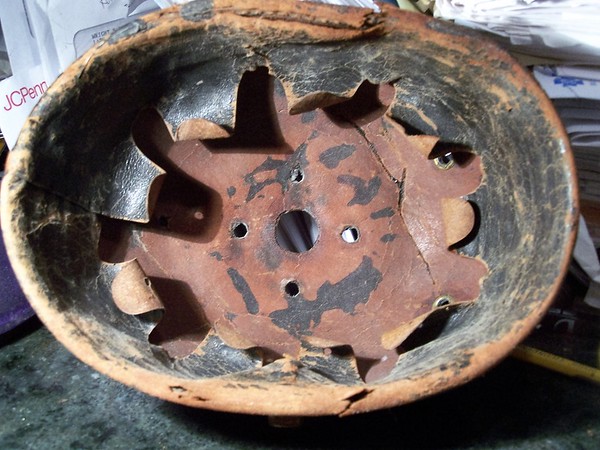
But I did use my phone ( I had forgotten ) to take some pictures and sent them to Randy T. to see what he thought . Here they are.


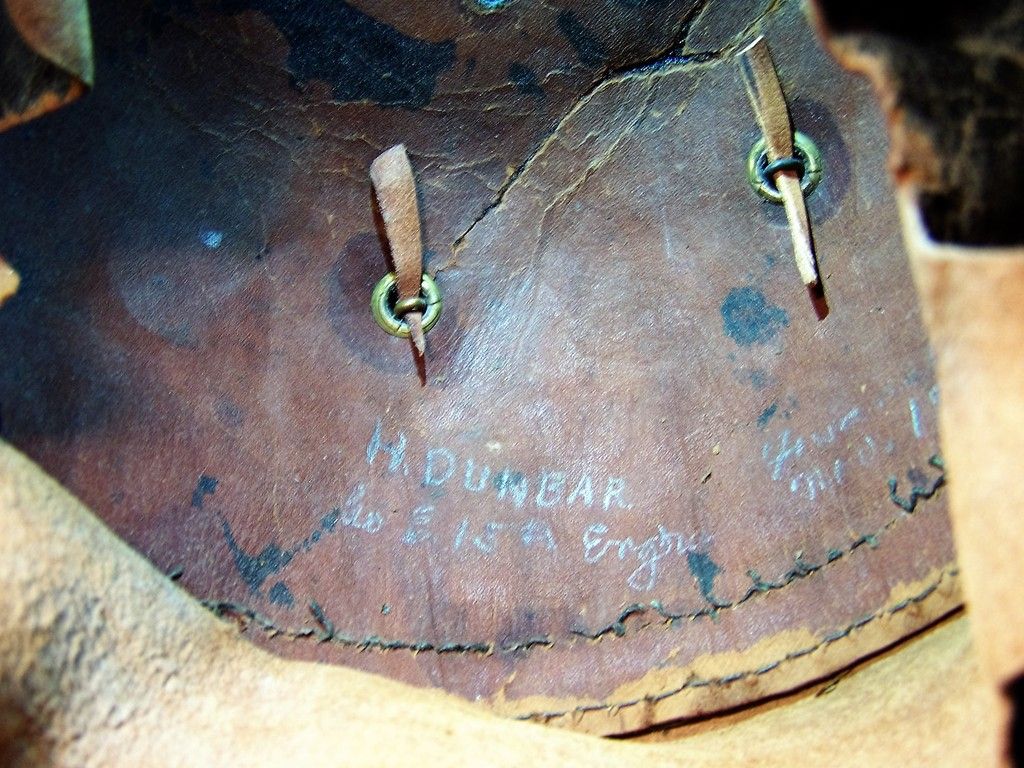
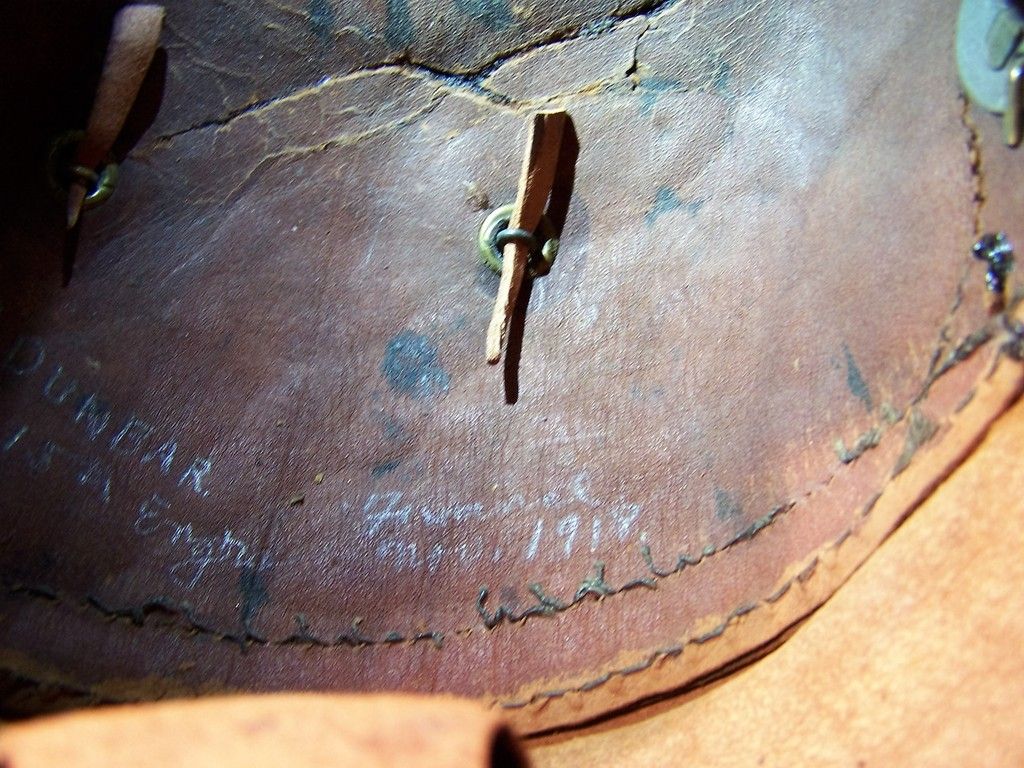
When I got the helmet I decided that it was just in too bad of shape until I inspected the inside. Written in pencil was

H DUNBAR
ho 315th (E 15th ?) Engineering Found Nov 1918

After seeing this the helmet was worth rebuilding and I decided not to scrap the dome and using a new dome from a donar helmet.

The first thing I did was super glue the 4 inch tear. I did this by pinching the tear together every half inch or so and spot the glue holding the tear as tight as possible. Onec done I came back with a full bead of glue.

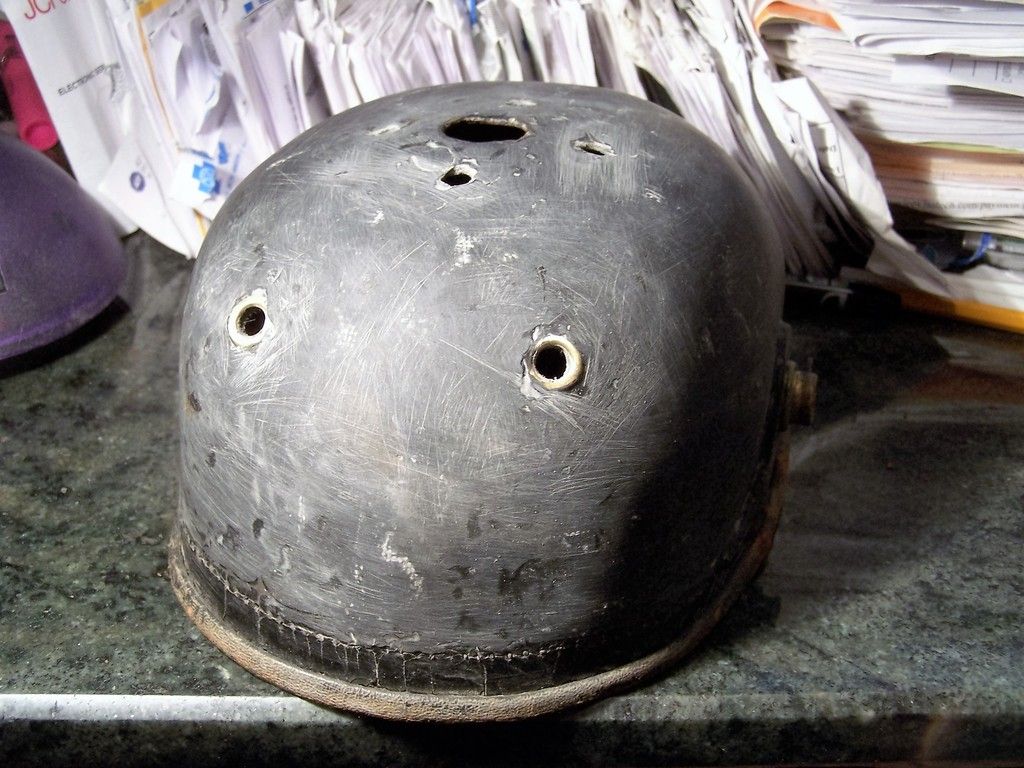
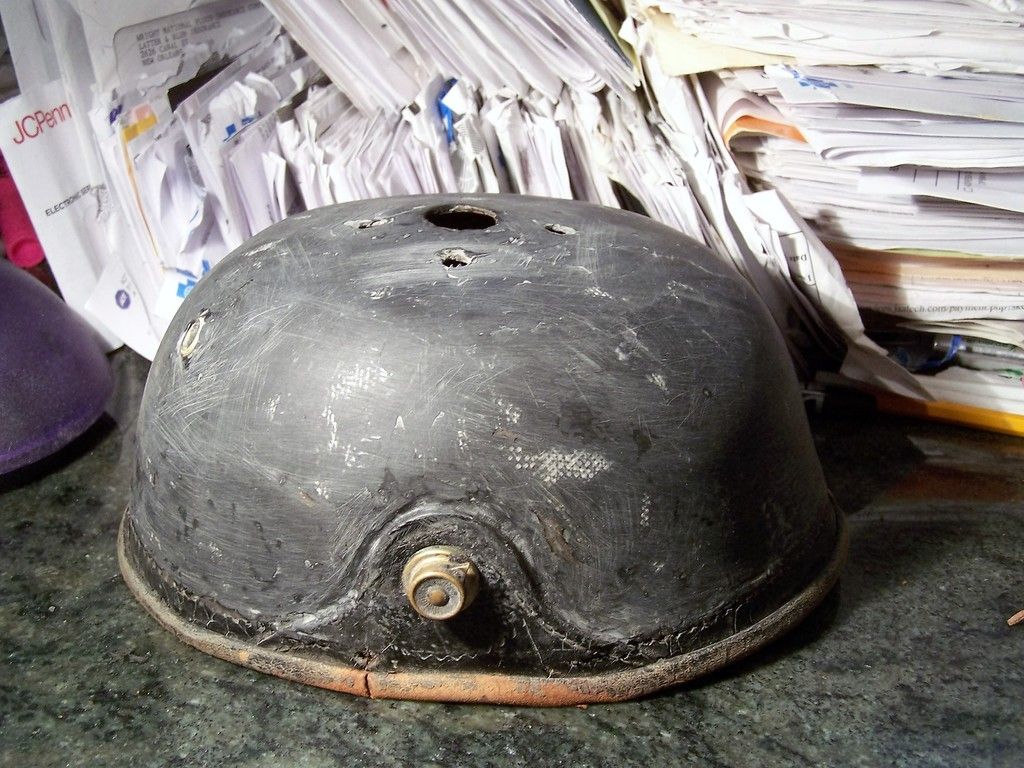
The helmet was so soft and with the collapse that I had to get radical with the use of fiberglass cloth and resin. Shellac or lacquer would not have worked. I managed to make a contraption out of thread rod to block the helmet up using the disc spike base and used a wooden hat shaper to shape and align the dome.

I cut the fiberglass cloth into thin strips starting at the top of the dome and stopping at the visor stich line I went around the helmet laying down the cloth with blackened resin.

The I went back after the first application and filled in the gaps. Then sanded . I went back about 4 times spot hitting it with the black resin filling in the low spots. I need to go one more time and it will be right.

This method was a bit mutch but I am glad I saved the dome. Now some coloring and re stitch the visors I will have a nice display piece using all the original parts.


Now after a little more sanding I will use black shoe dye and go over that with black shoe polish.
 
Thanks guys for the encouragement .

The reason I went with this radical fix is as I stated before the dome was crushed and extremely soft. Almost like a glove or worn out pair of leather shoes .

It would have collapsed if I would have tried shellac or lacquer .

I am busy with another project not pertaining to pickelhaubes probably through the month of Dec.

I make and build military models and I am working on a 1/18th scale Russian 'Hind ' Helicopter.

I need to finish the prototype and then it will go into production.

Once this is done I will have a chance to get back on this project.

Unless I get a few free days playing hooky .
 
You've really found yourself a fun challenge there! I like the name of the Engineer in it. I also have a vet bring-back that was taken by an engineer, but from the 13th. Interested to see how this progresses. :)

:D Ron
 
Very nice work, I never thought that a helmet in that condition could be restored.
Did I noticed right to say that you sanded the helmet surface, if yes what did you use to bring it back to life.
Thanks
Alf
 
dusmif said:
Very nice work, I never thought that a helmet in that condition could be restored.
Did I noticed right to say that you sanded the helmet surface, if yes what did you use to bring it back to life.
Thanks
Alf

I used fiber glass cloth and black colored fiber glass resin.

At first I cut the cloth into aprx 3/8 inch strips . After blocking the shell out painted the resin on the shell from top to visor stich line then laid on the cloth . Then I came right back on the cloth painting more of the resin.

Once that had set up I came back and filled in with cut to fit fiber glass cloth to fill in the spaces .

After the second wave of glass went on . Once set I sanded the whole thing. Then went back about 3 times filling in low spots with the resin. Sanded and repeated.

The trick is to sand LIGHTLY USING 80 GRIT sand paper. This step is that your trying to shape not soo much sand. Then come back with 120-180 grit sand paper to smooth everything out. Then wash with denatured alcohol . The sanded area will look gray and the low spots will look black. Then you touch up the low areas ( black ) then sand and repeat.

It took me about a day to get it were it is now . Appling / spot hitting 4 times with the resin.
 
pickelhauben said:
dusmif said:
Very nice work, I never thought that a helmet in that condition could be restored.
Did I noticed right to say that you sanded the helmet surface, if yes what did you use to bring it back to life.
Thanks
Alf

I used fiber glass cloth and black colored fiber glass resin.

At first I cut the cloth into aprx 3/3 inch strips . After blocking the shell out painted the resin on the shell from top to visor stich line then laid on the cloth . Then I came right back on the cloth painting more of the resin.

Once that had set up I came back and filled in with cut to fit fiber glass cloth to fill in the spaces .

After the second wave of glass went on . Once set I sanded the whole thing. Then went back about 3 times filling in low spots with the resin. Sanded and repeated.

The trick is to sand LIGHTLY USING 80 GRIT sand paper. This step is that your trying to shape not soo much sand. Then come back with 120-180 grit sand paper to smooth everything out. Then wash with denatured alcohol . The sanded area will look gray and the low spots will look black. Then you touch up the low areas ( black ) then sand and repeat.

It took me about a day to get it were it is now . Appling / spot hitting 4 times with the resin.

Thanks mate, that require a lot of dedication, I must say.
Alf.
 
And fibreglass dust itches like hell if it gets onto your skin. I repaired a motorcycle fairing years ago wearing only shorts due to the heat of summer and my thighs itched for about 3 days! (I had the fairing sitting on my lap)
 
Well! You answered my question. I was just going to ask if you put some FG cloth in with the resin (could actually see it in the photos when I looked again). The cloth is important because the resin will crack after a while if it's not reenforced.

:D Ron
 
Well I started this project about a year and a half ago and I will work on it all day on Mardi Gras .No parades for me.

I am not sure how far I will get but we shall see.

I am thinking about stabilizing the liner by glueing some thin back up leather pieces behind the worn through areas over the ears .

Then I think that I will re- stain the liner black .

I have never seen anybody do this but I have seen plenty of liners with oils applied .

It does look pretty worn as is .

Do you guys think that this will help or hurt this helmet ?


I take my hat off to you, with a deep bow! About your question: I think you have already done so much impressive work to preserve this helmet for future generations, that I wouldn't stop now but go all the way. The liner could do with a bit of stabilizing indeed, and the next logical step is to stain/paint it black again. :bravo:
 
Great work, as to the liner, well anything you do will have to help. I know some guys are totally against even oiling a liner, but if the choice is between saving what is left or loosing it, Good luck, I'm sure the finished piece will look great, can't wait to see photos.
 
Back
Top