Tips and experiences about photographing pickelhauben

Sandmann

Well-known member
Dear fellow forum members,​
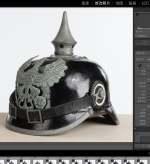
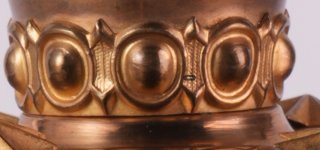
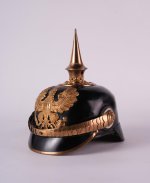
I'd like to share my experiences in photographing pickelhauben and initiate an exchange of experiences on this topic. I hope we can learn from each other as I've seen a lot of great photos from some of you here on the forum and I wish I could learn more about proper lighting for studio photography. My goal is to take a nice photo of a helmet that doesn't need any post-processing. For less reflective helmets, this issue is certainly not that important, but this helmet, for example, has a very shiny surface and was therefore quite challenging. To achieve my goal, I read and tested a lot to find a method of illuminating the helmet well all around while avoiding annoying reflections from the light sources on the helmet surface. (Please overlook the partially untidy image sections, as these are just test photos to check the lighting. For the final photos I would like to wait for this post)
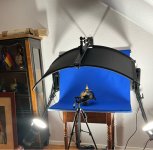
  • I started with indirect lighting on a white curved reflector (used lights: Rollei Soluna II-60 with 100% output). My idea was to avoid the typical reflections of 2 light sources on the surface, the light should look like ambient daylight. However, the illumination from the reflected light wasn’t sufficient and the helmet visors were unfortunately not illuminated well enough.
626464FD-694B-4FAF-BEEC-2DD78A883FFA.jpeg347E059F-DE93-4F75-9557-D08C69582F4C.jpeg
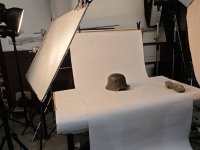
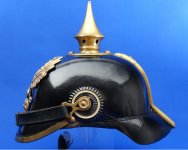
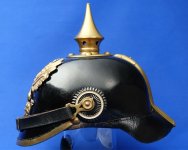
  • For the next try I used a 110 cm x 110 cm diffuser flag panel, which was placed a little above the helmet. In various guides on photographing very reflective objects, it was said that you should place a large white surface over the object so that this is as far as possible the only thing that is reflected on the object's surface. The light came from a 60cm x 90cm softbox positioned from above and slightly forward. The reflection from the diffuser flag on the helmet looks a little better to me, but unfortunately the helmet visors were still too dark.
3DE2654E-F549-4870-8896-B49A4418EFBC.jpegView attachment 46113
I therefore had to think about how I could use a front light on the helmet without the disturbing reflections of the softboxes on it.
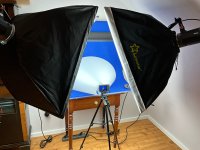
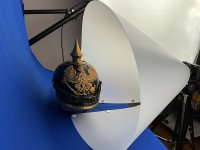
  • For this I tried a Light Cone (size L), which I placed horizontally around the helmet (open at the bottom). This was illuminated by my lights with 50% output and equipped with 2 softboxes 60 cm x 90 cm, that were positioned at the front left and front right, a little bit higher than the Camera. In my opinion this set up led to the best result, as the helmet is beautifully illuminated nearly everywhere and there are no annoying reflections from the room. The only small disadvantage is the slightly matted surface of the helmet, which was caused by the solid white surface of the light cone reflecting on it. To eliminate the disturbing reflections of the Light Cone in the glass, I decided to use a wooden helmet stand for future photos, with a surface that doesn't reflect the environment so much. However, there are no annoying reflections from the softboxes on the helmet and it looks as if only one light source was used. It is an extremely soft light created as a result of the two diffusion layers of the softboxes and the Light Cone.
905C2D88-B751-459E-8A43-A4AE5A902A45.jpeg2082EB6B-9442-486F-8438-2CEE5D70A0C8.jpeg2A147055-1D2B-4972-ADA1-777EA44CF8C5.jpegView attachment 46112
Hopefully my experiences will help you with an attractive helmet photography. I would be glad if you would also share your experiences in photographing helmets or other military objects with us.
Thank you very much in advance, I look forward to your tips and experiences.
 
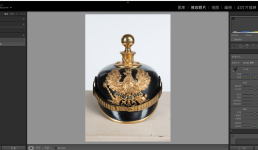
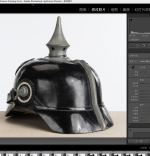
Hello Sandy, thanks for sharing your experiences with the lighting setups, it's very worth trying. I'm no professional photographer but I have dealt with the same problem many times, and it could be very frustrating sometimes. For me, I think the bright reflections are difficult to avoid in a studio environment, especially when you want to keep the pictures generally bright (and with a light-coloured/grey background). So I think the important thing is to make sure the reflections don't affect the details, I try to change shooting angles to avoid it. Softening the reflections can cause a loss of contrast and sharpness, which is what I try to avoid personally. For the last, I think the raw photos unfortunately must go through a retouching process, although I don't enjoy doing it because it's indeed boring. I find it too hard to generate perfect raw photos.
This is, however, just my own amateur opinion. I look forward to seeing more input from other members. Below are a few raw photos I took last year: as you can see the reflections from light sources are very obvious, and I wasn't able to find an adequate solution then. But I can accept them after some more editing. What do you think?

截屏2024-05-24 13.48.14.png

截屏2024-05-24 13.52.54.png

截屏2024-05-24 13.54.16.png
 
Last edited:
Dear fellow forum members,​
I'd like to share my experiences in photographing pickelhauben and initiate an exchange of experiences on this topic. I hope we can learn from each other as I've seen a lot of great photos from some of you here on the forum and I wish I could learn more about proper lighting for studio photography. My goal is to take a nice photo of a helmet that doesn't need any post-processing. For less reflective helmets, this issue is certainly not that important, but this helmet, for example, has a very shiny surface and was therefore quite challenging. To achieve my goal, I read and tested a lot to find a method of illuminating the helmet well all around while avoiding annoying reflections from the light sources on the helmet surface. (Please overlook the partially untidy image sections, as these are just test photos to check the lighting. For the final photos I would like to wait for this post)
  • I started with indirect lighting on a white curved reflector (used lights: Rollei Soluna II-60 with 100% output). My idea was to avoid the typical reflections of 2 light sources on the surface, the light should look like ambient daylight. However, the illumination from the reflected light wasn’t sufficient and the helmet visors were unfortunately not illuminated well enough.
View attachment 46173View attachment 46175
  • For the next try I used a 110 cm x 110 cm diffuser flag panel, which was placed a little above the helmet. In various guides on photographing very reflective objects, it was said that you should place a large white surface over the object so that this is as far as possible the only thing that is reflected on the object's surface. The light came from a 60cm x 90cm softbox positioned from above and slightly forward. The reflection from the diffuser flag on the helmet looks a little better to me, but unfortunately the helmet visors were still too dark.
View attachment 46172View attachment 46113
I therefore had to think about how I could use a front light on the helmet without the disturbing reflections of the softboxes on it.
  • For this I tried a Light Cone (size L), which I placed horizontally around the helmet (open at the bottom). This was illuminated by my lights with 50% output and equipped with 2 softboxes 60 cm x 90 cm, that were positioned at the front left and front right, a little bit higher than the Camera. In my opinion this set up led to the best result, as the helmet is beautifully illuminated nearly everywhere and there are no annoying reflections from the room. The only small disadvantage is the slightly matted surface of the helmet, which was caused by the solid white surface of the light cone reflecting on it. To eliminate the disturbing reflections of the Light Cone in the glass, I decided to use a wooden helmet stand for future photos, with a surface that doesn't reflect the environment so much. However, there are no annoying reflections from the softboxes on the helmet and it looks as if only one light source was used. It is an extremely soft light created as a result of the two diffusion layers of the softboxes and the Light Cone.
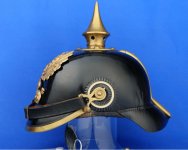
View attachment 46171View attachment 46170View attachment 46169View attachment 46112
Hopefully my experiences will help you with an attractive helmet photography. I would be glad if you would also share your experiences in photographing helmets or other military objects with us.
Thank you very much in advance, I look forward to your tips and experiences.
Sandy
That is a super set up
But it is above my pay grade
It would take me a whole day to shoot 1 photo
I admire what you do
Best wishes
Steve
 
For me, I'd go for one light that is always on, which would give me a picture that I personally feel is pretty good. For pickelhaube, I think it's more important not to highlight the flash.Benefit by SONY A7R5(6100W), details are well preserved.
With item lighting, it may take as many attempts as possible to achieve the look you desire.

2.jpg1.jpg3.jpg4.jpg
 
Thank you all for your nice comments and your participation to this thread.

@michiel: It’s just a cotton fabric with a coarser structure that I rolled up. I love Ed's (Spiker) photos with the purple background and Prussian Blue was a suitable alternative in my opinion ;)

@Jvpi and NON YX: Thank you for sharing your experiences. Your ways also provide wonderful photos and it's great to see how other collectors handle this topic. I'm also not a professional photographer and since there is only general product photography available as learning material online and helmet photography is, in my opinion, very specialized, I'm looking forward for more information on how to do this (y)
 
Back
Top