JR 88 Officer Helmet

b.loree

Administrator
Staff member
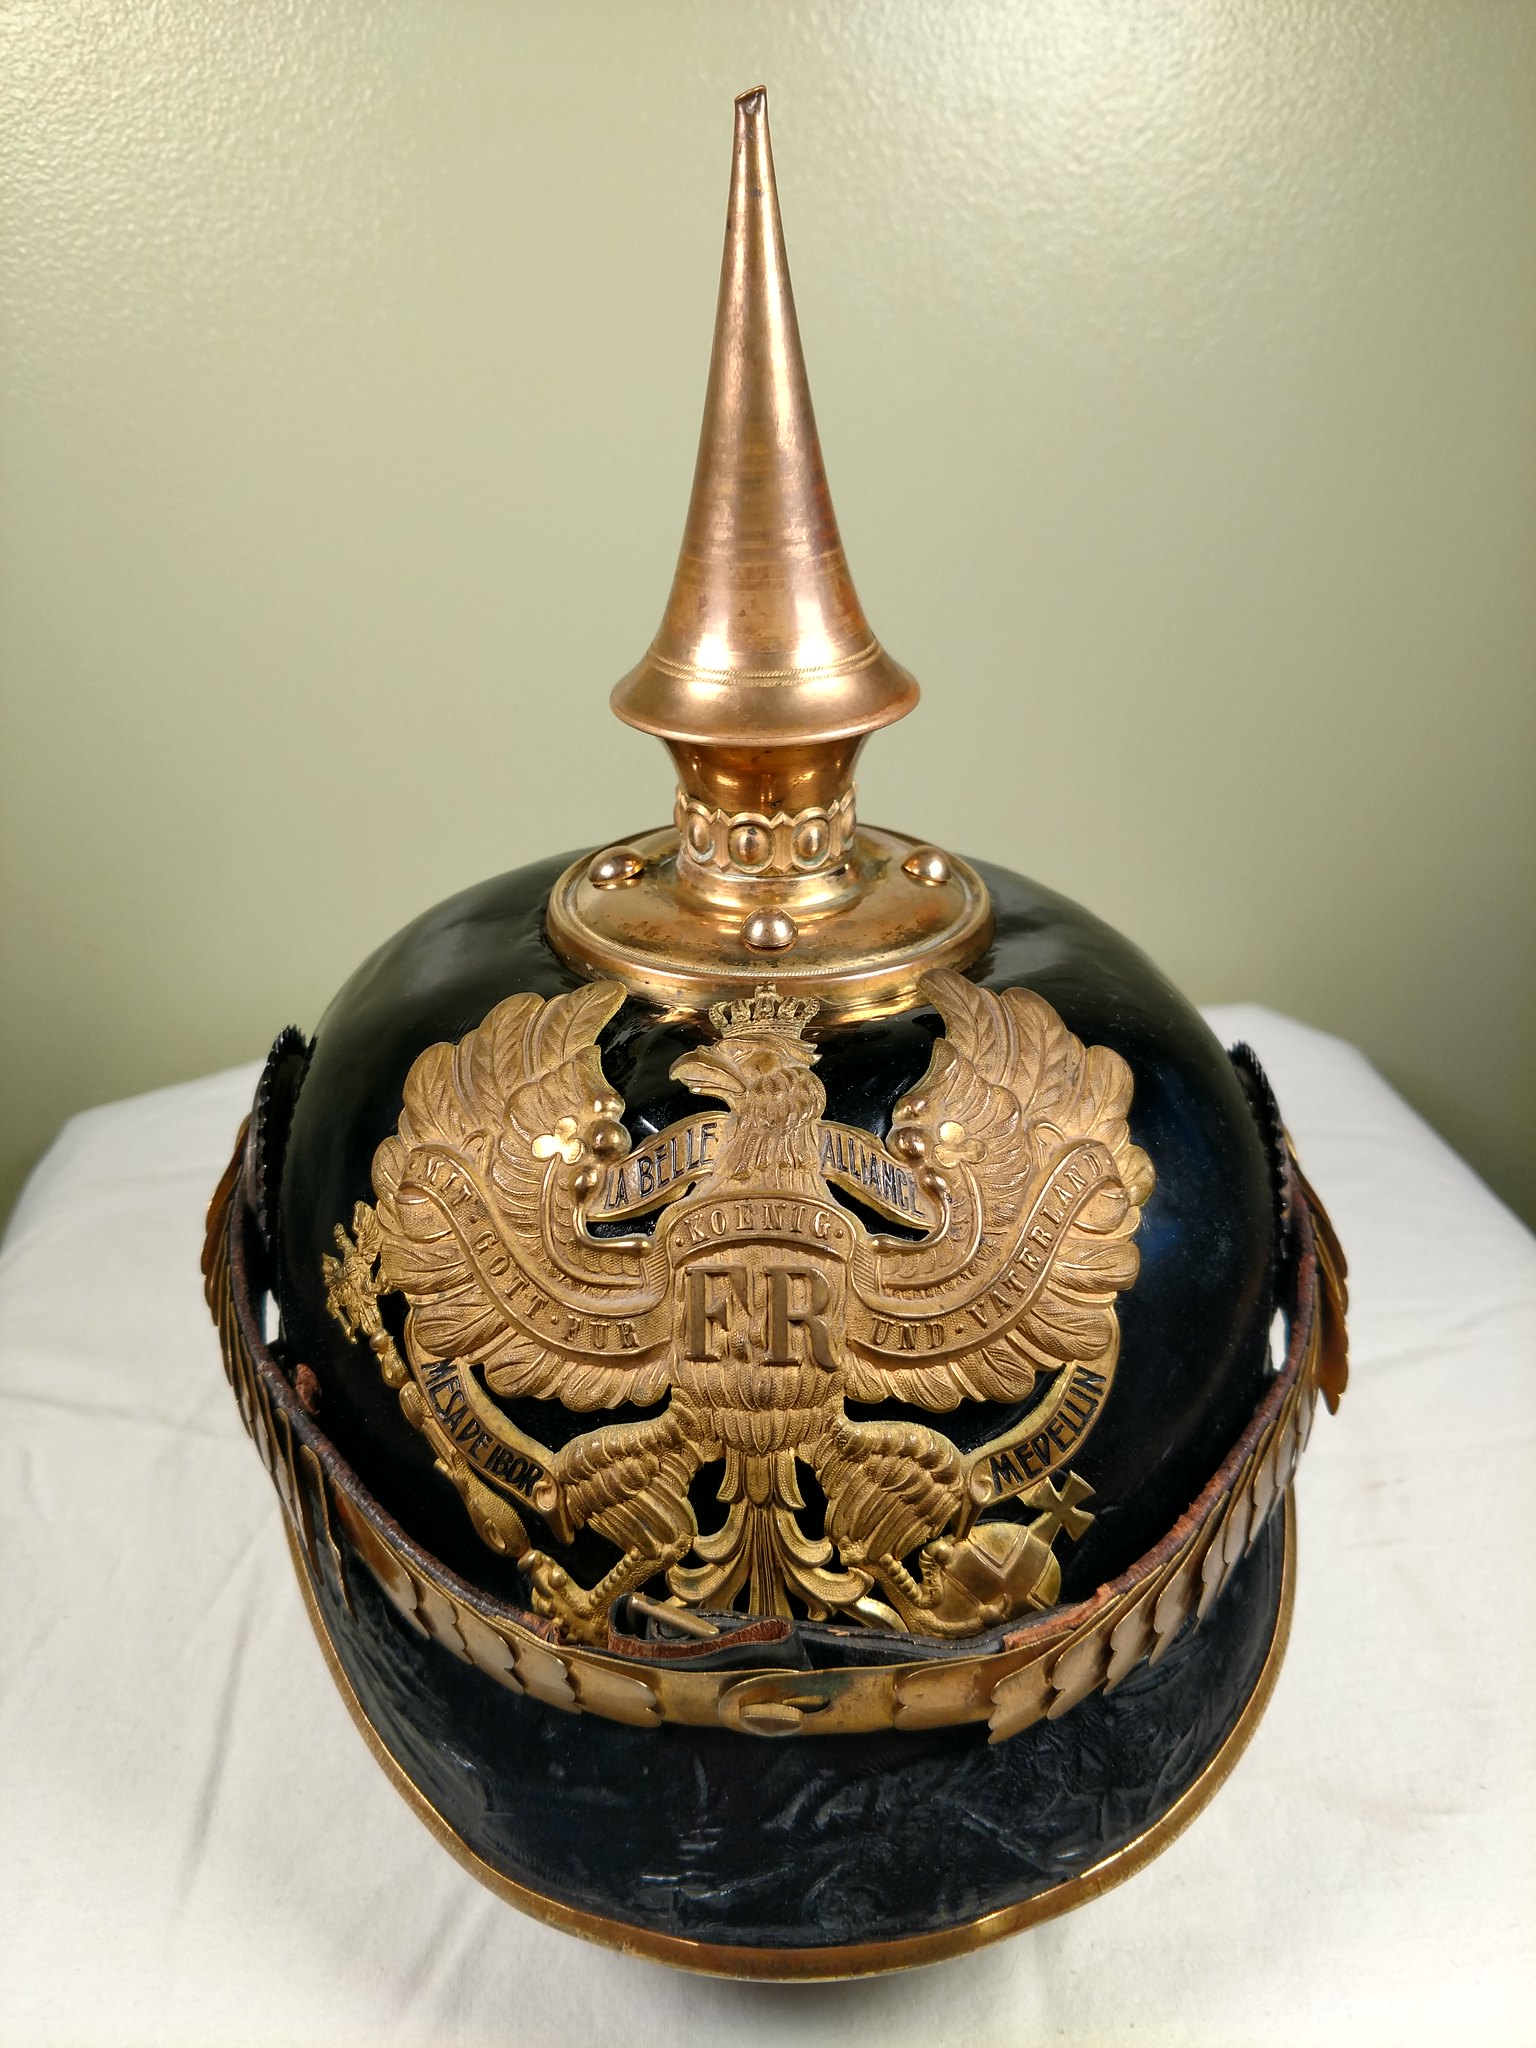
Another helmet I have been working on from JR 88. This job was supposed to be a "simple fix a depressed shell top" so the spike fits properly. Unfortunately, there can be surprises with 100 year old leather and shellac finish. Originally as you will see there were some bubbles in the finish, however, by my wetting the area most of the finish on the top of the shell loosened and had to be peeled off. So, now we are into a major refinish job. Some photos:
22B53E1E-891F-4C71-B934-6FF1D995C171_1_201_a.jpeg
It looked pretty simple in the beginning.
82DF3DEC-D3D9-4432-90E1-2924A27FE685_1_201_a.jpeg
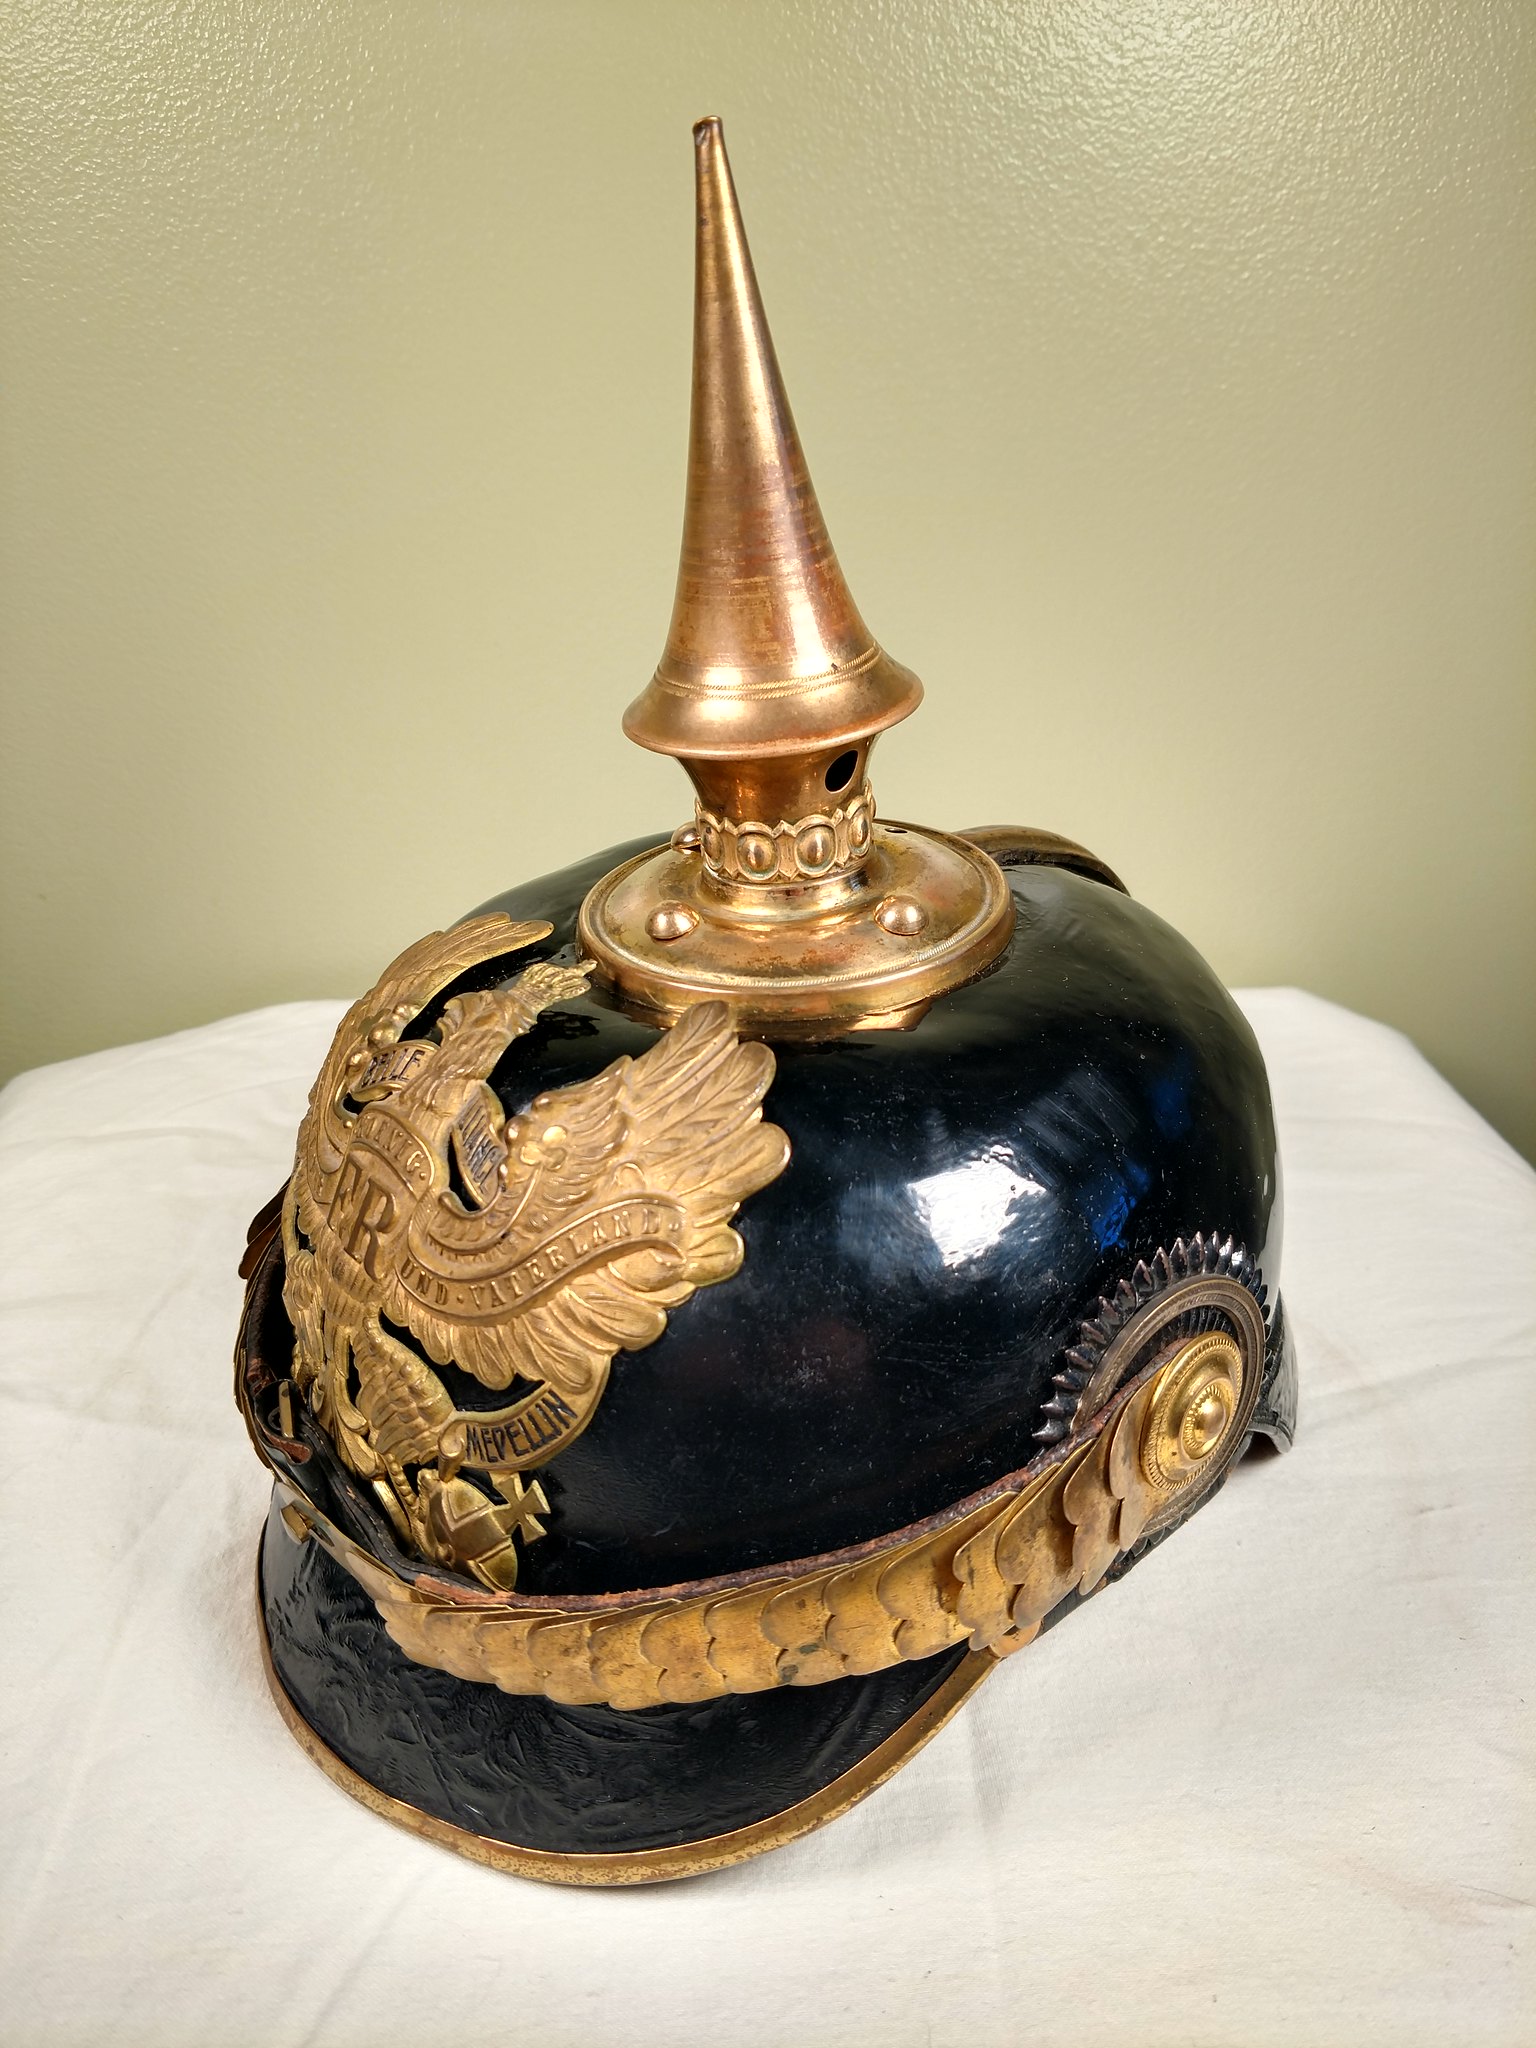
These creases in the shell are hard to fix but we are going to give it a try.
50A49863-9E5B-441B-8BA3-7555767937D0.jpeg
And then things get a bit more difficult....!
5A021780-6D3C-4C79-8A2A-FA506FC07E78.jpeg
All pieces of original finish were saved as much as possible.
B218DAD7-2BBA-459D-83CD-B0E7A5BE3E45.jpeg
Why?? Because we are going to use them.
D021CC10-64CA-4FB6-959A-840451EAF609.jpeg
All "bald areas" have to be sanded before new finish is applied. This roughens the surface so that the new finish will stick better. More pictures to follow.
 
Brian, WOW, that is some peeling of the shellac finish. Is that due to the top of the helmet getting crushed? It looks as if there is a rip in the leather shell.
I look forward to your progress in the restoration of this old pickelhaube.
John
 
No John, the top of the shell was not crushed, it had sunk in due to the weight of the spike. The only cure for this is to wet that area and push it back into position by blocking it on a head form. Unfortunately, this caused most of the shellac finish to bubble up off the shell. There was a dent in the side of the helmet, which came close to piercing the shell and looks like a rip in the photo. This series of pictures was taken about 8 weeks ago and I am still working on the piece. Refin takes time! 😀
 
Last edited:
It was supposed to be quick and easy, but it came out as usual. A lot of work ahead of you.Regards
 
Great idea to reuse the shellac. Do you prepare it like normal shellac just with some alcohol or does it need some other ingredients? Looking forward to see the final result :)
 
I am using the 1877 shellac formula that you discovered Sandy. I have applied it to the shell and then stuck small pieces of the old finish on to it. I will post some photos. Tony I will be posting a comparison of 4 Oldenburg Wappen including the one from this helmet in the wappen section today.
 
As promised, more photos of the process:
4DF8CA79-DF15-4BC4-A184-E0F9590333DF_1_201_a.jpeg
I am trying two things here...in the dented/creased areas, I am gluing bits of old finish in order to fill in. On the left side of the helmet shown here, I have left a large section to be filled with shellac as there was no crease. On the other side of the shell, again where there was a dent I am filling in with new shellac and old pieces of original finish. The areas where old finish flakes are used have to be sanded quite often. The idea is to fill in around the old finish pieces with new shellac, keep sanding until everything is filled in and we have a smooth surface once again.
03D45FFD-C990-473B-AB66-F2B84E5093C0_1_201_a.jpeg
This picture was taken this week and you can see, how slowly but surely, with countless applications, the new shellac is filling in around the old flakes. I have done used method before on an Officer tschapka so I know it works! (y) After sanding the shellac dust is melted back into the finish using shellac thinner and we are ready for another application.
CBC5FFBE-3321-4939-95F1-9CBA35D73E72_1_201_a.jpeg
This side had more problems, so more pieces of original finish were used. You can see where I am using them to fill in a dent above the rosette hole.
 
Brian you have the patience of a Saint - and the skills of an alchemist! Thanks for showing us this process, it is inspiring.
Steve
 
Thanks Steve. So after 4 months of work this is where we are at on this helmet, the end is finally in sight.
E0F8D93F-E1BB-4590-8C67-F91BB7F2EC3C_1_201_a.jpeg
The sanded patches are areas which still need a bit of work. The shine will be dulled down so everything matches but this is approximately what new hauben would have looked like finish wise.
0EDC4426-F2C2-4E22-8468-F71B5527CBEC_1_201_a.jpeg
The dark areas on the left show where more finish is required. Tony....the wappen was not sent with this helmet but I will ask John the owner to post pics in the wappen section.
2DEDD1E9-5D6C-477D-8E0C-C626F864033B_1_201_a.jpeg
Scales and spike back on as is a new original piece of visor trim. This trim from another helmet fit perfectly which is very rare!! 😀The lighting here makes it look like there is a huge dent in the front of the helmet. There is a dent which refused to cooperate with me but it is not huge and most of it will be covered by the wappen when it is put back on.
 
Last edited:
With my greatest apologies to Brian for taking so long to post these, may I present his unbelievable skills as a craftsman and artist, for which I shall ever be indebted to him!

THANK YOU BRIAN!!!!

52124389422_5b0aded493_k.jpg


52125911855_0d17692c9c_k.jpg


52125653344_2cd2546653_k.jpg


52125441838_99d337eb54_k.jpg


PS... Does anyone have a round head star screw that measure 8mm wide and 14mm long I could purchase?

Thanks,
John
 
John
Brian provided excellent craftsmanship in bringing back you Pickelhaube from the abyss and I see why due to the unique wappen! Is there a specific purpose for using OR rounded spike brads rather than Officer’s star brads for the spike base?
Best regards
John
 
John: The OR spike base brads are original to the helmet and I did not have a replacement for the missing screw post brad. As to what constitutes a OYV helmet or even a private purchase of any other ranks helmet, I have no clue. I suspect that each regiment had it's own rules as to what was acceptable for these non government issued helmets. The round spike base brads on this helmet indicate that the owner did not have officer rank.
 
Back
Top