THE MATHEW PROJECT!

b.loree

Administrator
Staff member
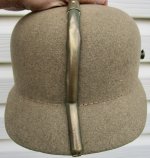
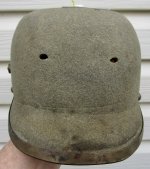
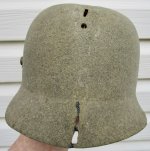
So our resident filz helmet restorer Mathew, you know the guy who is always looking for felt helmets in need of some TLC has been after me for several years to stitch in new original liners into some of his felt helmets. Just before the SOS I had finished all my restorations and was afraid of being left with nothing to do. Consequently, I finally gave in and agreed to try and restitch liners into his hats......he sent me 6 !! :oops: Here is what a stack of 6 filz helmets looks like:
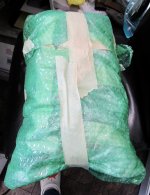
IMG_3963.jpeg
Oh, and I am wearing my Canuck indoor Crocs as usual...thanks again James!
IMG_3964.jpeg
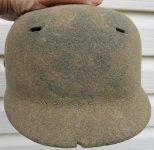
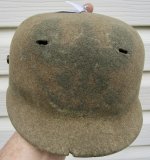
This is the first one of six pulled out of the stack...a Prussian reservist. Naturally Mathew removed as much hardware as he could before shipping.
IMG_3972.jpeg
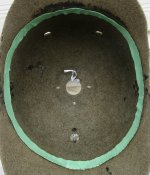
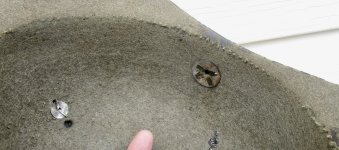
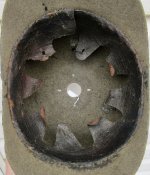
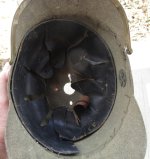
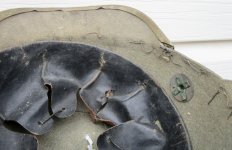
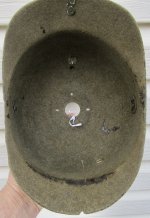
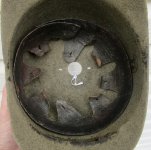
The inside of the empty shell. This is one of the thick hard shell versions of filz helmets. For some reason, most of the original liner stitch holes have disappeared. I have stuck a T pin into one as a sort of guide ??
IMG_3967.jpeg
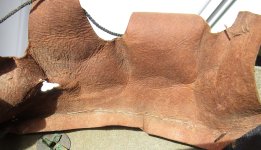
This is the original liner that I have been sent to stitch into this hat.
IMG_3965.jpeg
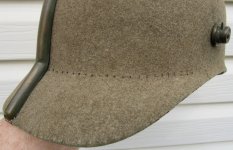
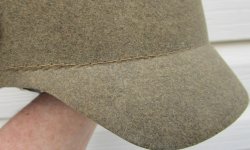
As the original stitch holes have disappeared, I have to remark them in pencil. I have an original helmet from my collection to work from.
IMG_3970.jpeg
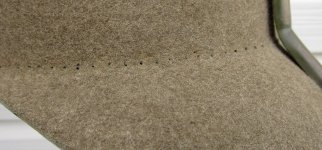
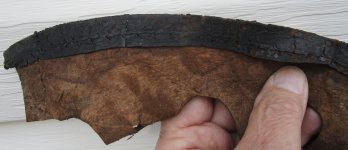
The original example that I have to work from.. My helmet is the same thick hard felt but does not have the rear spine. The stitch holes here are 5 mm apart as they are on Mathew's liner.
IMG_3969.jpeg
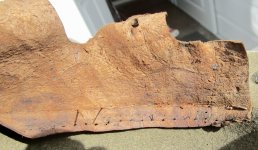
A close up of the stitch line on the donor liner. :rolleyes:
 
Last edited:
I have not been happy with Mathew during this past week. When I reluctantly took on this "project", I assumed that this would be basically like stitching a new original liner into a leather haube, all stitch holes would be visible.....NOT! The stitch holes on this first filz helme have disappeared. :( Initially I tried using a cloth tape measure going around the outside marking every 5 mm.....NO GOOD! and a super pain in the A-s! In truth, I began to think, I will finish one and send the rest back, TOOOO much aggravation! However, I think I may have found a solution to the problem:
IMG_3992.jpeg
Painter's tape...the stitch holes are 5mm apart.
IMG_3994.jpeg
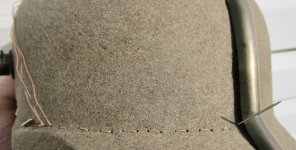
The stitch holes may be gone but the stain/mark of the original liner is still present along the rim of the shell.
IMG_3993.jpeg
So this is how it is going to be done!! The holes have to drilled Mathew, not punched as the felt is too hard and thick. I would have to use a hammer to punch through. An awl or ice pick can not be used as this would make too large a hole. To be continued... :censored:
 
Now that is a funny way of thinking 😄😄When i took the currage to restore my filzhelmet i made myself a drill bit out of a small paintbrush witch i cut off the hairs and glued in the smallest drill i could find and went for it ... it worked pretty good for an amature as i am 😇😇

Jonas
 
I use a pin vice Jonas and a set of very small drill bits which are used by hobbyists. The smallest/thinnest of these often break when you are cleaning out stitch holes in old leather. Usually at least in my experience the stitch holes in filz helmets can be seen but in this case they are gone, perhaps it is the thick hard felt??
 
I was told by Great War Militaria about 25 years ago that some felts were issued without a liner.
Guys on this forum said that was not done.
Maybe here is the proof !
 
I have never heard that before. To me that sounds like the old dealer story....the guy was transferred to another regiment with a different plate, that's why there are 2 sets of holes in the front of the helmet. Some holes can be seen on this piece but they 15 cm apart. I am just venting my frustration here Mathew, I will get this done now that I have figured things out.
 
Some progress photos.
IMG_3995.jpeg
The 5mm marked painter's tape proved to be unworkable when applied to the inside of the shell. Consequently, pieces of tape had to be lined up and moved around the outside rim so pencil marks could be made and stitch holes drilled. If you refer to the helmet from my collection, the stitches must run exactly in the crease where shell meets visor, you can't do this from the inside.
IMG_3997.jpeg
Next ther new liner must be stretched around the interior and pinned for stitching.
 
Go man go !!!!
I think that you may have picked out the biggest and hardest of what I sent you.
I think 1 other may be the same and the rest are the soft type felt.
One of them that liner is almost dethatched but the holes are there.
On 2 others the holes are there as well.
 
Last edited:
Your comment is well made Amy. The amount of work in completing this is substantial and I have talked with Mathew about this. I probably will only do this one helmet and Mathew is fine with that. It was a sunny day here and so the light was good for stitching. :)
IMG_4003.jpeg
All filz helme liners have a crease along the edge to be stitched. The original replacement liner was taken out of a leather helmet as can be seen from the old stitch holes. Mathew "creased all of these liners before shipment. The stitching must follow this crease. as shown.
IMG_4004.jpeg
The beginning of the first "pass" of stitches. You have to stitch around the shell twice to get a complete stitch line. The liner is pinned into position from the inside rear of the shell.
IMG_4013.jpeg
After 6 hours of stitching today, I have gone completely around the shell once and am now on the second stitch pass...not quite half way round the shell. Obviously, a labour intensive project. Imagine in 1915, Gretchen would have just zipped round that shell with her sewing machine and thrown this on a pile with a hundred others! :oops:
 
Finished:
IMG_4019.jpeg
I think it turned out pretty good but one hell of a lot of work to get it done.
IMG_4020.jpeg
This project would have been much easier if the stitch holes had not disappeared over 100 years.
IMG_4021.jpeg
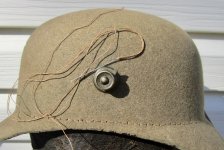
The brass fittings on this were painted feldgrau. A lot of this paint has worn off. On to the next helmet!
 
Brian, you always take pride in your work. Good job done.

The job requires on felt helmet is tremendous and that explains the price of felt with liner and just the felt shell alone.

Regards
Amy Bellars
 
Helmet number 2, I will not bother the membership with photos of all of these but this is the first felt helmet I have seen/worked on where the liner is tack stitched in place.
IMG_4024.jpeg
This is a Saxe helmet. You can see the soiled marks made by the tack stitches.
IMG_4026.jpeg
The tack stitches are much more visible on this helmet compared to the first one I did, this makes things much easier for me.
IMG_4029.jpeg
Another advantage here is that the original liner is still present. Obviously, the thread has given out on one side but the other is still stitched. I will start with the loose side and then deal with the other.
IMG_4028.jpeg
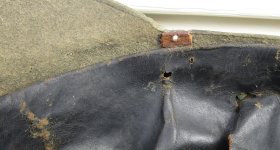
There is another problem which has to be dealt with first, the trim brad has pulled through the shell. A thin leather strip was glued over this split to renforce the hole and then the brad put back in. this small patch will be covered when the liner is put back in.
 
IMG_4043.jpeg
The "reinforcement" glued in place and a new hole punched. Initially, this patch was too thick so I had to sand it to thin it out. You can also see that all tack stitch holes had to be cleaned out.
IMG_4044.jpeg
A view from the inside of "tack stitching".
IMG_4045.jpeg
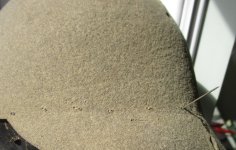
An outside view of the stitches. Cleaning out the stitch holes has made them more visible but the "punctures" will be smoother over.
IMG_4047.jpeg
The finished product.
 
Back
Top